
In spring especially, just as the world is becoming green again, there are a number of young shoots and leaves...
Read MoreChristmas Gift Ideas for UK Outdoor Enthusiasts – 2019!
Sunday, 08 December 2019

Christmas Gift Ideas for UK Outdoor Enthusiasts
Foraging, bushcraft, survival and navigation course vouchers for Xmas 2019
Buying a gift for somebody who loves nature, muddy trails and The Great Outdoors is always tricky. Chances are that they already have the equipment and clothing they need for doing what they want to do – what the bl**dy hell do you buy that you know that they will LOVE and remember for years to come?
Each and every year we sell dozens of places for the following year as personalised gift vouchers. These are places on our incredibly popular public foraging, bushcraft, survival, navigation or other outdoor skills courses.
Places for individual courses can be purchased for individuals, couples or groups – or you can buy a voucher for the year and let the recipient choose the date from our listed 2020 dates. You can see the full 2020 Course Calendar here, or the dates for each course on the pages linked below.[/vc_column_text][/vc_column][/vc_row][vc_row][vc_column][vc_separator][vc_column_text]
Bushcraft and Survival Courses
Below are some of our public 2020 bushcraft, survival and wilderness skills courses. Each course is run in private woodland or forests in North Wales and led by experienced and qualified instructors.
Building on the work we do with military, SAR, emergency service and industry clients in wilderness and expedition skills training – these are training courses for people who live, work or play in the Great Outdoors.
Bushcraft Basics Course
This is a one-day course covering the essential skills of bushcraft, set in a private Welsh woodland and led by experienced instructors.
[/vc_column_text][vc_btn title=”Learn More” color=”warning” align=”center” i_icon_fontawesome=”fa fa-info-circle” button_block=”true” add_icon=”true” link=”url:http%3A%2F%2Fbackup.originaloutdoors.co.uk%2Fall-courses%2Fbushcraft-basics-course%2F|||”][/vc_column_inner][vc_column_inner width=”1/3″][vc_single_image image=”11152″ img_size=”medium” alignment=”center”][vc_column_text]Survival Basics Course
A one-day survival skills course in North Wales on the borders of Snowdonia National Park and Clwydian Range AONB, led by instructors from SAR backgrounds.
[/vc_column_text][vc_btn title=”Learn More” color=”warning” align=”center” i_icon_fontawesome=”fa fa-info-circle” button_block=”true” add_icon=”true” link=”url:http%3A%2F%2Fbackup.originaloutdoors.co.uk%2Fall-courses%2Fsurvival-basics-course%2F|||”][/vc_column_inner][vc_column_inner width=”1/3″][vc_single_image image=”9604″ img_size=”medium” alignment=”center”][vc_column_text]Woodmaster Course
A four-day certificated bushcraft and woodland wilderness skills course for more experienced and confident outdoorspeople.
[/vc_column_text][vc_btn title=”Learn More” color=”warning” align=”center” i_icon_fontawesome=”fa fa-info-circle” button_block=”true” add_icon=”true” link=”url:http%3A%2F%2Fbackup.originaloutdoors.co.uk%2Fall-courses%2Fwoodmaster-bushcraft-course%2F|||”][/vc_column_inner][/vc_row_inner][vc_separator][/vc_column][/vc_row][vc_row css=”.vc_custom_1575803371724{background-color: #d1d1d1 !important;}”][vc_column][vc_column_text][/vc_column_text][/vc_column][/vc_row][vc_row][vc_column][vc_separator][vc_column_text]I have just returned from a weekend bushcraft course with Richard (Hagrid) and Kevin. I confess that when I was travelling from Essex in to Wales, I didn’t know what to expect but also didn’t have high hopes. How wrong was I!!
The entire weekend was incredible, the knowledge that was shared has blown my mind and given me a thirst for more.
Building my own shelter, sleeping out in the middle of no where and enjoying the company of some fantastic people! I genuinely couldn’t think of a better way to spend your time.
I got home and have bought a bush craft knife, some tarp and have booked a weekend in the diary to take my family out to enjoy some real camping!!
You guys are awesome and I am definitely going to be booking something again!
Field and Woodland Foraging Courses
Our foraging and wild food courses continue to be our most popular, and we have a range of courses from entry-level to training for instructors and leaders. Each course is led by experienced professional foragers and take place in locations that show off the very best ‘free’ food in North Wales.
[/vc_column_text][vc_row_inner][vc_column_inner width=”1/3″][vc_single_image image=”9606″ img_size=”medium” alignment=”center”][vc_column_text]Foraging and Wild Food Course
Explore over two dozen edible species of plants, trees and fungi with an experienced professional forager in the North Wales countryside.
[/vc_column_text][vc_btn title=”Learn More” color=”warning” align=”center” i_icon_fontawesome=”fa fa-info-circle” button_block=”true” add_icon=”true” link=”url:http%3A%2F%2Fbackup.originaloutdoors.co.uk%2Fall-courses%2Fuk-foraging-wild-food-course%2F|||”][/vc_column_inner][vc_column_inner width=”1/3″][vc_single_image image=”10221″ img_size=”medium” alignment=”center”][vc_column_text]Inland Foraging Basics
The inland foraging course for instructors, leaders and serious foragers. Certificated (Level One EST Framework) course run in a private woodland.
[/vc_column_text][vc_btn title=”Learn More” color=”warning” align=”center” i_icon_fontawesome=”fa fa-info-circle” button_block=”true” add_icon=”true” link=”url:http%3A%2F%2Fbackup.originaloutdoors.co.uk%2Fall-courses%2Fl1-inland-foraging-basics-course%2F|||”][/vc_column_inner][vc_column_inner width=”1/3″][vc_single_image image=”10245″ img_size=”medium” alignment=”center”][vc_column_text]Inland Foraging Practitioner
A 3-day intensive exploration of all aspects of foraging and wild food, aimed at foragers who want to push their knowledge and learning further. An EST Framework certificated course.
[/vc_column_text][vc_btn title=”Learn More” color=”warning” align=”center” i_icon_fontawesome=”fa fa-info-circle” button_block=”true” add_icon=”true” link=”url:http%3A%2F%2Fbackup.originaloutdoors.co.uk%2Fall-courses%2Fl2-inland-foraging-practitioner-course%2F|||”][/vc_column_inner][/vc_row_inner][vc_separator][/vc_column][/vc_row][vc_row css=”.vc_custom_1575803356560{background-color: #d1d1d1 !important;}”][vc_column][vc_column_text][/vc_column_text][/vc_column][/vc_row][vc_row][vc_column][vc_separator][vc_column_text]Attended the L1 Coastal Foraging Course on Anglesey and thoroughly enjoyed my day. Rich was engaging and knowledgeable in all areas of the outdoors. I would recommend these days to anyone. Perfect as a gift for that hard to buy for family member!
Coastal and Beach Foraging Courses
Considering that we live on a rocky island surrounded by stunning shores and extensive beaches – we really do not take advantage of the wild edibles that can be found on nearly every stretch of UK coastline. Our coastal foraging courses partner our inland courses and focus on the species available on the coast of North Wales and Snowdonia.
[/vc_column_text][vc_row_inner][vc_column_inner width=”1/2″][vc_single_image image=”9609″ img_size=”medium” alignment=”center”][vc_column_text]Coastal Foraging Walk
For this short introductory course we find our way down to the water’s edge on a secluded beach near Porthmadog to see what edible species of seaweed, molluscs, crustaceans and other wild edibles we can find.
[/vc_column_text][vc_btn title=”Learn More” color=”warning” align=”center” i_icon_fontawesome=”fa fa-info-circle” button_block=”true” add_icon=”true” link=”url:http%3A%2F%2Fbackup.originaloutdoors.co.uk%2Fall-courses%2Fcoastal-foraging-walk%2F|||”][/vc_column_inner][vc_column_inner width=”1/2″][vc_single_image image=”10744″ img_size=”medium” alignment=”center”][vc_column_text]Coastal Foraging Basics
Certificated (Level One EST Framework) coastal and seashore foraging course for those who want to take things more seriously.
[/vc_column_text][vc_btn title=”Learn More” color=”warning” align=”center” i_icon_fontawesome=”fa fa-info-circle” button_block=”true” add_icon=”true” link=”url:http%3A%2F%2Fbackup.originaloutdoors.co.uk%2Fall-courses%2Fl1-coastal-foraging-basics-course%2F|||”][/vc_column_inner][/vc_row_inner][vc_separator][/vc_column][/vc_row][vc_row css=”.vc_custom_1575803278319{background-color: #d1d1d1 !important;}”][vc_column][vc_column_text][/vc_column_text][/vc_column][/vc_row][vc_row][vc_column][vc_separator][vc_column_text]We loved this course and had a fantastic day! The day was very well structured, we learnt so much and we will be returning next year! A big thank you to Richard – we look forward to seeing you again next year
Navigation Courses
With Original Outdoors you can learn to navigate from scratch, develop your existing skills or even learn to navigate from the clues and signs in the landscape and nature around you. The main navigation courses are certificated under the EST Framework.
[/vc_column_text][vc_row_inner][vc_column_inner width=”1/3″][vc_single_image image=”9309″ img_size=”medium” alignment=”center”][vc_column_text]Basic Land Navigation Course
A two-day navigation course that starts with the basics and builds up to cover all of the essential skills of map and compass navigation.
[/vc_column_text][vc_btn title=”Learn More” color=”warning” align=”center” i_icon_fontawesome=”fa fa-info-circle” button_block=”true” add_icon=”true” link=”url:http%3A%2F%2Fbackup.originaloutdoors.co.uk%2Fall-courses%2Fuk-basic-navigation-course%2F|||”][/vc_column_inner][vc_column_inner width=”1/3″][vc_single_image image=”9314″ img_size=”medium” alignment=”center”][vc_column_text]Mountain (Intermediate) Navigation Course
The second level of our EST Framework certificated navigation courses – a slightly more intensive two-day course held in Snowdonia.
[/vc_column_text][vc_btn title=”Learn More” color=”warning” align=”center” i_icon_fontawesome=”fa fa-info-circle” button_block=”true” add_icon=”true” link=”url:http%3A%2F%2Fbackup.originaloutdoors.co.uk%2Fall-courses%2Fmountain-navigation-course%2F|||”][/vc_column_inner][vc_column_inner width=”1/3″][vc_single_image image=”9603″ img_size=”medium” alignment=”center”][vc_column_text]Natural Navigation Course
A different kind of navigation course – learn to navigate by using the natural signs around you such as trees, the movement of the sun and other hidden clues.
[/vc_column_text][vc_btn title=”Learn More” color=”warning” align=”center” i_icon_fontawesome=”fa fa-info-circle” button_block=”true” add_icon=”true” link=”url:http%3A%2F%2Fbackup.originaloutdoors.co.uk%2Fall-courses%2Fnatural-navigation-course%2F|||”][/vc_column_inner][/vc_row_inner][vc_row_inner][vc_column_inner width=”1/2″][vc_single_image image=”9642″ img_size=”medium” alignment=”center”][vc_column_text]Contour Map Workshop
A one-day navigation workshop that focuses entirely on contour lines and uses maps that ONLY feature contours.
[/vc_column_text][vc_btn title=”Learn More” color=”warning” align=”center” i_icon_fontawesome=”fa fa-info-circle” button_block=”true” add_icon=”true” link=”url:http%3A%2F%2Fbackup.originaloutdoors.co.uk%2Fall-courses%2Fcontour-mapping-workshop%2F|||”][/vc_column_inner][vc_column_inner width=”1/2″][vc_single_image image=”9610″ img_size=”medium” alignment=”center”][vc_column_text]Night Navigation Workshop
A navigation skills workshop that takes place after dark and looks at the skills of navigating in poor or zero visibility.
[/vc_column_text][vc_btn title=”Learn More” color=”warning” align=”center” i_icon_fontawesome=”fa fa-info-circle” button_block=”true” add_icon=”true” link=”url:http%3A%2F%2Fbackup.originaloutdoors.co.uk%2Fall-courses%2Fnight-navigation-course%2F|||”][/vc_column_inner][/vc_row_inner][vc_separator][/vc_column][/vc_row][vc_row][vc_column][vc_column_text]Buying a voucher – how it works
- For each course there is a dropdown menu – in there you can select the option for a ‘Gift Voucher’.
- You can choose to purchase multiple vouchers or just one place, and the progress onto the checkout page and securely pay using one of the options there.
- Once you order has been received we will contact you (using the email address from your order) and ask you if you want to write a personalised message on the voucher.
- We will then create the personalised voucher (as an A4 PDF) and email it to you.
- Once the person receiving the voucher as a gift has opened/received it they can come to this website to choose a course date from the listed 2020 dates, and they will have until the end of February 2020 to let us know which course date they would like to attend.
- If they do not get in touch before the end of February 2020 then the voucher can still be redeemed – but we cannot guarantee that they will be able to attend their chosen course date.
- Full terms and conditions can be found HERE.
If you have any questions at all about this process, or have a special request, the please do not hesitate to get in touch using one of the methods on this page.[/vc_column_text][/vc_column][/vc_row]
- Published in All Blog Posts, Articles, Bushcraft General, Mountain General
No Comments
Watching James Blunt get “Cold” in North Wales
Monday, 09 September 2019

Watching James Blunt get “Cold” in North Wales
Behind The Scenes on James Blunts’ new music video
[/vc_column_text][vc_column_text]Although Original Outdoors is primarily a training and adventure business, we get asked to help out with all sorts of projects that require our unique combination of skills, experience and connections. A recurring theme is helping out with location scouting, location safety and consultancy for media projects in North Wales.We took a call from a producer working with international music video and film production company Great Guns to help out with finding locations for their new production – the music video for James Blunt’s new song “Cold”. We launched straight into recommending, shortlisting and then recce-ing locations for them along the coastline of North Wales on Anglesey and the Llyn Peninsula.
We were also asked to come up with a plan and a team to keep everybody on the production safe – and as it involved thrashing around in the a (cold, obviously) sea, climbing on a sheer rockface (where bits kept falling off it) and working with a helicopter on a rocky headland – the team had to be good.[/vc_column_text][vc_row_inner][vc_column_inner width=”1/2″][vc_single_image image=”10854″ img_size=”full” add_caption=”yes” alignment=”center”][/vc_column_inner][vc_column_inner width=”1/2″][vc_single_image image=”10855″ img_size=”full” add_caption=”yes” alignment=”center”][/vc_column_inner][/vc_row_inner][vc_row_inner][vc_column_inner width=”1/2″][vc_single_image image=”10856″ img_size=”full” add_caption=”yes” alignment=”center”][/vc_column_inner][vc_column_inner width=”1/2″][vc_single_image image=”10867″ img_size=”full” add_caption=”yes” alignment=”center”][/vc_column_inner][/vc_row_inner][vc_column_text]
We had two days of production to cover at multiple locations, landowners to liaise with and some very Welsh weather to deal with and I relied on the skills of Chris Jackson, Luca Celano, Gav Emmerson and Dilwyn Sanderson-Jones to keep everything running smoothly from our side.
We watched ex-Army songster James Blunt battle through waves, scramble over granite boulders and through dense vegetation and literally sing through a storm on the side of a mountain for the first day, then set up ropes and dislodged some unsafe rocks from a quarry above the beach for the climbing segments.
[/vc_column_text][vc_row_inner][vc_column_inner width=”1/2″][vc_single_image image=”10859″ img_size=”full” add_caption=”yes” alignment=”center”][/vc_column_inner][vc_column_inner width=”1/2″][vc_single_image image=”10866″ img_size=”full” add_caption=”yes” alignment=”center”][/vc_column_inner][/vc_row_inner][vc_row_inner][vc_column_inner width=”1/3″][vc_single_image image=”10863″ img_size=”full” add_caption=”yes” alignment=”center”][/vc_column_inner][vc_column_inner width=”1/3″][vc_single_image image=”10862″ img_size=”full” add_caption=”yes” alignment=”center”][/vc_column_inner][vc_column_inner width=”1/3″][vc_single_image image=”10850″ img_size=”full” add_caption=”yes” alignment=”center”][/vc_column_inner][/vc_row_inner][vc_column_text]
There is always a lot to keep an eye on for jobs like this – the on-camera star who will happily put himself in harm’s way for the shot, the team immediately behind the camera ( DoP Max, Director Calum, 1st AD George and Producer Dale) plus the rest of the production crew (Sally, James, Tom, Gareth, Zac, Hannah, Sam, Ben, Luke and anyone else I have forgotten) who need to be kept informed about the likely hazards of the non-studio environment we are shooting in.
There is also a balance between keeping everyone safe and making sure that the shoot actually goes ahead – this means working closely with the Director and Assistant Director to ensure they get the shots we needed whilst managing their expectations about what we can do, where we can do it and how we can do it. When the cameras are rolling, the drone is in the air and the international music star is hanging around on a rope on a wet and loose rockface everything needs to happen quickly, smoothly and in a controlled manner.
For the first day Chris and Luca ran things whilst I led a foraging course and then attended a photo shoot for an upcoming collaboration with a brand. For the second day we split the roles between Chris keeping an eye on everyone for the last mountain shots whilst Dilwyn, Luca and Gav setup the quarry face with ropes, anchors and established safe zones for themselves, the crew and anyone else who needed to be there. [/vc_column_text][vc_row_inner][vc_column_inner width=”1/3″][vc_single_image image=”10851″ img_size=”full” add_caption=”yes” alignment=”center”][/vc_column_inner][vc_column_inner width=”1/3″][vc_single_image image=”10852″ img_size=”full” add_caption=”yes” alignment=”center”][/vc_column_inner][vc_column_inner width=”1/3″][vc_single_image image=”10853″ img_size=”full” add_caption=”yes” alignment=”center”][/vc_column_inner][/vc_row_inner][vc_column_text]
For the climbing sequences James needed to be lowered down to a ledge, then climb back up via a greasy traverse and up onto a rib and corner. He was roped on and belayed by Luca and Gav with Dilwyn acting as coordinator between the rope team and myself as we worked with the director to get James into exactly the right place for the cameras and the drone (piloted by our friends Off The Ground). This took several takes, including a sequence where a sizeable chunk of granite detaches from the rockface and crashes down past James’ feet to the rocks below.
Next we needed to get Director of Photography Max Witting down onto the adjacent face to get shots of James climbing on the exposed rib, which was no easy task considering that he would also be holding an incredibly expensive RED camera with the associated lense, filters, monitor and everything else that shouldn’t really be dangled off a rope over a sheer drop. Max did a fantastic job though, and didn’t seemed to be fazed at all by the edge transition over onto a vertical face. Sideways….[/vc_column_text][vc_single_image image=”10858″ img_size=”full” add_caption=”yes” alignment=”center”][vc_column_text]
So did James Blunt do all of his own stunts? He certainly did – and without even the hint of a raised eyebrow or question about what we asked him to do. You would have had to pay me a substantial sum to clamber around on a loose quarry face in wet, floppy trainers and a pair of tatty old jeans, especially after day and a half of standing around in the rain or lying in the Irish Sea. He is also a thoroughly nice, polite and friendly guy to work with. He took time for a cliff-top photo with us all, listened attentively to all safety briefings and did exactly what Dilwyn, Luca and Gav asked him to when we needed him to.
And then it was all done, and the circus rolled on to their next production and we all went back to living in possibly the finest place in the world – North Wales.[/vc_column_text][/vc_column][/vc_row][vc_row][vc_column][vc_video link=”https://youtu.be/xU4wN8WbTfE” align=”center”][/vc_column][/vc_row]
- Published in All Blog Posts, Company News, Mountain General, Videos
Axe Safety Basics – Simple rules for using an axe safely in the woods, at camp or at home
Sunday, 30 June 2019

The Basics of Axe Safety
Simple safety rules for all users of axes at camp, in the woods or at home
[/vc_column_text][/vc_column][/vc_row][vc_row][vc_column][vc_column_text]Axes are great. I use them every week, and have been swinging them around for at least 20 years. They are versatile tools, and as important as a crafting item as an outdoor safety/survival tool. I couldn’t do my job without one.
They’re also (potentially) bloody dangerous, and one misplaced swing with an axe could leave you with a bit more room in your gloves for the rest of your life, or with an extra hole in your leg (and a lot less blood in your body than you would like).
Anybody who has attended one of our North Wales bushcraft courses knows that when the cutting tools come out for the first time we spend a bit of time refreshing those safety basics. For any of our ‘safety rules’ I try and create one simple message that is unchanged throughout the sessions, something that works for users of all experience levels.
In the video below I go through what that safety rule is, and discuss a few other techniques and considerations for using an axe safely, such as The Blood Circle and how changing your body position will greatly affect how ‘safe’ your cutting action is.[/vc_column_text][/vc_column][/vc_row][vc_row][vc_column][vc_separator][/vc_column][/vc_row][vc_row][vc_column][vc_video link=”https://youtu.be/DeQ9PwLvGAo” align=”center”][/vc_column][/vc_row][vc_row][vc_column][vc_separator][/vc_column][/vc_row][vc_row][vc_column][vc_column_text]
The Three Safe Places an axe can come to a stop
The key message for that video, and the baseline standard I try and use for anytime I pick up and use an axe, is that when you are swining an axe of any size, in any way, it can only come to a complete rest at the end of that swing in one of Three Safe Places:[/vc_column_text][/vc_column][/vc_row][vc_row][vc_column width=”1/3″][vc_column_text]
In The Workpiece
[/vc_column_text][vc_single_image image=”10723″ img_size=”medium” alignment=”center”][/vc_column][vc_column width=”1/3″][vc_column_text]In The Cutting Surface
[/vc_column_text][vc_single_image image=”10722″ img_size=”medium” add_caption=”yes” alignment=”center”][/vc_column][vc_column width=”1/3″][vc_column_text]In The Air
[/vc_column_text][vc_single_image image=”10721″ img_size=”medium” alignment=”center”][/vc_column][/vc_row][vc_row][vc_column width=”2/3″][vc_column_text]If your swing of the axe, and any mishap or problem that might occur during it, means that your axe blade could hit something else before coming to a complete stop in one of those Three Safe Places then you need to stop and reassess what you’re about to do.A simple change in body position, in the way you are holding the workpiece or the axe, or just slightly changing the orientation of how the axe and the workpiece are interacting will normally fix most problems.
Don’t rely on leather boots to save you – an axe will happily cut right through them.[/vc_column_text][/vc_column][vc_column width=”1/3″][vc_single_image image=”10724″ img_size=”medium” alignment=”center”][vc_single_image image=”10719″ img_size=”medium” alignment=”center”][/vc_column][/vc_row][vc_row][vc_column][vc_separator][/vc_column][/vc_row][vc_row][vc_column width=”1/2″][vc_single_image image=”10734″ img_size=”medium” alignment=”center”][vc_column_text]
Axes get put away after use
All cutting tools should have a designated place that you keep them when not actively in use, and should have a sheath/mask/cover to both protect the cutting edge of the blade, and to protect you FROM that cutting edge.[/vc_column_text][/vc_column][vc_column width=”1/2″][vc_single_image image=”10718″ img_size=”medium” alignment=”center”][vc_column_text]
Respect the Blood Circle
You need to create a safe working area around you, with enough room for you to safely work and do what you need to do with that axe. You also need to communicate that to those around you, and they need to respect your working space. [/vc_column_text][/vc_column][/vc_row][vc_row][vc_column][vc_separator][/vc_column][/vc_row][vc_row][vc_column][vc_column_text]
Ad:
[/vc_column_text][vc_column_text][/vc_column_text][vc_column_text]
Why is there an ad here?
We place ads on blog posts and articles that reach a wide audience, especially visitors from overseas who probably won’t get a chance to come along to one of our skills courses or trips. By running ads alongside the more popular articles and blog posts we can help cover the costs of running the website and the blog.[/vc_column_text][/vc_column][/vc_row][vc_row][vc_column][vc_separator][/vc_column][/vc_row][vc_row][vc_column][vc_column_text]
Some Safe Axe-use Techniques
[/vc_column_text][vc_single_image image=”10732″ img_size=”large” add_caption=”yes” alignment=”center”][vc_single_image image=”10730″ img_size=”large” add_caption=”yes” alignment=”center”][vc_single_image image=”10733″ img_size=”large” add_caption=”yes” alignment=”center”][vc_single_image image=”10729″ img_size=”large” add_caption=”yes” alignment=”center”][vc_single_image image=”10728″ img_size=”large” add_caption=”yes” alignment=”center”][vc_column_text]This is the video where we make a mallet from a single piece of wood with green woodworker Doug Don.[/vc_column_text][vc_single_image image=”10725″ img_size=”large” add_caption=”yes” alignment=”center”][/vc_column][/vc_row][vc_row][vc_column][vc_column_text]It’s not rocket science
That rule should work for all axe users, in all use cases. There are many elaborate ways to use an axe for carving, shaping, splitting, snedding and felling. Different axe styles, different wood types and even different user sizes will dictate exactly which technique is best for that time and place, but all safe uses of an axe should mean that the axe only lands in one of those Three Safe Places:
1. The Workpiece
2. The Cutting Surface (or the ground)
3. The Air
Related outdoor skills courses in North Wales
[/vc_column_text][product_category per_page=”12″ columns=”4″ orderby=”menu_order title” order=”ASC” category=”bushcraft-courses”][/vc_column][/vc_row]- Published in All Blog Posts, Articles, Bushcraft General, EST Framework, Original Outdoors Tutorials, Videos
Wild Camping Food – What should I take?
Wednesday, 22 May 2019

Wild Camping – what are we going to eat?
A short guide to the food options for wild camping trips in the UK
[/vc_column_text][vc_column_text]This is a common question from clients who are heading out for their first ‘wild’ camping trips in the mountains and forests of the UK – what am I going to eat?We have normally gone through the laws of wild camping and taken a good look at the other parts of the equipment list, but food can sometimes be a bit of an afterthought. Wet or dry, bought or made – and just how much do I need to bring?
In this article I am going to look at two different aspects of packing food for a wild camping or UK backpacking trip – the type of food carried, and the amount. Pack weight and volume come into it, as do cooking options, access to water and just how much energy you are going to expend.[/vc_column_text][/vc_column][/vc_row][vc_row][vc_column][vc_single_image image=”7663″ img_size=”medium” alignment=”center”][/vc_column][/vc_row][vc_row][vc_column][vc_column_text]
Camping Food Types
When I am looking at food for camping and backpacking it comes down to three things:
– Weight/packed volume
– Taste
– Nutrition
It’s easy enough to find foods that can be carried in a rucksack for a day or two and will be perfectly edible once reheated in a pan over a stove – but if they are the heaviest and bulkiest items in your kit then you won’t get very far. The food also needs to be tasty enough to eat when you are cold, wet or tired – it’s not unusual for an appetite to disappear when fatigued and a warm sleeping bag is calling to you, but food is fuel and your physical and mental performance may start to suffer when you miss out on the calories. The mountains and wilderness regions are not the places to take up intermittent fasting or the 5:2 diet.
Nutrition is another key factor; sugar and simple carbohydrates are both lightweight and tasty – but not much good for a slow, steady release of energy or for long mountain days.
If you can keep an eye on all three of those factors when considering the food on your kitlist then you can start to make decisions on which type of foods you’re going to choose. They can be broken down into the following types:[/vc_column_text][vc_separator][vc_row_inner][vc_column_inner][vc_column_text]
Pre-Prepared ‘wet’ Meals
These are the types often found in soft, foil pouches on racks in camping shops, or as components in civilian or military ration packs/MREs. They are pre-cooked and can be safely eaten cold, or heated up in the pouch by dunking the (unopened) pouch in boiling or hot water.
Because they are ready-to-eat when cold and without additional preparation (a bit like a tin of baked beans – edible unheated, but not the best) they are also heavy, and quite bulky. Sometimes referred to as ‘wet’ food, packs and pouches like this contain a substantial amount of water/fluid in the accompanying sauces which makes them fairly heavy. They are often about twice the weight of dehydrated/dry meal pouches, if not slightly more.
[/vc_column_text][/vc_column_inner][/vc_row_inner][vc_row_inner][vc_column_inner width=”1/2″][vc_column_text]
Good because
- Can be eaten cold or with no preparation
- No mess, can be heated without dirtying a pan and eaten straight from the pouch
- Good selection available
- Long shelf life
Not -so-good because
- Heavy due to water/liquid content
- Often high in sugar and palm oil
Dehydrated and Freeze-Dried Meals
Over the past 20 years or so this type of camping meal has become more popular, and there are lots of new companies springing up every year. We reviewed the Firepot range last year, and a review of the TentMeals range is coming in a few weeks.
The two main methods for removing moisture from these meals are dehydration and freeze-drying. Dehydration involves passing warm air over the food and removes around 90-95% of the moisture, whereas freeze-drying involves lowering the temperature of the food, then removing the ice by sublimation – this removes about 97-99% of the moisture. Freeze-dried meals have a longer shelf life, but there is minimal weight difference between dehydrated and freeze-dried foods. A lot of people claim that dehydrated foods taste slightly better, but I personally don’t notice much of a difference.
Whatever the method for removing the moisture in the food, the method for rehydration is often the same. As the food is already cooked before being dried it can be safely rehydrated with cold water, but taste and consistency is always improved by using boiling or hot water. [/vc_column_text][vc_row_inner][vc_column_inner width=”1/2″][vc_column_text]
Good because
- Lightweight (roughly 100-200g per meal)
- No mess, can be eaten straight from the pouch once rehydrated
- Often healthier than ‘wet food’ pouches
- Long shelf life
Not-so-good because
- Requires some preparation and additional resources to be edible
- Gas/heat source consumables need to be considered
- Clean water needed for every meal
Supermarket Dried Meal Ingredients
Although broadly similar to the dedicated dried food pouches for camping and backpacking, these food types are sold for domestic use. With a bit of careful thought and creativity they can be used by wild campers and trampers – indeed, dried noodles and instant cup-soups have been a staple of my backpacking menus for nearly two decades.
The main drawback is the extra preparation and mess that comes with buying individual ingredients – they will need to be rehydrated in a pan or container of some sort, so you run the risk of accidentally welding it to the inside of a pan. There is also potential problem of calculating portion sizes and measuring it out at camp and avoiding the problem of inadvertently eating more than your daily allocation.
If you can live with that extra hassle then you can create some elaborate and varied meals with a short list of ingredients, and combining dried ingredients with small amounts of ‘wet’ food (such as adding a tin of tuna to cooked dried pasta) gives you even more variety. It is worth exploring the dried goods aisles of your local supermarket to see just what you can pick up easily – but always remember that you are limited to a stove and pan in your preparation equipment.[/vc_column_text][vc_row_inner][vc_column_inner width=”1/2″][vc_column_text]
Good because
- Lightweight
- Much cheaper
- Variable combinations and portion sizes
Not-so-good because
- Requires some careful preparation and measurement
- Takes longer to shop/procure
DIY Camping Meals
Although combining various off-the-shelf dried and long-life foods is a DIY solution, there are plenty of other ways you can prepare your own camping meals – even if it’s just putting cooked leftovers in tupperware and throwing it into your rucksack.
Domestic counter-top dehydrators are surprisingly cheap and easy to use (something like this), so cooking meals at home and then dehydrating them to take with you on trips is a realistic option. If you combine a dehydrator with other gadgets such as a vacuum-sealer then you aren’t far off making your own long-life camping meals.
As well as the extra work involved in preparing and experimenting with your own camping foods there is another factor to consider – food safety. You may be quite happy eating leftover food two days after cooking it when it has been stored in a fridge, but what about when it has been festering in a ziploc bag in your rucksack for a day or two? This is much less of a problem when dehydrating food yourself, but when carrying fresh food and ingredients you should give careful consideration to how you are going to store and transport it.[/vc_column_text][vc_row_inner][vc_column_inner width=”1/2″][vc_column_text]
Good because
- Cheaper (after initial outlay)
- Lots of variation and choice
- Comfortable/familiar food from known sources
Not-so-good because
- Experimentation and preparation needed
- Requires cooking skills
- Potential food-safety risks
Snacks
This is a little easier than finding main-meal options for backpacking and wild camping as bars, biscuits and nibbles often come in smaller packets and are made for reasonably long shelf-lives. Chococlate, cereal and biscuit bars are the obvious choice, along with dried fruits, nuts and small sweets. The infamous mix of those fruit, nuts and small pieces of chocolate and sweets has proven popular with many trail hikers and long-distance backpackers (me included…).
Homemade biscuits, bites and other small foods are easy to make and there are thousands of recipes online on blogs and forums – from peanut-butter balls to Lembas bread for the Tolkein fans.[/vc_column_text][vc_separator][/vc_column][/vc_row][vc_row][vc_column][vc_single_image image=”9176″ img_size=”medium” alignment=”center”][/vc_column][/vc_row][vc_row][vc_column][vc_column_text]
How much food will I need?
The very short answer is “slightly more than you expect to eat”…
There are many possible approaches to this, and my strategies for food and eating for a short or medium-length backpacking trip are very different to what I would take for a day trip into the mountains or forests. For single-day trips I tend to take food that I can nibble on at various points throughout the day – specially if I am going to be moving all day without stopping for longer than 15-30 minutes at a time.
When backpacking the pace slows right down, and I take advantage of the fact I have more time and don’t have to return back to the valley by stopping for a meal somewhere in the middle of the day.
With that in mind, I calculate how much food I will need by how many meals I will be consuming whilst walking/moving, and then work things out from there. If I am heading out for a two-night trip my food list might look something like this:[/vc_column_text][vc_row_inner][vc_column_inner width=”1/4″][vc_column_text]
Breakfast (x2)
- Breakfast bar
- Instant oats/porridge
- Coffee
Lunch (x3)
- Oatcakes
- Peanut butter (squeezy tube)
- Instant soup
- Dried fruits/nuts
Evening Meal (x2)
- Dehydrated meal pouch
- Chorizo (sliced) or tuna
- Instant soup,or noodles if a particularly long or hard day
Snacks and Drinks
- Cereal bars
- Peanut balls (homemade)
- Dried fruit/nut/chocolate mix
- Coffee (either instant or ground depending on weight and length of trip)
If you are working your way up to your first wild camping trip then you’ll probably have a good idea of how hungry you are, and how your body responds to more or less food. For your first trip it is better to err on the side of caution and carry plenty of food, but not enough to slow you down.
If you are concentrating on calorie intake then the previously recommended adult guidelines of 2,000 calories for women and 2,500 for men is a good starting point. How you acquire those calories does make a difference of course – too much sugar and you will be on a constant cycle of peaking and crashing on a glucose high, but your first overnight backpacking trip is not the time to experiment with the paleo diet. [/vc_column_text][/vc_column][/vc_row][vc_row][vc_column][vc_separator][/vc_column][/vc_row][vc_row][vc_column width=”1/4″][product id=”7606″][/vc_column][vc_column width=”1/4″][product id=”7267″][/vc_column][vc_column width=”1/4″][product id=”9519″][/vc_column][vc_column width=”1/4″][product id=”7338″][/vc_column][/vc_row][vc_row][vc_column][vc_separator][/vc_column][/vc_row]
- Published in All Blog Posts, Articles, Bushcraft General, Camping, Mountain General, Skills
Can I pick wild flowers in the U.K.? When is it illegal?
Friday, 10 May 2019

Is it illegal to pick wild flowers in the U.K? Can I pick them to eat?
A brief explanation of the laws about picking wild plants, flowers and other items in the UK
[/vc_column_text][vc_column_text]Well, this one won’t be easy.Maybe it is actually – the relevant laws/legislation that refers to the picking and use of plants growing in the British countryside is actually quite clear. The tricky bit is knowing which ‘side of the law’ you are actually on when you bend over to pick a particular flower, leaf, fruit or fungi.
In this blog post I will do my best to explain it, pick out the relevant parts of the legislation and steer a forager, bushcrafter or ethnobotanist in what is (hopefully) the right direction.
At the bottom of this blog post is the shortened explanation (a tl;dr), but for those who want to know exactly where that came from here are some blocks of legal text:[/vc_column_text][vc_separator][/vc_column][/vc_row][vc_row][vc_column width=”2/3″][vc_column_text]
The Theft Act (1968)
Within Section 4 (Property) of the Theft Act (1968) you will find the following:
(3)A person who picks mushrooms growing wild on any land, or who picks flowers, fruit or foliage from a plant growing wild on any land, does not (although not in possession of the land) steal what he picks, unless he does it for reward or for sale or other commercial purpose.
For purposes of this subsection “mushroom” includes any fungus, and “plant” includes any shrub or tree.
This section is often quoted when discussing foraging and taking wild plants from the British countryside, and is fairly well known and easy to understand. What is less clear is the situation with regard to land owned and maintained by the local Council. Several blogs, newspaper articles and other sources have articles and posts online that mention something along the lines of:
According to the Theft Act of 1968 it is illegal to…
Pick cultivated flowers in public parks or gardens as well as plants and flowers growing on land which is maintained by the council (for example roundabouts and grass verges).
That particular quote was taken from the blog of online gardening retailer Primrose, but with no direct link to a relevant section in the Theft Act, or any other reference. Other websites will have a similar message as a byline in articles related to the legality of picking wild flowers in the UK, often following on from some related newsworthy incident.
The thing is – as far as I can see, and you should always conduct your own research of course – there is nothing in the Theft Act which specifically protects ‘Council maintained land’ when it comes to picking wildflowers or other plants. The illegal activity would most likely be the picking of flowers etc that have been planted deliberately or cultivated – for example from a floral display or flowerbed. If you were to pick one of these plants then you would be committing an offence (theft, funnily enough) – but it would be the same situation if you were to lean over into someone’s garden and pick something from their flowerbed.
[/vc_column_text][/vc_column][vc_column width=”1/3″][vc_single_image image=”10515″ img_size=”large” add_caption=”yes” alignment=”center”][vc_single_image image=”10516″ img_size=”large” add_caption=”yes” alignment=”center”][/vc_column][/vc_row][vc_row][vc_column][vc_separator][vc_column_text]
The Wildlife and Countryside act (1981)
There is much more to read in this act, and the parts that any forager, bushcrafter or ethnobotanist should pay attention to are:
Part 1, Section 13 (England and Wales, for Scotland see below)) states:
13 Protection of wild plants.
(1)Subject to the provisions of this Part, if any person—
(a)intentionally picks, uproots or destroys any wild plant included in Schedule 8; or
(b)not being an authorised person, intentionally uproots any wild plant not included in that Schedule,he shall be guilty of an offence.
(2)Subject to the provisions of this Part, if any person—
(a)sells, offers or exposes for sale, or has in his possession or transports for the purpose of sale, any live or dead wild plant included in Schedule 8, or any part of, or anything derived from, such a plant; or
(b)publishes or causes to be published any advertisement likely to be understood as conveying that he buys or sells, or intends to buy or sell, any of those things,he shall be guilty of an offence.
(3)Notwithstanding anything in subsection (1), a person shall not be guilty of an offence by reason of any act made unlawful by that subsection if he shows that the act was an incidental result of a lawful operation and could not reasonably have been avoided.
(4)In any proceedings for an offence under subsection (2)(a), the plant in question shall be presumed to have been a wild plant unless the contrary is shown.
The Scottish version was amended by the creation of the Nature Conservation Act (Scotland, 2004). It added in the word ‘recklessly’ plus a few other minor changes:
(1)Subject to the provisions of this Part, if any person—
(a)intentionally or recklessly picks, uproots or destroys any wild plant included in Schedule 8; or any seed or spore attached to any such wild plant; or
(b)not being an authorised person, intentionally or recklessly uproots any wild plant not included in that Schedule, he shall be guilty of an offence.
(2)Subject to the provisions of this Part, if any person—
(a)sells, offers or exposes for sale, or has in his possession or transports for the purpose of sale, any live or dead wild plant included in Schedule 8, or any part of, or anything derived from, such a plant; or
(b)publishes or causes to be published any advertisement likely to be understood as conveying that he buys or sells, or intends to buy or sell, any of those things,he shall be guilty of an offence.
(3)Notwithstanding anything in subsection (1), a person shall not be guilty of an offence by reason of any act made unlawful by that subsection (“an unlawful act”) if he shows—
(a)that the unlawful act was the incidental result of a lawful operation or other activity;
(b)that the person who carried out the lawful operation or other activity—
(i)took reasonable precautions for the purpose of avoiding carrying out the unlawful act; or
(ii)did not foresee, and could not reasonably have foreseen, that the unlawful act would be an incidental result of the carrying out of the lawful operation or other activity; and
(c)that the person who carried out the unlawful act took, immediately upon the consequence of that act becoming apparent, such steps as were reasonably practicable in the circumstances to minimise the damage to the wild plant in relation to which the unlawful act was carried out.
(3A)Subject to the provisions of this Part, any person who knowingly causes or permits to be done an act which is made unlawful by any of the foregoing provisions of this section shall be guilty of an offence.
(4)In any proceedings for an offence under subsection (2)(a) or for an offence under subsection (3A) relating to an act which is mentioned in subsection (2)(a) , the plant in question shall be presumed to have been a wild plant unless the contrary is shown.
Schedule 8 lists the protected species than cannot be picked or disturbed without special permission – even if you are the landowner. Happily for foragers there is nothing in there that will be of interest, but it is worth familiarising yourself with some of the more common species.
Sites of Special Scientific Interest
The Wildlife and Countryside Act (1981) did not create SSSIs – Sites of Special Scientific Interest, but it is the current legislation that oversees them. These are designated areas where extra protections exist to protect certain species or habitats, and there are almost always a list of ‘PDOs’ (Potentially Damaging Operations) that are attached to each site. These lists almost always include the ‘removal of plants’ as being a PDO – i.e. you cannot remove plants from the SSSI without other permission, no matter what the species.
This is why you will often see something along the lines of ‘you cannot pick plants from a SSSI or a nature reserve‘ in reference to foraging. [/vc_column_text][vc_separator][vc_single_image image=”10518″ img_size=”large” add_caption=”yes” alignment=”center”][/vc_column][/vc_row][vc_row][vc_column][vc_separator][vc_column_text]
The Royal Parks and Other Open Spaces Regulations (1997)
Applying specifically to the ‘Royal Parks’ and similar designated ‘Royal’ spaces, this Act built upon existing laws governing users of these urban outdoor spaces dating back over a century.
Regulation 4 (Acts for which written permission is required) refers directly to plants and fungi:
Acts in a Park for which written permission is required
4. Unless the Secretary of State’s written permission has first been obtained, no person using a Park shall—(1) interfere with any plant or fungus;
There is a LONG list here of what you cannot do, with some notable highlights:
(12) camp or erect or cause to be erected any tent or enclosure;
(13) wash or dry any piece of clothing or linen;
(24) feed or touch any deer or pelican
So if you are camping in Hyde Park, whilst washing your clothes after they were soiled by your touching of a pelican then you should certainly then refrain from interfering with a plant.
[/vc_column_text][vc_separator][/vc_column][/vc_row][vc_row][vc_column][vc_column_text]Epping Forest Byelaws
There are a number of byelaws for the large public forest (and surrounding area) north of London. They date back to the Epping Forest Act (1878) but the most relevant part for foragers etc is:
Prohibited acts3. The doing of or attempting to do any of the following acts in the Forest is prohibited and shall be deemed to be an offence against the Epping Forest Act 1878:
Taking anything from the Forest
(4) Taking or moving any substance in or from the Forest, save with the previous written consent of the Conservators, PROVIDED that this byelaw shall not apply to the collection in any one day of no more than 12 kg of loose, dead or driftwood, of which no piece shall exceed 5 cm in diameter and 91 cm in length.Damaging trees or other growing things
(5) Damaging or injuring or climbing up or upon any tree or other growing thing in or from the Forest, save with the previous written consent of the Conservators.
Epping Forest has become notorious in UK foraging law discussion due to the annual news pieces about the actions of ‘commercial’ foragers hunting for mushrooms to sell to, or in, the restaurants of the capital. It is often, incorrectly, stated that it had ‘become illegal’ to forage in Epping Forest – in fact it has been illegal to forage there under the byelaws, and commercial foraging was already outlawed under the Theft Act 1968.[/vc_column_text][vc_separator][vc_single_image image=”10519″ img_size=”large” add_caption=”yes” alignment=”center”][/vc_column][/vc_row][vc_row][vc_column][vc_separator][vc_column_text]
Trespass and Land Access
Although often brought together with the above legislature (Theft Act, Wildlife and Countryside Act etc) the issue of trespass and access to the land has very little to do with the picking of leaves, fruit, flowers or fungi.
The only place where picking plants/removal of plants is specifically mentioned is the Countryside Rights of Way Act (2000). Under land designated as part of the CROW Act you can walk on open ground as if it were a public footpath etc, but you must behave within certain restrictions. There are several things that you ‘cannot’ do as a person exercising their rights under the Countryside Rights of Way Act, including:
SCHEDULE 2
Restrictions to be observed by persons exercising right of access
General restrictions
1(1)Section 2(1) Subject to sub-paragraph (2), section 2(1) does not entitle a person to be on any land if, in or on that land, he—(l)intentionally removes, damages or destroys any plant, shrub, tree or root or any part of a plant, shrub, tree or root,
This means that you can access the designated areas of land under the CROW Act, but as soon as you perform one of the prohibited activities in that list (including foraging) then your ‘right’ to be there evaporates and you are now trespassing.
A simpler guide to what you can and cannot do under the CROW Act can be found here.
Other than the CROW Act there is nothing else (as far as I can see) in UK law currently that refers to public access AND ‘foraging’ in the same document. This means that the question of foraging or picking wild plants ‘legally’ has two sides – what you are picking, and your right’legality to be standing in that spot to pick it.
Trespass is a very interesting topic in it’s own right (no really, I promise you) but it is worth creating a separate article – we already have explored part of it in this post about UK Wild Camping Law.[/vc_column_text][/vc_column][/vc_row][vc_row][vc_column][vc_separator][vc_column_text]
The Short and Simple Version
TL;DR
OK, if you have just scrolled down to the bottom of the article for a quick answer then here it is…
- Under the Theft Act (1968) you cannot ‘steal’ a plant that it is genuinely growing wild as long as you are not picking it/parts of it for commercial purposes
- This means that you can pick plants that are growing wild, but not from gardens, flower beds or other places where the plants are being cultivated or have been planted
- Under the Wildlife and Countryside Act (1981) you cannot uproot a plant without the permission of the landowner, you cannot pick a protected species and cannot forage from a SSSI or NNR (National Nature Reserve)
- There are places where byelaws and other laws exist that mean you cannot remove plants from those areas, no matter if it is planted or growing wild (Royal Parks, Epping Forest etc)
- Access and trespass is a separate issue
-
- So if you are picking a plant or part of it but nor uprooting it, it isn’t a protected species, you aren’t within a SSSI, NNR or other ecologically protected site, you aren’t in a Royal Park or Epping Forest or similar site with special byelaws AND it is genuinely growing wild then yes, you can legally pick that wild flower.
The ethical side of all of this is a bit fuzzier – the charity Plantlife have a campaign encouraging people to go and pick wild flowers in order to improve the general knowledge and appreciation of them. They also have a very good Code of Conduct that is worth looking at and following. Personally I broadly agree with campaigns like this – if we are to appreciate the natural environment around us then we need to interact with it and learn to value it.
We have no interest in protecting the things we don’t value, and we don’t value that which is unknown to us.
- Published in All Blog Posts, Articles, Bushcraft General, EST Framework, Flowers, Foraging, Gather, Law and Ethics, Mountain General
How to choose the right map scale – 25k, 40k or 50k?
Friday, 25 January 2019

How to choose the right map scale – 25k, 40k or 50k?
Choosing the right mapping scale for hiking and walking in the UK
[/vc_column_text][vc_column_text]Anyone who as attended one of our North Wales navigation courses will be familiar with one of the tabletop sessions dealing with the various maps available for the UK. We run these sessions during the brief indoor part of the courses (usually accompanied by a cup of something warm and caffeinated) because it is not quite as straightforward as it might appear to be.I am of the confident assertion that in the UK we have probably the best topographical mapping in the world, especially for hillwalking, mountaineering and outdoor activities. There can occasionally be a bit TOO much choice though, and choosing the correct map scale (and publisher) for the area you are about to go adventuring in needs a little careful thought.
This post should cover the basics of choosing a map scale for the UK.[/vc_column_text][/vc_column][/vc_row][vc_row][vc_column][vc_column_text]
Mapping Scale Options for the UK
There are two mapping scales that tend to be used for walking, mountaineering and other human-powered travels across the landscape in the UK – 1:25,000 and 1:50,000 scales. The main producer of topographical maps for outdoor activities (and everything else) is the Ordnance Survey (OS), and the 1:25,000 (Explorer) and 1:50,000 (Landranger) scales are readily available at outdoor shops, online and local retailers. They also produce various digital mapping products, as well as an online mapping service and smartphone app.
Harvey Maps, founded in 1977, produce maps that cover the popular hillwalking and mountaineering areas of the UK, plus some of the designated long-distance trails and other areas. They also produce maps for cyclists, fell runners and orienteering.
Their maps differ from OS maps in that they are produced at the slightly less common 1:40,000 scale, sometimes referred to as the ‘magic scale’ as it has enough detail to navigate by whilst also covering a wide area. They also produce a 1:25,000 series called Superwalker.
1:25,000 Scale (OS Explorer Maps Series and Harvey Superwalker)
At this scale 4cm on the map is equal to 1km and public rights of way, fence/wall lines and even individual crags and large boulders. This scale is about as detailed as you would want it to be for hiking and mountain walking, but it can show TOO much detail for some users. More on that below!
1:50,000 Scale (OS Landranger Maps Series)
This is the ‘next’ level of mapping up from 1:25,000 scale. At this level 2cm is equal to 1km, and in one sense you can fit four times the area of mapped land into the same space on the paper. Roads, major paths/trails and watercourses are shown and the contour interval is always 10m.
1:40,000 Scale (Harvey Maps various)
This is the in-between scale that some people favour because it balances detail with coverage. At this scale 2.5cm is equal to 1km, and the contour interval is at 15m. Harvey Maps also include ‘extra’ contour lines that show complex terrain that would otherwise be missed by the 15m contour interval. Some fencelines and paths are shown, but not all. The features that are chosen to be included on the map are biased towards hillwalkers and mountaineers, and extra shading is included to show ‘bands’ of relative altitude.[/vc_column_text][/vc_column][/vc_row][vc_row][vc_column][vc_separator][vc_column_text]
How far do you need to see?
The obvious factor to consider when choosing a map scale is how much of an area you need to be able to see on one map sheet versus how much detail you need.
If you need to be able to see the information for a dozen kilometres or more at a time then you will need a map with a relatively small scale of 1:100,000 or smaller. This will give you a good overview of the large features of an area, but won’t show the minor details. You can distinguish between roads and the major rivers, but won’t be able to see the individual folds of a hillside or where isolated building are.
If you want to have some fine detail, but still have an overview of several kilometres at a time then something like a 1:50,000 scale map will be more appropriate. This will show contours, paths, major crags and some significant buildings but will also allow you to quickly scan across the next few hours of walking route without having to unfold/refold the map.
For finer detail and only looking at a small area at a time then a 1:25,000 scale map is about as detailed as you would want it to be. This will show individual boundary lines, smaller crags and rockfaces and areas of different ground vegetation and even bogs. It will also have A LOT of information and you may need to mentally ‘blank out’ the bits you don’t need to pay attention to so that you can focus on the relevant parts.
In the three photographs below I have placed the same compass on roughly the same line running west-east just north of Fort William. It shows the balance between having enough detail to navigate by and being able to see a larger area in one glance:[/vc_column_text][vc_single_image image=”10330″ img_size=”full” alignment=”center”][/vc_column][/vc_row][vc_row][vc_column][vc_column_text]
Contour Intervals
The ‘contour interval’ is the vertical gap between marked contour lines on the map. If a contour line reads ’90m’ and then the next one up the hill reads ’95m’ then the contour interval is 5m, and so on.
This matters when choosing a map scale as the contour lines shown can both give the navigator a lot of detail to navigate from BUT also provide too much detail and make things confusing. With that said, contour lines only show a broad trend in the shape of a landscape. Objects and lumps on the hillside that are smaller than the contour interval may not be shown. 5m is the height of a bungalow, which would be a significant obstacle to navigate around but it would not appear on a 10m-interval map.
For Ordnance Survey maps the contour interval of 1:50,000 scale is every 10m (vertically), and it can be either 5m OR 10m for 1:25,000 scale maps. For Harvey maps the contour interval is every 15m.
On the 1:25,000 OS maps that variance between it being either 5m or 10m for the vertical contour interval can be a little confusing – the deciding factor seems to be just how ‘lumpy’ the area covered is. If it’s more mountainous then the contour interval is more likely to be 10m, and for flatter, more gently rolling areas then it is more likely to be 5m.
The graphic below has two photos, each of the same ‘grid square’ (just west of Ruthin in Denbighshire). However, one photo (the left one) is from Explorer sheet 265 Clwydian Range and the other (right) is from sheet 264 Vale of Clwyd. Both are the same scale (1:25,000) and they overlap for a few kilometres in the are to the west of Ruthin and Denbigh. However – as you can see – there are two completely different contour intervals for that area, depending on which map sheet you are looking at.[/vc_column_text][vc_single_image image=”10328″ img_size=”full” alignment=”center”][vc_separator][/vc_column][/vc_row][vc_row][vc_column][vc_column_text]
How much detail do you need?
For any mapmaker there is a balance that needs to be struck between presenting information in a clear and relevant way and ensuring that the map is still usable. This isn’t just about scale, but also about choice of colour and symbols used to represent real-world features.
On the graphic below you can see the same area of the eastern flanks of Snowdon, particularly the area between Llyn Lydaw and Glaslyn.
The difference between the OS 1:50,000 and 1:25,000 mapping (left hand) is subtle, as the contour interval is the same and the colours are broadly similar. The most obvious difference is that the crags and rocky outcrop locations are more accurately mapped on the 1:25,000, and it would be possible to navigate from buttress to buttress.
On the right there are two versions of Harvey 1:40,000 scale mapping, the top one produced by the British Mountaineering Council (BMC) and the lower the Harvey standard mapping for the same area. Shading to denote bands of altitude/height really makes the ‘shape’ of the landscape jump out. It’s very clear on the upper (BMC) map, but it’s still quite apparent on the lower one.[/vc_column_text][vc_single_image image=”10332″ img_size=”full” alignment=”center”][vc_separator][/vc_column][/vc_row][vc_row][vc_column width=”1/2″][vc_column_text]
Do fences and boundary lines matter?
One significant difference between OS 1:25,000 and 1:50,000 mapping is the presence or absence of marked fencing and wall locations on the map. As these are static and almost always long-standing features of the landscape they CAN make excellent navigation aids. I have navigated to and from fence junctions numerous times, and they make great features for handrailing along when navigating between waypoints.
The three photos here show the same area of the north-eastern end of Llyn Gwynant and the hillside above. On the 1:50,000 OS map there are some significant feature but no fence or boundary lines marked. On the 1:25,000 Os map and the 1:40,000 Harvey map the fence running uphill from the river are clearly marked – although much more accurately on the 1:25,000 map. If I was navigating using the 1:40,000 map I could say that “there is a fence somewhere around here”, but if I was using the 1:25,000 map I could identify the fence and follow it uphill or downhill with confidence of my position at all times.[/vc_column_text][vc_btn title=”Sign up for our mailing list” color=”warning” align=”center” i_icon_fontawesome=”fa fa-envelope-open-o” button_block=”true” add_icon=”true”][/vc_column][vc_column width=”1/2″][vc_single_image image=”10331″ img_size=”full” alignment=”center”][/vc_column][/vc_row][vc_row][vc_column][vc_separator][vc_column_text]
More detail than 1:25,000?
There are other mapping scales on the market, but they are only readily available for certain areas of the UK, or through specialist suppliers. Harvey Maps include ultra-detailed 1:12,500 scale sections of difficult mountain areas on the reverse side of some of their 1:25,000 scale Superwalker series.
Below are three images of maps of the Cuillin range on Skye; the left one being the OS 1:25,000 map, the middle the Harvey Maps 1:25,000 and the right a cropped and zoomed shot of the relevant area of the 1:12,500 section. The three sections show the same terrain, but the 1:12,500 version is much easier to read. This can be critical when trying to navigate in poor visibility in very complex terrain, especially in places where the rocks are mildly magnetic and make compasses unreliable – like Skye!
[/vc_column_text][vc_single_image image=”10329″ img_size=”full” alignment=”center”][vc_separator][vc_single_image image=”10349″ img_size=”full” add_caption=”yes” alignment=”center”][vc_column_text]
So, 1:25,000 is the best because of the detail?
Maaaaaaaybe. I use Ordnance Survey 1:25,000 mapping for about 95% of the work I do in the UK, but there are times when I will use 1:50,000 – and that’s often in the winter.
Having extra detail and lots of features to navigate between is great for micro-navigation, but if half of those features are buried beneath a metre or two of snow then they aren’t much use – in fact, they are more of a hinderance. So when there is a thick blanket of snow on the ground I will often choose a 1:50,000 map as I am able to see the overall shape of the landscape. A blanket of snow will round off the sharp edges of a mountain and smooth out the crevices – all that is left is a broad curve, which is exactly what you see on a 1:50,000 map.[/vc_column_text][vc_column_text]
A matter of personal choice
In the vast majority of cases it won’t matter TOO much if you are carrying a 1;50,000 or a 1:25,000 map for the area – as long as it is up to date, waterproofed somehow and YOU KNOW HOW TO USE IT! 🙂
It matters most that the map shows enough detail for what you are planning to do, and that you know how to read it. If you feel that a 1:50,000 or 1:40,000 scale map has enough detail for the activity you are doing then it will be fine. If however you want to know the exact location of field edges or the a wiggle in a contour line then a 1:25,000 scale map will be more appropriate.
I use a mixture, using 1:25,000 for navigating when out on the ground, 1:50,000 for planning multi-day routes and mountain biking and other scales when necessary. I tend to use OS maps rather than Harvey Maps, but I think that is because I first learned how to read a map with a battered OS map, deep in the countryside and stumbling through muddy fields on Air Cadet camp weekends as a teenager. I know, and work with, quite a few instructors and outdoor professionals who will only use a 1:50,000 map, and it is expected that you be competent navigating off all of the common mapping scales if you undertake your Mountain Leader assessment or similar.
[/vc_column_text][/vc_column][/vc_row][vc_row][vc_column][vc_column_text]Our UK Outdoor Navigation Courses
[/vc_column_text][product_category per_page=”12″ columns=”4″ orderby=”menu_order title” order=”ASC” category=”navigation-courses”][/vc_column][/vc_row]- Published in All Blog Posts, Articles, Bushcraft General, EST Framework, Land Navigation, Navigation, Skills
New Foraging Course Dates for 2019!
Wednesday, 23 January 2019

New Foraging Course Dates for 2019!
New dates for our Foraging and Wild Foods course plus brand new courses in North Wales!
[/vc_column_text][vc_column_text]We have known for some time now that by far our most popular course is our Foraging and Wild Foods course – a one-day introduction to foraging in the woods, fields and byways of this corner of North Wales. 2019 looks like it’s going to be our busiest foraging year yet, with two of the 2019 course dates already fully booked and enquiries coming in thick and fast for other dates and private courses.To cope with the demand we have added some more dates to the calendar for the Foraging and Wild Foods course. The list of course dates for 2019 is now:
-
- 13th April 2019 This date now full – Please get in touch
- 20th April 2019 NEW DATE!
- 21st April 2019 NEW DATE!
- 4th May 2019 This date now full – Please get in touch
- 26th May 2019 NEW DATE!
- 15th June 2019
- 13th July 2019
- 3rd August 2019
- 7th September 2019
- 12th October 2019
If you have received a gift voucher for 2019 then it will be redeemable against these new dates, and if you wish to move from a date that you have already booked onto one of the new dates then please get in touch and we will try our best to accommodate your request.
New Foraging Courses from Original Outdoors
If you have been following our courses for the last 12 months or so you have probably seen us start to offer our training courses under the EST Framework – a structured training pathway designed to give those attending the courses a clear route for developing their personal and professional outdoor skills. We have been running these course for ‘professional’ users through our partner brand outdoorprofessional.co.uk and now we are offering them to a wider public audience.
For foragers we have the Level 1, 2 and 3 (assessed) courses for inland and coastal foraging. There are a few audiences for these courses:
- Outdoor instructors and other outdoor professionals
- Teachers and educators
- Chefs and food professionals wanting to work with wild food
- Group leaders and coaches who want to integrate wild food education into their sessions
- Parents who want to give their children an education in wild food themselves
- Individuals that want to develop a deep understanding of the wild food available in the UK, and how to use it
This is the closest we can get to offering a foraging instructor course without delving into the depths of group leadership, duties of care and emergency techniques that come with leading any group in the great outdoors. These courses focus on the skills of finding edible wild plants, fungi and other items of wild food in the UK landscape AND on how to share these skills with other people in a sustainable, ethical and structured way.
These courses are certificated under the EST Framework and can be used in conjunction with other NGB outdoor training schemes.[/vc_column_text][/vc_column][/vc_row][vc_row][vc_column][product_category per_page=”12″ columns=”4″ orderby=”menu_order title” order=”ASC” category=”wild-food-foraging-courses-uk”][/vc_column][/vc_row][vc_row][vc_column][/vc_column][/vc_row]
- Published in All Blog Posts, Bushcraft General, Company News
Examining a wild camp site – tracking and reading the ground
Wednesday, 05 December 2018
Examining a Wild Camp – Tracking and reading the story the ground is telling you
A story of tracking, site interpretation and a lesson for investigators
[/vc_column_text][vc_column_text]So there I was, wandering through the woods with the dog. This is one of several woodland sites that we occasionally rent to run some of our bushcraft, survival and other wilderness skills courses in North Wales. I am far from any of the footpaths, both the public ones and the ones made by locals through the trees. It’s about 15 minutes after sunset and the light is poor – nearly time for the head torch.After ducking past a couple of low branches I come to a more open area near the top of a small hill. There are a couple of mature oak trees, a dead-standing Rowan and a surrounding screen of Western Hemlock Spruce enclosing an area roughly 5m in diameter. Something seems ‘different’ about this site, and I pause to quickly look around. I’m fairly sure that I haven’t visited this particular glade before, but something is tickling my senses in a way I can’t vocalise…
Down at the foot of one of the mature spruce trees is a short, blackened and partially burned length of wood. This isn’t unusual near the areas where we run courses, but out here in this relatively untouched corner of the woodland it stands out – there is a reason for it being here, and I am suddenly compelled to investigate further.
A little bit of background information
As I have mentioned on this blog before – a good portion of the work that I do as an instructor and consultant in various outdoor fields doesn’t end up on the website as a public course or event – we even have a seperate website for that kind of thing: outdoorprofessional.co.uk.
Something that we do occasionally is to create bespoke training events for clients who want to be trained in a particular skill or activity. Following a series of connections and conversations we were asked to create training events especially for AFOs (Authorised Firearms Officers – armed response Police officers) and those they work closely with. They specifically wanted to have some training in tracking of subjects through woodland and mountainous areas – and particularly how to perform Site Exploitation (SE, other common terms are also used depending on the force or role) on areas where people had created camps or bivvy sites in conjunction with other criminal activity. Anybody familiar with the Raoul Moat incident in 2010 will have an understanding of why these particular skills were of interest to these particular clients. My own experience in SAR/Mountain Rescue and subsequently teaching tracking for search operations combined with experience teaching people how to camp in the woods without leaving a trace probably puts me in a good place for this kind of training.[/vc_column_text][vc_column_text]
Other Notes
This is, of course, just a bit of fun and in no way is an example of how to examine a site like this. The photos taken are quick shots on a phone camera, illumiated by an LED torch. There are no in-shot reference items or scale, and no other records taken.[/vc_column_text][/vc_column][/vc_row][vc_row][vc_column][vc_single_image image=”10017″ img_size=”large” add_caption=”yes” alignment=”center” onclick=”zoom”][vc_column_text]
The Tell-Tale Log
So this was the item which first drew my attention – other than that weird, tingly spidey-sense that trackers and searchers get when they get close to something interesting. It’s a small lump of wood, partially burned on one side and cut to length with a saw of some kind. The marks on the end of the log suggest a chainsaw rather than bow-saw or similar, so it was probably lifted from a log stack elsewhere in the forest.
Partially burned firewood is a common piece of evidence in these kind of sites and disposing of these blackened, charred logs is a key problem for disguising a camp fire site. Best practice to burn them all away completely, gradually reducing the size of the fire until only ash and small lumps of charcoal are left behind.
This log was my IPP (Initial Planning Point) for the site analysis, but I knew that I would probably change that once further evidence was uncovered.[/vc_column_text][/vc_column][/vc_row][vc_row][vc_column][vc_single_image image=”10018″ img_size=”large” add_caption=”yes” alignment=”center” onclick=”zoom”][vc_column_text]
The Circumference Sweep
I look over at the dog, who is now whining gently in the softly-falling rain. It’s pretty dark now, so I break out a small-but-powerful LED hand torch and start walking slowly around the edge of the small glade that the log is on the edge of. I want to see what there is to find in the transition zone where the ‘clearing’ stops and the dense woodland begins. This is the area where something may be thrown to, or placed ‘out of the way’ whilst activity occurs in the camp.
On the opposite side of the clearing I find a few more charred logs – longer, thinner pieces that have been burned through at some point.[/vc_column_text][/vc_column][/vc_row][vc_row][vc_column][vc_single_image image=”10019″ img_size=”large” add_caption=”yes” alignment=”center” onclick=”zoom”][vc_column_text]
Gridding it out
The rest of the circumference sweep revealed nothing obvious, at least not in the conditions and using this search method. Now it’s time to move into the clearing and methodically move across the area to identify any key features that may remain – specifically the site of the fire that charred those logs.
The easiest way to do this is to walk directly across the site along one edge, carefully stepping on the leaf litter rather than pushing it to the side and potentially covering something that is lying on the surface. Once you reach the other side you move across slightly and sweep across in the other direction, parallel to the first track.
I repeated this, moving slowly and sweeping with the torch, until I had covered the entire width of the clearing. One area interested me in particular – where some stones were clustered together at one edge – but I wanted to sweep the rest of the area before starting to mess around with the leaf litter and uncovering the stones.
Next I repeated the series of parallel sweeping motions – but at 90° to the original tracks. This gave me a different perspective on the terrain and made it more likely that I would spot anything unusual – the ‘break in the pattern’.[/vc_column_text][/vc_column][/vc_row][vc_row][vc_column][vc_single_image image=”10020″ img_size=”large” add_caption=”yes” alignment=”center” onclick=”zoom”][vc_column_text]
Examining the Point of Interest
Nothing else was coming up in my cursory examination, so it was time to investigate that pile of stones. It was made up of shale, very common locally but not often seen in small piles like this. The pile is partially covered by fallen leaves, and easily missed.
Kneeling down to get a closer look I could see that some of the stones were fractured and had slightly blackened edges. Common advice is to “surround camp fires with rocks to prevent the flames from spreading”. This is terrible advice with rocks like shale – they have a tendency to explode like grenades when heated by fire. Whoever made this fire had probably never experienced it before – but evidently had some knowledge of how “things should be done”. [/vc_column_text][/vc_column][/vc_row][vc_row][vc_column][vc_single_image image=”10021″ img_size=”large” add_caption=”yes” alignment=”center” onclick=”zoom”][vc_column_text]
Digging deeper
Under the layer of stones I found the blackened soil and vegetation residue that is always found around fire scars like this – something well known to archaeologists looking for evidence of human activity in the layers of excavated soil. There was no residual heat, dryness or any other sign that this fire was recently burning. In fact there were insect larvae/egg cases under some of the stones and other evidence that these stones had been undisturbed for several months at least.[/vc_column_text][/vc_column][/vc_row][vc_row][vc_column][vc_single_image image=”10023″ img_size=”large” add_caption=”yes” alignment=”center” onclick=”zoom”][vc_column_text]
Spiraling Out
Satisfied that I have discovered the likely fire site I can create a new IPP (IPP2) in my mind and base my search from that. The most effective method here is to ‘spiral’ out from that focal point and uncover anything that may be left under the leaf litter – scraps from food packets, pieces of foil or discarded plastic or maybe something like a cigarette butt.
Or a knife…
Yes. A knife. A folding, locking-blade knife with wooden scales and brass trim. It was buried under the leaf litter, roughly 100cm from the centre of the fire scar. It was open, laid out as it is in the photo above.[/vc_column_text][/vc_column][/vc_row][vc_row][vc_column][vc_single_image image=”10028″ img_size=”large” add_caption=”yes” alignment=”center” onclick=”zoom”][vc_column_text]
Closer Examination
As this is not a forensic analysis (but a fun way of practicing skills for real) I can of course pick the knife up with my bare hand and take a closer look.
It’s an inexpensive, Chinese-made stainless steel knife with wooden scales and tarnished brass trim. It’s quite well made for the type, which suggests an older knife rather than one of the modern, flimsier types that you will find on the market today. Maybe mid-1990s vintage?
The blade itself has been modified by the looks of it.[/vc_column_text][/vc_column][/vc_row][vc_row][vc_column][vc_single_image image=”10029″ img_size=”large” add_caption=”yes” alignment=”center” onclick=”zoom”][vc_column_text]
Modified Blade
It has been significantly shortened, and is now around 60mm in length. It looks like it has been re-shaped to make it into a slightly narrower profile, and a longer tip. There are scratch marks where it has been sharpened with something coarse, possibly a rough file or dry oilstone.[/vc_column_text][/vc_column][/vc_row][vc_row][vc_column][vc_single_image image=”10032″ img_size=”large” add_caption=”yes” alignment=”center” onclick=”zoom”][vc_column_text]
Moving Out
Nothing else comes up after removing the leaf litter for the surrounding 3m or so, and the dog is still gently whining (in the way that only a German Shepherd can). It’s time to cast the net wider and look up rather than at my feet.
The spruces surround the clearing have been trimmed of their dry, dead lower branches – probably for kindling in the same way that I do it in this video. A little further out there are signs that larger branches have been snapped off, and marks where a few tentative swings with a hatchet or large knife have been made against a dead tree.[/vc_column_text][/vc_column][/vc_row][vc_row][vc_column][vc_single_image image=”10025″ img_size=”large” add_caption=”yes” alignment=”center” onclick=”zoom”][/vc_column][/vc_row][vc_row][vc_column][vc_single_image image=”10027″ img_size=”large” add_caption=”yes” alignment=”center” onclick=”zoom”][/vc_column][/vc_row][vc_row][vc_column][vc_column_text]
Reading the rest
A wider sweep reveals more of the same – broken or sawn branches and evidence of firewood collection. There is no apparent sign of shelter-building from natural materials, so if somebody did sleep out alongside this fire then they probably used a bivvy bag, tarp, tent or hammock. There was no obvious evidence of rope marks on the trees, but I only gave them a very cursory examination – there were certainly quite a few that were substantial enough to support a tarp or hammock setup.
Just how much detail one would go into for a site like this depends very much on the reason for you searching it. If it is a possible crime scene then a forensic analysis must be made and records taken of all associative, trace and transient evidence found. The records of the movements and actions of the initial searchers will need to be accounted for too – Locard’s exchange principle still holds true, even in the middle of nowhere.
If however the site is discovered whilst in active pursuit of a subject where time is critical then a rapid analysis to discover if it is relevant to the current investigation can be made within a few minutes. This will at least help those officers decide if it is worth further investigation and exploitation, or if it is just an unrelated or historic site.
This particular camp was probably made sometime between late 2016 and autumn 2017, judging by the depth of leaf litter covering both the knife and fire scar. This is based on my experience in this particular woodland though, and of course is a very vague estimate. As sites like this age it is increasingly difficult to accurately age them as time passes, especially without other evidence that could be used to date it (expiration dates on discarded food packets maybe, or algae/moss growth on items moved or used during the camp activity).[/vc_column_text][vc_column_text]
Anybody missing a knife?
It looks like somebody has gone to some significant effort to modify or repair this knife, and if you think you know who owned it then please get in touch directly.[/vc_column_text][/vc_column][/vc_row][vc_row][vc_column][vc_column_text]
Our Courses
If you work in a law enforcement, investigation or security field and think that we could do something to help you do your job then please get in touch directly.
Not all of our tracking courses are open to the general public – but the courses and events with public dates should be listed below:[/vc_column_text][product_category per_page=”12″ columns=”4″ orderby=”rand” order=”ASC” category=”tracking-courses”][/vc_column][/vc_row]
- Published in All Blog Posts, Articles, Bushcraft General, EST Framework, Mountain General, Tracking
17 Different ways of making fire
Tuesday, 04 December 2018

17 Different Ways of Making Fire
A selection of natural and artificial ignition sources, tinders and accelerants to help with your next fire
[/vc_column_text][vc_column_text]Anybody who has attended one of our bushcraft, survival or campcraft courses will know that when we teach the skills of firecraft and firelighting we break it down into two distinct halves – ignition and architecture.There are many ways of making that first flame – the ‘ignition’ phase – and the video clips below show 17 of those methods.
Each video segment is set to begin at the relevant segment in the video, but the entire video can be found here on our YouTube channel.[/vc_column_text][vc_separator][/vc_column][/vc_row][vc_row][vc_column][vc_column_text]
Butane Lighters
[/vc_column_text][vc_video link=”https://youtu.be/QyLPn39ENs0″ align=”center”][vc_column_text]More Information
Butane lighters (the type with liquid fuel and a spark-wheel) are one of my favourite ways of achieving the ‘first stage’ of a fire. They are reliable, have few moving parts and even if you break the casing and lose all of the fuel – you can still use the miniature ferro rod and the spark-wheel mechanism to ignite a suitable tinder that way.
[/vc_column_text][vc_separator][/vc_column][/vc_row][vc_row][vc_column][vc_column_text]
Windproof Lighters
[/vc_column_text][vc_video link=”https://youtu.be/QyLPn39ENs0?t=7″ align=”center”][vc_column_text]More Information
These gas-fuelled lighters are effectively mini blowtorches. They are very powerful, and not susceptible to wind. They are however a little more delicate or finicky than their simpler butane cousins – and are very heavy on fuel. For short trips they work well but don’t rely solely on them.[/vc_column_text][vc_separator][/vc_column][/vc_row][vc_row][vc_column][vc_column_text]
Safety Matches
[/vc_column_text][vc_video link=”https://youtu.be/QyLPn39ENs0?t=11″ align=”center”][vc_column_text]More Information
It’s becoming increasingly difficult to get hold of the traditional style of matches (the ones that rely on friction), and instead safety matches (that rely on a chemical reaction with the striker strip) are becoming the default option when you look for them in shops. This is fine, but you need to make sure you protect the striker strip when storing them in your kit.
Matches are a good low-tech backup to keep in your firecraft kit, but it’s worth making sure you have developed a good match-striking technique so you don’t waste them when out in the field.[/vc_column_text][vc_separator][/vc_column][/vc_row][vc_row][vc_column][vc_column_text]
Lifeboat Matches
[/vc_column_text][vc_video link=”https://youtu.be/QyLPn39ENs0?t=20″ align=”center”][vc_column_text]More Information
A Lifeboat Match (AKA Flare Matches or Storm Matches) differ from ‘normal’ matches in that two thirds of the length of the match is made up of the ‘head’, i.e. the part that initially combust when struck. These matches are almost always ‘safety’ types, and need to be used with the supplied striker strip to work. They are issued in some military ration packs and survival kits and can also be purchased in waterproof boxes.[/vc_column_text][vc_separator][/vc_column][/vc_row][vc_row][vc_column][vc_column_text]
Cotton Wool Pads and Petroleum Jelly
[/vc_column_text][vc_video link=”https://youtu.be/QyLPn39ENs0?t=25″ align=”center”][vc_column_text]More Information
This is two methods, because the addition of petroleum jelly does significantly affect how useful this is as a technique.
Cotton wool (either in balls, or pads) can be easily lit with matches, lighters or ferro rods. As long as they are kept dry and grease-free they will light easily – but also burn away very quickly without producing much usable heat.
The addition of petroleum jelly (a very small amount, less than a teaspoonful) will significantly change the amount of potential energy in the tinder and allow it to be released steadily – producing a steady, hot flame that will burn for several minutes.[/vc_column_text][vc_separator][/vc_column][/vc_row][vc_row][vc_column][vc_column_text]
Tampons
[/vc_column_text][vc_video link=”https://youtu.be/QyLPn39ENs0?t=62″ align=”center”][vc_column_text]More Information
Tampons are essentially compressed cotton wool surrounded by vaguely flammable material. They come in waterproof pouches and can be easily opened, spread out and ignited. They don’t burn as well as other improvised tinders, but do work. This is probably something to keep in your emergency kit, but is a useful technique.[/vc_column_text][vc_separator][/vc_column][/vc_row][vc_row][vc_column][vc_column_text]
Bicycle Inner Tube
[/vc_column_text][vc_video link=”https://youtu.be/QyLPn39ENs0?t=80″ align=”center”][vc_column_text]More Information
Butyl rubber bicycle inner tubes (the cheaper, more common type) are handy for several things. They can be made into improvised lashings and add extra grip and storage options as Ranger Bands – but also make very good components for lighting fires in wet, humid conditions. I have used thin strips of inner tube to light fires in the pouring rain, or after travelling through wet and humid places where everything in my kit was possibly going to be saturated – they are fully waterproof and don’t absorb moisture.
They work best when cut into tapering strips and being lit from the thin end.[/vc_column_text][vc_separator][/vc_column][/vc_row][vc_row][vc_column][vc_column_text]
Go Prepared Survival Tinder Strips
[/vc_column_text][vc_video link=”https://youtu.be/QyLPn39ENs0?t=102″ align=”center”][vc_column_text]More Information
This is a commercial product marketed as a ‘survival’ tinder, but could be used as a regular firecraft resource if it suits your needs (and your budget!). It is included in some NATO military survival kits, and has the benefits of being easily stored and tucked away with no weight or packed-size penalty. It does however need a flame to light directly, to use a ferro rod you will need to combine it with cotton wool (supplied in the purchased/issued kits).[/vc_column_text][vc_separator][/vc_column][/vc_row][vc_row][vc_column][vc_column_text]
Hammaro/BCB Tindercard
[/vc_column_text][vc_video link=”https://youtu.be/QyLPn39ENs0?t=112″ align=”center”][vc_column_text]More Information
Another commercial product, but a little cheaper. Rather than being a woven fabric this is a paper-based product and a little bulkier. It will light with a flame or a ferro rod, but for the latter I find it helps to warm it in my hands for a minute or so, then to create some fibres/particles by scraping with the striker of my ferro rod (as you would with birch bark).
This is one of my favourite ways of quickly and reliably starting a fire – even if it’s just embedded in a larger bundle of natural tinder.[/vc_column_text][vc_separator][/vc_column][/vc_row][vc_row][vc_column][vc_column_text]
BCB FireDragon Fuel
[/vc_column_text][vc_video link=”https://youtu.be/QyLPn39ENs0?t=133″ align=”center”][vc_column_text]More Information
We have used BCB FireDragon fuel blocks for several years now and they are very useful – it’s easy to see why they have replaced the famous ‘hexy blocks’ as the solid fuel source issued to UK military personnel.
These solid blocks of ethanol are easily divided into smaller segments and will light with a flame or a ferro rod. They can also be blown out easily, but do melt and turn to liquid whilst burning so be careful with your placement.[/vc_column_text][vc_separator][/vc_column][/vc_row][vc_row][vc_column][vc_column_text]
Sisal String
[/vc_column_text][vc_video link=”https://youtu.be/QyLPn39ENs0?t=157″ align=”center”][vc_column_text]More Information
Sisal string, made from the fibres of Agave, is pretty terrible for any serious lashing or other cordage uses – but if you have some to hand it can be unwoven and separated into fibres that will ignite from a flame or a ferro rod.[/vc_column_text][vc_separator][/vc_column][/vc_row][vc_row][vc_column][vc_column_text]
Daldinia concentrica (Fungus)
[/vc_column_text][vc_video link=”https://youtu.be/QyLPn39ENs0?t=173″ align=”center”][vc_column_text]More Information
Daldinia concentrica, AKA King Alfred’s Cakes, Cramp Balls etc, is inedible but quite useful as a way of creating then preserving an ember. It is flammable, but won’t burst into flame – even with strong encouragement. It will however glow brightly like a piece of charcoal, and can be embedded into a ‘nest’ of natural tinder which will ignite from the heat created by the glowing fungus.[/vc_column_text][vc_separator][/vc_column][/vc_row][vc_row][vc_column][vc_column_text]
Fatwood
[/vc_column_text][vc_video link=”https://youtu.be/QyLPn39ENs0?t=197″ align=”center”][vc_column_text]More Information
Fatwood – wood from resinous pine trees that has been infused with that flammable resin – can have shavings taken from the surface which will ignite either with a flame or several strikes from a ferro rod (if the shavings are thin enough).[/vc_column_text][vc_separator][/vc_column][/vc_row][vc_row][vc_column][vc_column_text]
Birch Bark
[/vc_column_text][vc_video link=”https://youtu.be/QyLPn39ENs0?t=225″ align=”center”][vc_column_text]More Information
There are several varieties of Birch with flammable outer barks (the type in the video is Betula papyrifera – Paper Birch), but a similar technique is used for all of them. Scrape away several small shavings of the outer side of the bark and then strike firmly with a ferro rod to produce a good shower of sparks. I will always try to have a small handful of thin strips of bark ready to add to the flames once they have begun.[/vc_column_text][vc_separator][/vc_column][/vc_row][vc_row][vc_column][vc_column_text]
Honeysuckle Bark
[/vc_column_text][vc_video link=”https://youtu.be/QyLPn39ENs0?t=246″ align=”center”][vc_column_text]More Information
The type used in this video is Common Honeysuckle (Lonicera periclymenum) and was collected shortly before filming the video so isn’t the best example – it is slightly easier to work with when completely dry. If torn into thin strips it will light easily with a flame, and can be coaxed into combustion with a ferro rod if dry and thin enough.[/vc_column_text][vc_separator][/vc_column][/vc_row][vc_row][vc_column][vc_column_text]
Potassium Permanganate and Glycerol
[/vc_column_text][vc_video link=”https://youtu.be/QyLPn39ENs0?t=256″ align=”center”][vc_column_text]More Information
Potassium Permanganate is a chemical with strong oxidizing properties, and is often purchased as a fine powder. When combined with glycerol (or other substances) it will oxidize and combust, producing a short-lived but bright and smokey flame. This can be used to ignite other tinders, but is pretty useless on its own.[/vc_column_text][vc_separator][/vc_column][/vc_row][vc_row][vc_column][product_category per_page=”12″ columns=”4″ orderby=”rand” order=”ASC” category=”bushcraft-courses”][product_category per_page=”12″ columns=”4″ orderby=”rand” order=”ASC” category=”survival-courses”][/vc_column][/vc_row]
- Published in All Blog Posts, Bushcraft General, EST Framework, Firecraft, Videos
The Six-Bundle Fire Lay
Sunday, 11 November 2018

The Six-Bundle Fire Lay
A stick-bundle method of lighting a fire
This fire lay requires six bundles of dry, straight dead wood and a good ignition source. It relies on good airflow at the beginning, and the fire lay ‘collapsing’ in on itself in the later stages to ensure a good bed of coals and ash to cook over.
It is also a good option for making a ‘One Match Fire’.
The thickness of the wood in each bundle increases as the fire develops, staring with match stick-sized twigs, moving through pencil-sized ones and finally finger-sized branches.
This is one of the first ways we teach new clients to arrange kindling and fire wood for a simple, reliable camp fire. It works particularly well in the areas we use to run training courses (mature Western Hemlock Spruce woodland) where there is an abundance of dry and easily-accessed materials that works particularly well with a stick-bundle fire lay. It would also work with dry/dead-standing Birch branches and some other straight, small branches.
This video is part of the training materials given to clients participating in training courses under the EST Framework
Learn more at:
OutdoorProfessional.co.uk
[/vc_column_text][/vc_column][/vc_row][vc_row][vc_column][vc_video link=”https://youtu.be/aQLeFTp6x9Y” align=”center”][/vc_column][/vc_row][vc_row][vc_column][vc_column_text]
Some of our North Wales and UK Bushcraft Courses
[/vc_column_text][product_category per_page=”12″ columns=”4″ orderby=”rand” order=”ASC” category=”bushcraft-courses”][/vc_column][/vc_row]- Published in All Blog Posts, Articles, Bushcraft, Bushcraft General, Camping, Emergency and Safety, EST Framework, Firecraft, Skills, Videos
Extreme Low Tide Foraging – How to find the lowest tides
Thursday, 01 November 2018

Extreme Low Tide Foraging
How to find the lowest tides on the UK coastline
Extreme Low Tide foraging is becoming popular and one of the increasingly common requests we get for a private coastal foraging course over here in North Wales. It’s easy to understand why – when all of the most interesting and edible parts of the beach are under the water for part of every day then there’s a lot more to see when the water has retreated to its lowest point.
The UK is home to one of the biggest tidal ranges in the world – the Severn Estuary can have a difference of as much as 15m (49ft). The tidal range of one particular spot can be dependent on several factors, ranging from the shape of the bay, inlet or estuary where the range is being measured to the underwater geology and topography, and even the direction it is facing relative to the prevailing winds.
You don’t have to travel far to see a big difference between tidal ranges – the average tidal range in Colwyn Bay is about 8.5-9m whereas the range at Barmouth (only 42 miles away as the crow flies) is more like 4.5-5m. So a small building’s worth of difference in tidal range then![/vc_column_text][/vc_column][/vc_row][vc_row][vc_column][vc_single_image image=”9909″ img_size=”full” alignment=”center”][vc_column_text]A comprehensive and very complicated diagram courtesy of this Wikipedia page.[/vc_column_text][/vc_column][/vc_row][vc_row][vc_column][vc_column_text]
Why Tidal Ranges are important to the coastal forager
When looking for wild edibles on the UK coastline the REALLY good stuff spends at least part of its life under the water – the edible seaweeds, molluscs, bivalves and gastropods and of course the fish and crustaceans. As the tide drops away (the ebb) then some of these species are left stranded on the rocks and the sand of the intertidal zone (the area between the high tide and low tide marks). This makes them easy to gather (as long as you’re doing it safely, legally and responsibly) and identify, and is also safer than wading around in deep rock pools and crashing waves!
For most of the UK the tidal period is around 12 hours and 25 minutes – the period between each high tide. The UK has what is known as a semi-diurnal regime – meaning that there are usually two high tides and two low tides every day. Other regions may only experience one tidal cycle in a 24hr period, such as happens in the Guld of Mexico.
This semidiurnal regime gives the forager on the UK coastline two chances of reaching that intertidal zone on foot, although for a good part of the year only one of those chances is going to be in daylight hours!
Predicting the tides
Understanding the local tidal cycle is very important to anybody working or exploring that intertidal zone, whether it’s on land or in a boat. Fortunately – it has never been easier to access that information. There are multiple reliable websites, smartphone apps and other resources that help give reasonably accurate forecasts for the tidal cycle for any given location along the coast:
- Tide Charts/Books – These are the more traditional way of predicting a tidal cycle, and are usually sold for a 12 month period and are specific to a region of the coast. They give the tidal forecast for one specific, accurately measured location in that region (Liverpool is the spot for the North Wales tidal charts) and then a list of adjustments that you need to make for another location in the region. The ‘High Tide’ does not hit all locations along one stretch of coastline at the same time, and there can be a differenc eof several hours between one location and another.
- Tidal Forecast Websites – There are several websites that not only give reasonably accurate forecasts for a given location (usually based on popular locations like coastal towns or tourist beaches) but also give you a visualisation of that tidal cycle. Most websites only give you a forecast of up to 14 days from the current date, but some offer a premium service where you can get more detailed longe-range forecasts of the tidal cycle.
- Smartphone Apps – These are often associated with tidal forecast websites mentioned above, or at least make use of the same data. Again – they may only give up to 14 days of forecast and might be limited on locations. There are also several that I have found to be very innacurate for some locations – it’s worth checking against other sources of information before you start relying on one app or website
- Local newspapers – Many local papers for coastal regions still publish the local tide times for the coming week
- Local information boards – Many harbours and council-owned beach areas have information boards with the local tide times published somewhere.
The published tide tables I use for North Wales and Anglesey are here (Amazon link) and I often use a combination of these two websites for free online tidal predictions:
TideTimes.org.uk
Tide-Forecast.com
A strategy of using a combination of printed tide tables and online sources is probably wisest – I have the printed set in my truck and use it if I want to quickly plan a spontaneous trip to the shore.[/vc_column_text][vc_column_text]For the UK specifically there is an excellent set of FAQs and diagrams on the National Tidal And Sea Level facility here.[/vc_column_text][/vc_column][/vc_row][vc_row][vc_column][vc_column_text]
How Tides Work – a video explanation
I did consider doing our video on how tides work to help explain this point further – but then I discovered that BrainStuff had already produced on, at least a 1,000 times more interesting and concise than my ramblings would have been.
This video runs through how tides work, has a great visualisation of the ‘bulge’ of water created by the gravitational pull of the moon and a little more on the tidal cycle.[/vc_column_text][vc_video link=”https://youtu.be/5ohDG7RqQ9I” align=”center”][vc_column_text]
How Tides Work – a simple explanation
There are several factors affecting the cycle of tides on our planet, but the simplest way to think of it is to associate the tidal cycle with that of the moon in orbit around us. Imagine a ‘bulge’ of water being pulled out from the surface of the Earth towards the moon. As the earth rotates that ‘bulge’ of water can be seen by the fact that the sea ‘moves’ a little further up the shore. When the bulge disappears (i.e. moves away to another part of the Earth) it seems like the water level drops.
There are actually TWO ‘bulges’ of water, one directly under the moon and another on the opposite side of the Earth. This is where the rotational force of the moon and the Earth comes into play – the common centre of mass between the Earth and the moon isn’t in the centre of the Earth, but at a point a little clsoer to the moon.
This rotational force also has an effect on the ‘bulge’ of water, creating a second one on the opposite side from the one ‘under’ the moon.
As these two imaginary (but helpful for visualisation) ‘bulges’ pass by your area of coast then you will experience a cycle of the water rising, then receding as they come and go.
Hang on, do I need to know all of this???
Yes, I know this isn’t particularly clear AND an oversimplification, but you reach a point with trying to understand tidal cycles where your knowledge of orbital physics and rotational geometry becomes more important than your knowledge of edible coastal species.
So for the coastal forager and hunter there are a few key things you need to understand and be aware of:
- Tides are predictable and run in cycles, but gradually change from day to today, and can be very different in locations that aren’t THAT far away from each other
- There are several sources of information that will give you the tide times and ranges, but you need to be able to read them AND make sure that you are looking at the right date and location as it can make a big difference
- The tidal range changes throughout a month, and there are other factors that can affect how high or low a tide will be. Local knowledge is incredibly useful, and it is worth learning about the variables in your local area.
The Extreme Low Tides – AKA the Spring Tides
This is the term that has started to become popular for the point in the tidal cycle where the low tide is as far down the beach as it is likely to be. More properly it is known as a ‘Spring Tide’, and occurs twice per month.
Despite the name, Spring Tides have nothing to do with the season between Winter and Summer, but probably have something to do with the way the water seems to ‘leap up’ at high tide.
Maybe.
They do occur on regular cycle, usually a day or two after a full moon OR new moon.
Why do Spring Tides happen?
If we go back to the simplified-but-helpful idea of there being two ‘bulges’ of water moving around the earth (‘under’ the moon and on the opposite side of the earth) then we can start to work out why Spring Tides occur.
The sun also has an effect on the mass of water on the surface of the earth, but much less than that of the moon. However – when the sun and the moon ‘line up’ relative to the earth then the effect of both of these bodies creates a bigger ‘pull’ than normally experienced. This happens twice per lunar month (which is approximately 29.5 days), and the noticeable effect on the Earth is that the ‘bulge’ of water is bigger/higher than at other times in that cycle. As the mass of water on the surface is largely unchanged then as more water is ‘pulled’ towards the Moon/Sun then the low tide in between the high tide will be as low as it can get – the water has gone away into the ‘bulge’ as it moved elsewhere.
This occurs a day or so AFTER a full moon or new moon, as it takes some time for the mass of water to ‘catch up’ with the gravitational forces.
Basically – when the sun and moon align there’s a bigger pull on the sea than normal, raising it slightly higher and further up the beach. Halfway between the ‘High Tides’ we get a the ‘Low Tide’, and during a Spring Tide the lowest point of the tidal range is as about as low as it can get – this, of course, is the really interesting part for the forager.[/vc_column_text][vc_column_text]
Predicting the Extreme Low Tides
As there is a regular, predictable tidal cycle it is easy enough to predict when that extreme low tide event will occur. It will be roughly 6 hours BEFORE or AFTER the highest point of a Spring Tide, and local factors (shape of the coastline and underwater features) will affect which one of these two low tides will be the lowest.
You can see it on tidal forecasting websites that show the next period of tidal cycles as a ‘wave’ diagram. You will see that the height difference between the ‘peaks’ of the wave and the ‘trough’ or ‘dip’ between those peaks changes from day to day. When the difference is greatest you are probably looking at the Spring Tide, and when the difference is at its least then you have the Neap Tide.
In printed tidal charts you can look to see the relative height of the high tide – normall listed in metres. When it is at its highest number then you are again probably looking at a Spring Tide. Some tidal charts will have a symbol or letter next to that Spring Tide, or have other information that help you calculate it for your area.
[/vc_column_text][vc_column_text]What About Neap Tides?
Neap Tides are simply the points halfway between the Spring Tides, when those lunar and solar forces cancel each other out. During a neap tide the high tide won’t be very high, but the low tide won’t be very low either. The tidal range for any location is at its lowest during a neap tide.
[/vc_column_text][vc_column_text]
The Neap/Spring Tidal Cycle
Within a lunar month (29.5 days-ish) you will usually find two Spring Tides and two Neap Tides. The cycle might look something like this:
Spring Tide > 7 Days > Neap Tide > 7 days > Spring Tide > 7 Days > Neap Tide > 7 Days > Spring Tide
So if you have just experienced a Spring Tide, with the extreme low tide that a forager is looking for, then you will have to wait roughly 14 days until the next one. This is of course dependant on several local factors AND the fact that the tidal cycle doesn’t exactly line up with a set of 24hr periods.
[/vc_column_text][vc_separator][vc_single_image image=”9914″ img_size=”full” add_caption=”yes” alignment=”center”][vc_column_text]The above diagram shows the tidal cycle for roughly one month. Each ‘wave’ peak or trough on the chart represents one tide, with the ones under the line being low tide, and the ones above being the high tides. You can clearly see the two Spring Tides either side of a Neap Tide.[/vc_column_text][vc_separator][vc_column_text]The Other Factors that affect Tide Height
I keep mentioning ‘other factors’ that would affect how high (or low) any given tide might be, and it’s probably worth exploring that a little further.
The Wind
A strong wind blowing onto the shore can prevent the water from being able to move away as the tide recedes, and in narrow estuaries or coves this effect can be magnified. There is a term sometimes used – “wind over tide” – which refers to times when the wind and the tide are moving in opposite directions. This is particularly dangerous for anybody trying to broach the surf or head out to sea as the wavelength (gap between waves) is much shorter than normal and they can ‘stack up’ on each other. For the forager it can mean that the carefully-planned excursion to the beach to take advantage of the low water of a Spring Tide is scuppered by a strong onshore wind pushing the water further up the beach than expected.
Coastline Shape
Coves, narrow inlets and estuaries can trap water and hold it for longer than the area of coast either side if there is a narrowing or other restriction stopping the water from draining out as the tide recedes. This can be worsened by fresh water draining into a bay or estuary, ‘filling up’ the bay as the sea tries to drain away on a falling tide. Heavy rain somewhere inland combined with a Neap Tide can actually make for an almost negligible tidal range in some places along the North Wales coast – the water from the river fills up the estuary nearly as quickly as it drains away.
[/vc_column_text][vc_column_text]So what if I can’t wait for the Spring Tide?
If for some reason you are incredibly impatient (or, more likely, you’re only on the coast for a short period and it doesn’t align with the Spring Tides) then there are a number of options open to you. However I must stress that buggering around in even very shallow water can kill you, or at least cause serious injury. Rocks are slippery below the high water mark, they can have hidden holes or openings that can trap legs (or cause you to slip and break something) and the mud of estuaries and shallow bays can entrap you or leave you stranded on a rapidly shrinking sandbar. It’s worth taking care and planning any in-water foraging very carefully.
It SOUNDS like I am being over cautious – but if you want to hear more have a word with your local RNLI or HM Coastguard teams and see if they thing the waters edge is a perfectly safe place to be…
- Snorkeling – I have happily foraged for very fresh and healthy seaweed and had my pick of the edible molluscs,bivalves and gastropods just below the low water mark by snorkeling along with a netted bag in one hand, carefully selecting as I go. This only works in calm and clear-ish waters, but if your wetsuit is up to it and you can handle the cold you can forage on the UK coast year-round. This works best on rocky beaches or areas where there is a sudden change in water depth at the low water mark (otherwise you end up beaching yourself on the bottom most of the time).
- Waders – these are cheaper than ever and there are plenty to choose from. I like these neoprene ones from Bison, but they aren’t the toughest and have a few patches and repair marks. There is a perpetual myth that if you fall into water wearing waders they will ‘drag you to the bottom’. This isn’t quite true, and I have succesfully swam in waders with a ‘swim belt’ several times – but if they do fill with water then it makes it almost impossible to clamber back onto a rocky ledge or a ladder due to the extra weight. They’re only suitable for use up to about knee depth if you want to stay safe – and they can still get snagged or trapped on underwater hazards.
- Bare legs and wading – this is essentially the same as wading in with waders, except without the waders. The water temperature can be tolerable for most of the year, but the real hazards come from your unprotected legs (and maybe feet if barefoot or in sandals) either being injured by sharp rocks (or fishing tackle, or broken glass) or from interacting with something stingy or sharp that dwells in the water – probably jellyfish or the lovely Weever fish.
If you want to make the very most out of any coastal foraging excursion then I strongly recommend just arriving during a falling (ebb) tide, at least 2-3hrs before low tide, and following the water as it receds. This way you find things that have only just been stranded by the receding water and more likely to be healthy and better for collecting.[/vc_column_text][/vc_column][/vc_row][vc_row][vc_column][product_category per_page=”12″ columns=”4″ orderby=”menu_order title” order=”ASC” category=”foraging-courses-uk”][/vc_column][/vc_row]
Sharpening Bushcraft Knives and Axes – a 2018 update
Friday, 10 August 2018

A guide to sharpening axes and knives for bushcraft and the outdoors
The equipment and techniques we use to sharpen our equipment at home and at camp
[/vc_column_text][/vc_column][/vc_row][vc_row][vc_column width=”2/3″][vc_column_text]This isn’t the first article on the blog about the equipment we use for sharpening knives and axes. The last one was quite short and was mostly just a list of the equipment – but I have been meaning to write out a more in-depth guide. We cover knife and axe sharpening at different levels on our bushcraft and campcraft courses, and it’s one of those subjects where the course participants ‘lean in’ to the topic – most of those who attend the course have tried to sharpen their own equipment and had, shall we say, a variety of results? Sometimes at the end of that lecture or presentation I have been handed a knife or axe that could be a lot sharper than it currently is and have been asked for advice on how to improve it, and if we have time I will show that person how to regain the shape and edge they want. As one of the instructor team said during our most recent Woodcrafter course – “what the hell did you do that guy’s axe? Last time I saw it you could have used it as a spoon and now it’s shaving the hairs off a nettle!”I need to state a few things from the outset – first, I’m not a ‘knife guy’. I don’t collect knives, and I don’t buy knives to put in a display case. That is not to denigrate or to criticise those who do – it’s just that I have enough hobbies and collections to fill my time (and home) and knives, axes and similar items have been, quite literally, the tools of my trade. I use my cutting tools weekly, both on courses and for tasks at home – my morning exercise today was snedding, crosscutting and splitting several dozen kgs of firewood for the logburner in the office, using a chainsaw, forest axe and maul that have all been sharpened or fettled by myself recently. I use knives and axes, and teach others how to use them within an ‘outdoors’ context – but I know many other people who care much more about the subject than I do and will have strong opinions on everything that follows.
I also need to acknowledge that there are many different ways to achieve the same thing when it comes to tool sharpening, and a quick Google search would bring up dozens of techniques and variations – each written by somebody who swears that their way is the ‘true’ method.
This is, as with many things on the internet, complete cobblers.
When it comes to teaching a complex skill like sharpening any good instructor should acknowledge that there are often multiple ways of achieving the same thing. Generally speaking, if someone says that “THIS is the only way to do this…” then it’s likely that:
- They don’t know another way of doing it, because they have a limited range of experience
- They have an external pressure on them teaching ‘that way’ of doing things – i.e. they need to keep to a strict syllabus or lesson plan, often seen in military training
- They are selling you ‘that way’ of doing things, usually to go along with the equipment they are selling
In short – there are several techniques and methods that can achieve the same thing. Some are certainly easier for novice users, or work more efficiently with certain blade shapes – but if you find one method works best for you and your tools, you can repeat that process time and again and recognise when you have achieved what you wanted then that’s absolutely fine.[/vc_column_text][/vc_column][vc_column width=”1/3″][vc_single_image image=”9255″ img_size=”medium” add_caption=”yes” alignment=”center”][vc_single_image image=”9261″ img_size=”medium” add_caption=”yes” alignment=”center”][vc_single_image image=”9260″ img_size=”medium” add_caption=”yes” alignment=”center”][vc_single_image image=”9262″ img_size=”medium” add_caption=”yes” alignment=”center”][/vc_column][/vc_row][vc_row][vc_column][vc_column_text]
Stage 1 – Shaping the Blade
In most cases you will only need to perform this stage if the knife or axe is VERY blunt, needs to be reshaped or has a dent/ding in the edge of the blade that needs to be removed (well, the material either side needs to be removed to match it). It is often performed with a file, either one dedicated for use with outdoor cutting tools or a general machinist/metalworking file.
This is the most aggressive stage in the sharpening process and care needs to be taken. All sharpening processes involve removing material from the blade, but when you are using a file or very coarse stone you can quickly grind away more material than you wanted to. Each stroke needs to be deliberate and assessed and done to a plan.
Remember also to only use hand tools unless you have access to dedicated grinding and honing machines for this stage – power tools like grinders will unevenly heat the blade, changing the chemistry of the steel and ruining the ‘temper’ of the steel. Cutting tools like knives or axes are made from steel or alloys that have been carefully heated and shaped to maintain a balance between hardness and shapeability – something that can be sharpened to a fine edge but is resilient enough to not chip or dent the moment it is used to cut something.
Knives
It’s rare that you will need to reshape or repair a knife blade with a file but it can be useful if you need to change a knife ‘grind’ from a convex to a bevel shape – it’s still unlikely that a general user will reprofile a knife in this way. I have repaired knife blades with a file though, removing material from across the length of the blade until it has dropped to the same level of the ding. It can also be useful for reinstating a point on the knife, and area that can be tricky to sharpen and easily dulled by repeated ‘stabbing’ of material or game/fish preparation.
A file can also be useful for ensuring the ‘spine’ of a knife has a 90° edge, vital for use with a ferro rod.
Axes
This is where you are more likely to use a file, as the force used to swing an axe can easily put a significant dent into an edge if it comes across a hard spot in the wood, or misses and hits a stone in the ground. I once managed to ding an axe when I hit a bolt that was buried in a small tree – at some point someone had bolted/screwed a sign to the tree and the tree had regrown around it.
Using a File on an Axe or Knife
I favour longer, flat files, such as those used for sharpening chainsaws (for dropping the height of the cutter guides, not the round ones used on the cutters themselves). I hold the knife or axe on a stump or other flat surface where I can hold it steady and push the file over the edge from behind – i.e. my hand stays behind the cutting edge and I DO NOT file towards the edge. It can be done that way but it does have a significant risk of slipping with the file and plunging your fingers into the blade.
Work carefully and steadily and be wary of removing too much material or making a gouge in the blade. Maintain the original angle of the cutting edge and replicate the effort on the other side of the blade – it is very easy to end up with an asymmetric blade when using a file.
I wear leather gloves when possible, and work in good light. A head torch can help, but there is no substitute for moving out from under the trees to a clearing where you can carefully examine what you are doing.
Cleaning a blade
If your knife or axe has seen some heavy use, particularly with woods or materials that can ‘stain’ the blade or leave deposits on the surface, then it’s probably a good idea to clean them from the blade before beginning to sharpen it. Depending on what it is you’re trying to remove it could prevent the blade from properly contacting with the sharpening stone, it could prevent the blade from cutting through material effectively or just carry on corroding into the steel.
There are several ways you can clean the blade, but my favourite is to use either an abrasive block (the Garryflex blocks are great) or an abrasive paper. Just be careful to not be too enthusiastic with your actions as you could end up dulling the edge of the blade or cutting yourself through a bit of careless finger placement. [/vc_column_text][vc_row_inner][vc_column_inner width=”1/2″][vc_single_image image=”9291″ img_size=”medium” add_caption=”yes” alignment=”center”][/vc_column_inner][vc_column_inner width=”1/2″][vc_single_image image=”9286″ img_size=”medium” add_caption=”yes” alignment=”center”][/vc_column_inner][/vc_row_inner][/vc_column][/vc_row][vc_row][vc_column][vc_column_text]
Stage 2 – Sharpening Stones
This is the stage in the sharpening process where most people begin, and with good reason – if you knife/axe is the right ‘shape’ but just blunt then you do not need to go through the heavy work with a file to regrind the blade.
As mentioned above – any sharpening of a blade involves removing material until you achieved the desired angle. The way you remove that material matters when it comes to cutting effectiveness, and there are a number of ways to achieve the desired level of sharpness.
All ‘sharpening stones’ (including stones plucked from a riverbed or shore) are an abrasive, and harder than the steel/metal of the knife or axe. By moving the blade across the stone you grind away material from the blade – although you may also remove material from the stone as well. Some stones require the use of a fluid or lubricant, normally water or some kind of oil, to aid the process. Some stones (increasingly difficult/expensive to obtain) are made from naturally-occurring material, others from a composite of materials, some artificial and some naturally-sourced.
Most stones are graded by ‘grit’, with a number denoting the grit. The smaller the number the more coarse the stone (and the more aggressively it will remove the material from the blade) – usually starting at about 250 for knife sharpening and moving on up to around 3-5000 or even higher.
The aim is to move from a coarse grit (small number) to a fine grit (large number) with several steps between. As you progress through the steps you remove some of the scratches/scoring made by the step before and create a uniform cutting edge.
[/vc_column_text][vc_column_text css=”.vc_custom_1533896498483{padding-top: 5px !important;padding-right: 5px !important;padding-bottom: 5px !important;padding-left: 5px !important;background-color: #eaeaea !important;}”]
Sharpening Stone Types
There are several commonly available sharpening stones, and hundreds of commercial products making use of these types of stone within their designs.
Whetstones (Oil Stones) – can be made from natural stone (usually Novaculite, AKA Arkansasa Oilstone) or synthetically using an abrasive such as silicon carbide or aluminium oxide. The synthetic variety are often sold as double sided, with a finer grit on one side and a coarser grit on the other. They are relatively cheap and robust, although heavy. They do not necessarily NEED the use of a lubricant (I use 3-in-1 oil) but this does help with the movement of the blade across the stone and remove swarf (material removed from the blade that may prevent the blade touching the stone evenly or even blocking the ‘pores’ of the stone that have the abrasive effect).
Japanese Water Stones – these are mostly made as synthetic product using naturally-occurring stone and are seen by many as being the ‘ultimate’ way of sharpening a blade – but I’ve personally had as good a result with an oilstone. There is certainly a strong cultural association with these Japanese stones, and there is a whole world of nagura, Shapton, Debado and Ao Toishithat you could dive into if you so wished. The grit sizes range from around 400 up to 12000 which takes you well into ‘polishing’ territory. These stones tend to be quite heavy but robust, and most require immersion in water prior to use (using water as a lubricant – never use oil on a water stone).
Diamond Stones – diamond has been used industrially for sharpening and cutting applications for a long time now, making use of the hardness of diamond and the relatively low cost of it in granule form. It is usually a coating on top of a steel plate, often with a plastic or resin surround – they often look a little like a cheese grater. These ‘stones’ can be used to sharpen a blade directly or even used to ‘true’ a sharpening stone – i.e. make it back into a flat surface, removing the depression often formed by repeated grinding and sharpening. They do not require the use of lubricant and have a long service life.
Abrasive Paper – high-quality abrasive and polishing papers, often bonded onto glass or flat wood. This is the method associated with the term ‘scary sharp‘ and is inexpensive and simple to master. It works best with blades that have a ‘flat’ bevel and where the whole blade can be run across the surface. It works very well with woodworking tools (chisels etc) but can be modified for use with an axe or knife.
Sharpening Tools – these sharpening kits and items are often one of the above types of stone set into a jig or pre-defined shape. The best types are ones that can accommodate various angles and knife shapes and use good materials – but there are several terrible sharpening kits on the market – beware and read several independent reviews before purchasing if you can.[/vc_column_text][vc_row_inner][vc_column_inner width=”1/3″][vc_single_image image=”9284″ img_size=”medium” add_caption=”yes” alignment=”center”][/vc_column_inner][vc_column_inner width=”1/3″][vc_single_image image=”9296″ img_size=”medium” add_caption=”yes” alignment=”center”][/vc_column_inner][vc_column_inner width=”1/3″][vc_single_image image=”9297″ img_size=”medium” add_caption=”yes” alignment=”center”][/vc_column_inner][/vc_row_inner][vc_column_text]
Sharpening Stone Technique (Knife)
Fortunately, despite the slightly confusing array of sharpening stones available on the market, the technique for actually sharpening a knife on a stone is fairly simple and common to most types of stone. The key points are:
- Ensure that whatever you do to one side you do to the other – ideally in alternating strokes
- Be consistent with your angles, pressure and movements to avoid imbalanced blade shapes
- Be conscious of where the cutting edge of the blade is relative to your hands and body etc
Sharpening Strokes
- Position yourself so you can stay comfortably in that position for a while, and place the stone on a flat, stable surface. When in the woods/field it can be tricky to find such a surface – tree stumps, logs, rocks, equipment cases and even the bonnet of a Land Rover have all been used by me in the past. The key is stability, flatness and a comfortable working height.
- Start with the ‘coarse’ grit of whatever stone system you are using and place the blade edge on the surface of the stone so that the very edge is touching the stone. You will need to know what kind of blade ‘grind’ you knife has in order to decide where that final flat surface you need to lay on the stone actually is. A simple test is to see if there is a shadow or ‘gap’ between the metal of the blade and the surface of the stone – if there’s a gap you need to tile the blade a little further. The angle is key, as too shallow an angle will remove material in the wrong place, and too steep an angle will actually make the knife blunter.
- Move the blade across the stone as if you are trying to take a slice off the top of the stone itself. Start at one end of the stone, aiming to finish at the other end of the stone having moved the entire length of the blade over the stone in a single pass. This will require care and practice to ensure you maintain the angle of the blade throughout the stroke length – most outdoor-oriented knives have a curve at one end of the blade, requiring the user to lift the handle of the knife to maintain the angle.
- After completing the stroke you can repeat, or turn the knife and perform the same action on the other side of the blade. When sharpening a knife on a stone all actions have to be repeated for the opposing side. Most people end up with a sharpening ‘pattern’ – mine is outlined below.
Push or Pull?
There are several schools of thought about whether a knife should be pushed across a stone with the cutting edge as the ‘leading’ edge of the blade, or whether it should be dragged, i.e. the cutting edge ‘trails’ over the stone. There is also a debate about whether you should ‘push’ the knife in the same direction (normally away from you, swapping the knife from hand to hand to maintain direction and angle) or if you should ‘push’ it away from you on one stroke, then turn the knife and ‘push’ it back towards you to sharpen the other side. The consensus seems to be for ‘push’ over ‘pull/drag’, but with a split over which way to perform that ‘push’ action.
Knife grind/shape certainly comes into it, with scandi and convex grinds easier maybe to sharpen with a ‘push’ and other grinds with a drag. Personal preference and a host of other factors come into play – so if you find a technique that you replicate time and again, it works for your equipment and you understand WHY it works then I wouldn’t worry too much about it.[/vc_column_text][vc_row_inner][vc_column_inner width=”1/3″][vc_single_image image=”9281″ img_size=”medium” add_caption=”yes” alignment=”center”][/vc_column_inner][vc_column_inner width=”1/3″][vc_single_image image=”9282″ img_size=”medium” add_caption=”yes” alignment=”center”][/vc_column_inner][vc_column_inner width=”1/3″][vc_single_image image=”9283″ img_size=”medium” add_caption=”yes” alignment=”center”][/vc_column_inner][/vc_row_inner][vc_column_text]
Sharpening Stone Technique (Axe)
Most axes you are going to come across in a bushcraft, campcraft and outdoor context will have a convex grind, and also be a bit too cumbersome to bring to a bench sharpening stone. There are several versions of the ‘hockey puck’ axe sharpening stones on the market – I use the Gransfors Bruks Yxsten/Axestone but others are available.
The technique with these stones is to sharpen the length of the blade in a circular motion, being careful to keep fingers out of the way. Again – all actions performed on one side of the blade should be repeated on the other, and a progression from coarse to fine grit sizes will ensure a sharp edge free from scratches and abrasion marks can be achieved.[/vc_column_text][/vc_column][/vc_row][vc_row][vc_column][vc_column_text]
Stage 3 – Polishing and Stropping
Once you have progressed through the sharpening stones you have you SHOULD already have a sharp blade – but it could be sharper, especially for fine work with wood or for skinning animals and game preparation.
The point where sharpening stops and polishing begins with regards to cutting tools is a little… fuzzy. As you progress through to around 3000 and higher you should start to see a ‘shiny’ surface on the area you have been sharpening. Scratches left behind by the earlier sharpening steps have begun to disappear and the surface will be a lot smoother.
There may also be a burr that develops at the very edge of the blade – a strip of metal that is the result of the grinding process of sharpening. Stropping removes this without further grinding of the edge.
The next stage normally involves the use of a ‘strop’ – usually a piece of leather, often in conjunction with a polishing compound like Autosol or similar.
A strop can be free-hanging (i.e. not attached to any surface, or just anchored at the ends) or bonded to a surface, usually a wooden board. The leather needs to be thick enough to ‘hold’ the polishing compound and some people look for a thicker leather as it can ‘wrap’ around the edge of the blade. An additional layer of foam between the leather and a the board can help with this effect –
Technique for stropping knives and axes
As with using a sharpening stone, the technique for stropping involves putting equal work into both sides. It’s best to ‘drag’ the blade as this helps remove the burr. It’s also very difficult to do it any other way as the blade would cut into the leather.
You’ll get better results with more strokes, and 50-100 strokes across the strop is what I aim for. If your strop is mounted to a wooden board you can keep the blade still and move the strop across it – but be careful to maintain the angle and not ‘roll’ over the edge of the blade. It’s very easy to undo all of the hard work you’ve put in already!
[/vc_column_text][vc_row_inner][vc_column_inner width=”1/3″][vc_single_image image=”9298″ img_size=”medium” add_caption=”yes” alignment=”center”][/vc_column_inner][vc_column_inner width=”1/3″][vc_single_image image=”9287″ img_size=”medium” add_caption=”yes” alignment=”center”][/vc_column_inner][vc_column_inner width=”1/3″][vc_single_image image=”9285″ img_size=”medium” add_caption=”yes” alignment=”center”][/vc_column_inner][/vc_row_inner][/vc_column][/vc_row][vc_row][vc_column width=”2/3″][vc_column_text]
Aftercare and Oiling
If you have performed the above steps correctly you SHOULD have a sharp blade with a smooth and consistent edge. It’s good practice to finish the day with a sharp cutting tool, and often my work days end with a sharpening session. Starting a long day with a set of sharp and well-maintained tools is always a morale boost, and doubly so if you weren’t the last person to use that tool.
Corrosion Prevention
If you have a carbon steel axe or knife (i.e. something that can rust) then you will need to perform some kind of post-sharpening oiling or corrosion prevention before putting it away. There are a number of things you can use to prevent corrosion on a knife or axe blade:
- Oil – something that can be applied safely to the blade that won’t evaporate or solidify (or turn rancid). I use either 3-in-1 oil or a silicone gun oil on my blades, but you may want to consider using a food-grade mineral oil for blades that will be used for food.
- Wax – either ordinary candle wax, beeswax or a dedicated corrosion-prevention product like Renaissance Wax (used in museums etc).
The key thing is to ensure that you treat the whole blade, but not excessively. A small amount of oil on a rag or piece of kitchen towel is normally sufficient. If your knife has a leather sheath (or leather mask on an axe) then the leather will probably begin to be impregnated by the oil and help prevent corrosion when stored for a longer period.
I tend to use mineral oil on my knives that live in leather sheaths, gun oil (that creates a thicker, corrosion-resistant layer on an uncovered steel surface) on knives and axes that are uncovered or in plastic sheaths (like Moras, Hultafors etc) and wax on other carbon steel surface (saws etc).[/vc_column_text][/vc_column][vc_column width=”1/3″][vc_single_image image=”9293″ img_size=”medium” add_caption=”yes” alignment=”center”][/vc_column][/vc_row][vc_row][vc_column width=”1/3″][vc_single_image image=”9275″ img_size=”medium” add_caption=”yes” alignment=”center”][/vc_column][vc_column width=”1/3″][vc_single_image image=”9276″ img_size=”medium” add_caption=”yes” alignment=”center”][/vc_column][vc_column width=”1/3″][vc_single_image image=”9277″ img_size=”medium” add_caption=”yes” alignment=”center”][/vc_column][/vc_row][vc_row css=”.vc_custom_1533897160026{padding: 5px !important;background-color: #eaeaea !important;}”][vc_column][vc_column_text]
My Sharpening Methods
The above is intended as a general guide to the separate stages of the sharpening process for most user types, and (hopefully) answers to some of the frequently asked sharpening questions. Below are my current methods for sharpening axes and knives for bushcraft and other outdoor activities at home and in the field.
Knife (at home/workshop)
The below steps are performed at a workbench with good lighting:
- Visually inspect edge for damage (looking for reflective spots along the edge, possibly with a loupe/jeweller’s lens if one is available). If no damage then proceed to Step 3.
- If damaged then begin to file back the blade to a level where the ding/dent is no longer visible
- 800 grit water stone – 10 strokes in one direction then 10 in other, then 10 alternating strokes. Repeat at least once.
- 1200 grit water stone – 10 strokes in one direction, one stroke in other, then another 10. Repeat for other side, then 20 alternating strokes.
- 5000 grit water stone – 10 strokes in one direction, one stroke in other, then another 10. Repeat for other side, then 20 alternating strokes.
- Strop the knife over a leather strop using Tormek paste. The strop is bonded to a thin layer of foam on a flat oak board.
Knife (in camp)
The below steps are performed on a tree stump or equipment case if possible, but the flattest, most stable surface I can find. If no flat surface is available then I will try and do it carefully by hand, but accept that it will be harder to get the same quality of sharpness. If I know that I will be performing a lot of carving and woodworking tasks at the camp then I will carry a more comprehensive sharpening kit, but I usually carry as a bare minimum a ‘pocket’ diamond or oil stone. there is always a balance to be struck between the amount of equipment you are willing to carry vs what you can realistically achieve with minimal equipment:
- Visually inspect edge for damage (looking for reflective spots along the edge, possibly with a loupe/jeweller’s lens if one is available). If no damage then proceed to Step 3.
- If damaged then begin to file back the blade to a level where the ding/dent is no longer visible
- 300 grit diamond stone (DMT folding type) – 10 strokes in one direction then 10 in other, then 10 alternating strokes. Repeat at least once.
- 650 grit diamond stone – 10 strokes in one direction, one stroke in other, then another 10. Repeat for other side, then 20 alternating strokes.
- 1200 grit abrasive paper on a board (if carried) – 10 strokes in one direction, 10 in other then 10 alternating. Must be ‘dragged’ or paper will catch and tear.
- Strop the knife over a leather strop (using Tormek paste if carried). The strop is either a dedicated strip of leather or even a leather belt.
Axe (at home or in camp)
The process for sharpening my axes is very similar in camp or at home – either way I normally take the sharpening stone to the axe rather than laying the stone down and moving the axe across it. The only difference may be that I use a (soft) vise or clamp to hold the axe securely if filing the edge at home:
- Visually inspect edge for damage (looking for reflective spots along the edge, possibly with a loupe/jeweller’s lens if one is available). If no damage then proceed to Step 3.
- If damaged then begin to file back the blade to a level where the ding/dent is no longer visible
- 180 grit axestone – careful rotational strokes along one edge, trying to replicate on both sides and maintain a balance in the shape.
- 600 grit axestone – as above, with extra care due to increasingly sharp edge
- 1200 grit abrasive paper on a board – use eye to estimate how much work you have done on one side, but use colour change in metal/reflection to estimate how much has been done in order to match on other side.
- 2500 grit abrasive paper on a board – as above
- Strop the knife using a leather bonded to an oak board using Tormek paste.
Essentially the stage are the same – progressive movement through from a coarse abrasive to a finer one and finishing with a ‘polishing’ stage using a leather strop. Consideration is given to how much equipment can be carried and, realistically how sharp you can get your tools when working from a camp. I can usually achieve a ‘shaving sharp’ edge using a diamond stone or axestone on a well-maintained blade with access to leather for stropping, but I am realistic about my expectations when it comes to working far from the trappings of civilisation (and my workshop…)[/vc_column_text][/vc_column][/vc_row][vc_row][vc_column width=”2/3″][vc_column_text]
How sharp does it need to be?
Depends on what you’re doing with it…
The point to where a blade is ‘sharp enough’ is subjective and varies from tool to tool, and is often dependent on the task you are going to perform with it. My wood carving knives are orders of magnitude sharper than my splitting maul, but my felling and woodworking axes are usually sharp enough to shave with (although I don’t recommend it). If my splitting maul was much sharper then I would likely dent the edge whenever I hit a knot in the wood (or miss and hit the ground), but my carving knives need to be that sharp so that I can remove fine layers of wood without much force and do so delicately and carefully.
As a very general rule I go and sharpen the blade of a cutting tool as soon as I find that I have to put in more effort than I expected to perform that task. A good number of the minor cuts and scars on my hands have come from using more force than was necessary with a slightly blunt tool. It’s a hard-won lesson, but it makes you appreciate the importance of a sharp tool.
For some tools that need a lot of force to use effectively (splitting mauls and larger axes normally, plus some machetes/parangs) there can be a point where the tool is too sharp. By this I mean that the edge could be slightly blunter and still perform the required task, but the consequences of a mistimed strike or swing could be at best a damaged tool – and at worse a damaged limb. I will leave it to the reader to decide how sharp their cutting tool should be, but does EVERY item in your kit need to be sharp enough to shave a gooseberry, or are you creating a potential safety issue by making everything that narrow/sharp?
[/vc_column_text][/vc_column][vc_column width=”1/3″][vc_single_image image=”9295″ img_size=”medium” add_caption=”yes” alignment=”center”][/vc_column][/vc_row][vc_row][vc_column][vc_column_text]
Testing the sharpness of a cutting edge
There are a couple of tests I use, although I will steer the novice user towards some rather than others. Any time you bring a sharp cutting tool into close proximity with your skin and flesh you are increasing the risk of an injury. Unless you are 100% confident in your abilities then stick with one of the methods that doesn’t involve testing the edge by shaving your arm or your fingernail!
We don’t have many disclaimers or warnings on this blog – but if you are swinging cutting tools around you need to be aware of the potential risks of things going wrong, and position yourself, your knife/axe and anybody watching accordingly.
- The Paper Test – take a piece of A4 printer paper (I use 80gsm stuff, straight from the printer in the office) and hold one corner, with the paper in landscape orientation. Holding the knife in your dominant hand (i.e. the had you write with normally) try and take a swipe at the corner of the paper. If you can take the tip of the corner off in one swipe without the paper bunching up or tearing then your knife or axe is sharp enough for most tasks, including carving. If you can take several (careful) swipes and remove stripe after stripe of the paper then you can be confident that your blade is sharp – although you may need to quickly perform the stropping stage again as paper is great for blunting a knife!
- The Onion Test – this one takes a little practice but is a good test if you are sharpening a knife for food prep, and it also works on ripe tomatoes and starchy potatoes. If the knife can ‘fall’ through the onion with little effort, cutting through the individual layers without crushing them together and no ‘notchy’ resistance then it’s pretty sharp. A slightly mad variation on this test is to put the knife blade-upwards on a chopping board and drop a cherry tomato onto it from about 30cm above. If the cherry tomato lands on the blade and cuts through, partially or wholly, then the knife is at the ‘scary’ end of the sharpness spectrum.
- The Wood Test – AKA the Featherstick Test. This is a good one when in the field and a quick test of a blade edge is required. Take a quartered log (i.e. something that has been split in two, then that half has been split again) and try to make a fine, curling shaving from the corner. If you can do this two or three times then it is sharp enough for most tasks.
- The Shaving Test – this works best on hairy forearms, and stay away from anywhere else on the body! If you can shave the fine hairs from the outside of a forearm with minimal effort then that blade is, of course, shaving-sharp. The potential risks with this method include cutting into the flesh (with possible infection as a result) and even the risk of hitting something VERY important, like a major blood vessel or a tendon.
- The Fingerprint Test – once again, a risky strategy. Turn the blade upwards and LIGHTLY place a fingertip on the blade. If you can feel the individual ridges of your fingertip ACROSS the blade edge then you are certainly holding a sharp tool – but DO NOT run your finger along the edge. I heard a story from a client about them watching an experienced ‘woodsman’ and outdoor gear reviewer at a trade show take a new knife from a vendor and go to perform this test – but instead absent-mindedly ran their finger ALONG the blade instead. The bloodstains apparently remained on that patch of carpet for the rest of the trade show.
- The Fingernail Test – as with the above, one of the outcomes of getting this wrong involves blood and missing/damaged flesh. Stick out your index finger and lay the knife on it perpendicular to the surface. If the blade leaves a mark without any effort required from the user then it is, again, at the ‘scary’ end of the sharpness spectrum. DO NOT slide the knife blade around or put any pressure on it – fingernails aren’t that thick and they are easily cut through.
With any of the tests above there is the potential risk of injury – but that risk is much lower when the material you are testing is not part of your body. The Paper Test and the Wood Test are probably the safest and most easily performed in a camp/outdoor environment.[/vc_column_text][/vc_column][/vc_row][vc_row][vc_column][vc_column_text]
Another Method
This is a video we shot with green woodworker Doug Don of Heartwood Treen a couple of years ago. In it he takes a factory-fresh Hultafors axe and brings the edge up to a razor-sharpness with a mirrored edge – all using cheap materials.[/vc_column_text][vc_video link=”https://youtu.be/39zvVKnFFao” align=”center”][/vc_column][/vc_row][vc_row][vc_column][vc_column_text]
Some of our related courses
[/vc_column_text][product_category per_page=”12″ columns=”4″ orderby=”rand” order=”ASC” category=”bushcraft-courses”][/vc_column][/vc_row][vc_row][vc_column width=”1/4″][vc_raw_html]JTNDaWZyYW1lJTIwc3R5bGUlM0QlMjJ3aWR0aCUzQTEyMHB4JTNCaGVpZ2h0JTNBMjQwcHglM0IlMjIlMjBtYXJnaW53aWR0aCUzRCUyMjAlMjIlMjBtYXJnaW5oZWlnaHQlM0QlMjIwJTIyJTIwc2Nyb2xsaW5nJTNEJTIybm8lMjIlMjBmcmFtZWJvcmRlciUzRCUyMjAlMjIlMjBzcmMlM0QlMjIlMkYlMkZ3cy1ldS5hbWF6b24tYWRzeXN0ZW0uY29tJTJGd2lkZ2V0cyUyRnElM0ZTZXJ2aWNlVmVyc2lvbiUzRDIwMDcwODIyJTI2T25lSlMlM0QxJTI2T3BlcmF0aW9uJTNER2V0QWRIdG1sJTI2TWFya2V0UGxhY2UlM0RHQiUyNnNvdXJjZSUzRHNzJTI2cmVmJTNEYXNfc3NfbGlfdGlsJTI2YWRfdHlwZSUzRHByb2R1Y3RfbGluayUyNnRyYWNraW5nX2lkJTNEb3JpZ2lvdXRkbzA1LTIxJTI2bGFuZ3VhZ2UlM0Rlbl9HQiUyNm1hcmtldHBsYWNlJTNEYW1hem9uJTI2cmVnaW9uJTNER0IlMjZwbGFjZW1lbnQlM0RCMDAwMDRXRlRXJTI2YXNpbnMlM0RCMDAwMDRXRlRXJTI2bGlua0lkJTNEZWFmMGQ5NTAyMzAzYjI2MGI3NTQxZWI2MGZlZDdlMTYlMjZzaG93X2JvcmRlciUzRHRydWUlMjZsaW5rX29wZW5zX2luX25ld193aW5kb3clM0R0cnVlJTIyJTNFJTNDJTJGaWZyYW1lJTNF[/vc_raw_html][/vc_column][vc_column width=”1/4″][vc_raw_html]JTNDaWZyYW1lJTIwc3R5bGUlM0QlMjJ3aWR0aCUzQTEyMHB4JTNCaGVpZ2h0JTNBMjQwcHglM0IlMjIlMjBtYXJnaW53aWR0aCUzRCUyMjAlMjIlMjBtYXJnaW5oZWlnaHQlM0QlMjIwJTIyJTIwc2Nyb2xsaW5nJTNEJTIybm8lMjIlMjBmcmFtZWJvcmRlciUzRCUyMjAlMjIlMjBzcmMlM0QlMjIlMkYlMkZ3cy1ldS5hbWF6b24tYWRzeXN0ZW0uY29tJTJGd2lkZ2V0cyUyRnElM0ZTZXJ2aWNlVmVyc2lvbiUzRDIwMDcwODIyJTI2T25lSlMlM0QxJTI2T3BlcmF0aW9uJTNER2V0QWRIdG1sJTI2TWFya2V0UGxhY2UlM0RHQiUyNnNvdXJjZSUzRHNzJTI2cmVmJTNEYXNfc3NfbGlfdGlsJTI2YWRfdHlwZSUzRHByb2R1Y3RfbGluayUyNnRyYWNraW5nX2lkJTNEb3JpZ2lvdXRkbzA1LTIxJTI2bGFuZ3VhZ2UlM0Rlbl9HQiUyNm1hcmtldHBsYWNlJTNEYW1hem9uJTI2cmVnaW9uJTNER0IlMjZwbGFjZW1lbnQlM0RCMDc1WVZOSFpYJTI2YXNpbnMlM0RCMDc1WVZOSFpYJTI2bGlua0lkJTNEZGIyNDRlYTA5MThjNzJjMDhkODRiN2RkYjg2YzcyMDAlMjZzaG93X2JvcmRlciUzRHRydWUlMjZsaW5rX29wZW5zX2luX25ld193aW5kb3clM0R0cnVlJTIyJTNFJTNDJTJGaWZyYW1lJTNF[/vc_raw_html][/vc_column][vc_column width=”1/4″][vc_raw_html]JTNDaWZyYW1lJTIwc3R5bGUlM0QlMjJ3aWR0aCUzQTEyMHB4JTNCaGVpZ2h0JTNBMjQwcHglM0IlMjIlMjBtYXJnaW53aWR0aCUzRCUyMjAlMjIlMjBtYXJnaW5oZWlnaHQlM0QlMjIwJTIyJTIwc2Nyb2xsaW5nJTNEJTIybm8lMjIlMjBmcmFtZWJvcmRlciUzRCUyMjAlMjIlMjBzcmMlM0QlMjIlMkYlMkZ3cy1ldS5hbWF6b24tYWRzeXN0ZW0uY29tJTJGd2lkZ2V0cyUyRnElM0ZTZXJ2aWNlVmVyc2lvbiUzRDIwMDcwODIyJTI2T25lSlMlM0QxJTI2T3BlcmF0aW9uJTNER2V0QWRIdG1sJTI2TWFya2V0UGxhY2UlM0RHQiUyNnNvdXJjZSUzRHNzJTI2cmVmJTNEYXNfc3NfbGlfdGlsJTI2YWRfdHlwZSUzRHByb2R1Y3RfbGluayUyNnRyYWNraW5nX2lkJTNEb3JpZ2lvdXRkbzA1LTIxJTI2bGFuZ3VhZ2UlM0Rlbl9HQiUyNm1hcmtldHBsYWNlJTNEYW1hem9uJTI2cmVnaW9uJTNER0IlMjZwbGFjZW1lbnQlM0RCMDA0NzMyQlNBJTI2YXNpbnMlM0RCMDA0NzMyQlNBJTI2bGlua0lkJTNEMWNiNTMwMGU2NjU1NDZiMDY1OWU1NzkzN2Q3Mzg2NTclMjZzaG93X2JvcmRlciUzRHRydWUlMjZsaW5rX29wZW5zX2luX25ld193aW5kb3clM0R0cnVlJTIyJTNFJTNDJTJGaWZyYW1lJTNF[/vc_raw_html][/vc_column][vc_column width=”1/4″][vc_raw_html]JTNDaWZyYW1lJTIwc3R5bGUlM0QlMjJ3aWR0aCUzQTEyMHB4JTNCaGVpZ2h0JTNBMjQwcHglM0IlMjIlMjBtYXJnaW53aWR0aCUzRCUyMjAlMjIlMjBtYXJnaW5oZWlnaHQlM0QlMjIwJTIyJTIwc2Nyb2xsaW5nJTNEJTIybm8lMjIlMjBmcmFtZWJvcmRlciUzRCUyMjAlMjIlMjBzcmMlM0QlMjIlMkYlMkZ3cy1ldS5hbWF6b24tYWRzeXN0ZW0uY29tJTJGd2lkZ2V0cyUyRnElM0ZTZXJ2aWNlVmVyc2lvbiUzRDIwMDcwODIyJTI2T25lSlMlM0QxJTI2T3BlcmF0aW9uJTNER2V0QWRIdG1sJTI2TWFya2V0UGxhY2UlM0RHQiUyNnNvdXJjZSUzRHNzJTI2cmVmJTNEYXNfc3NfbGlfdGlsJTI2YWRfdHlwZSUzRHByb2R1Y3RfbGluayUyNnRyYWNraW5nX2lkJTNEb3JpZ2lvdXRkbzA1LTIxJTI2bGFuZ3VhZ2UlM0Rlbl9HQiUyNm1hcmtldHBsYWNlJTNEYW1hem9uJTI2cmVnaW9uJTNER0IlMjZwbGFjZW1lbnQlM0RCMDAwMUs5Wk1TJTI2YXNpbnMlM0RCMDAwMUs5Wk1TJTI2bGlua0lkJTNEY2YwZjllMWU4YjFlNjc4YzA3N2RjMGI5MWM0OGM4Y2ElMjZzaG93X2JvcmRlciUzRHRydWUlMjZsaW5rX29wZW5zX2luX25ld193aW5kb3clM0R0cnVlJTIyJTNFJTNDJTJGaWZyYW1lJTNF[/vc_raw_html][/vc_column][/vc_row][vc_row][vc_column width=”1/4″][vc_raw_html]JTNDaWZyYW1lJTIwc3R5bGUlM0QlMjJ3aWR0aCUzQTEyMHB4JTNCaGVpZ2h0JTNBMjQwcHglM0IlMjIlMjBtYXJnaW53aWR0aCUzRCUyMjAlMjIlMjBtYXJnaW5oZWlnaHQlM0QlMjIwJTIyJTIwc2Nyb2xsaW5nJTNEJTIybm8lMjIlMjBmcmFtZWJvcmRlciUzRCUyMjAlMjIlMjBzcmMlM0QlMjIlMkYlMkZ3cy1ldS5hbWF6b24tYWRzeXN0ZW0uY29tJTJGd2lkZ2V0cyUyRnElM0ZTZXJ2aWNlVmVyc2lvbiUzRDIwMDcwODIyJTI2T25lSlMlM0QxJTI2T3BlcmF0aW9uJTNER2V0QWRIdG1sJTI2TWFya2V0UGxhY2UlM0RHQiUyNnNvdXJjZSUzRHNzJTI2cmVmJTNEYXNfc3NfbGlfdGlsJTI2YWRfdHlwZSUzRHByb2R1Y3RfbGluayUyNnRyYWNraW5nX2lkJTNEb3JpZ2lvdXRkbzA1LTIxJTI2bGFuZ3VhZ2UlM0Rlbl9HQiUyNm1hcmtldHBsYWNlJTNEYW1hem9uJTI2cmVnaW9uJTNER0IlMjZwbGFjZW1lbnQlM0RCMDAzQlVWMjI2JTI2YXNpbnMlM0RCMDAzQlVWMjI2JTI2bGlua0lkJTNEYTAyNmI4NGIxYzM2N2M4Y2I3YWEzMzc4NTMzNTZlMDYlMjZzaG93X2JvcmRlciUzRHRydWUlMjZsaW5rX29wZW5zX2luX25ld193aW5kb3clM0R0cnVlJTIyJTNFJTNDJTJGaWZyYW1lJTNF[/vc_raw_html][/vc_column][vc_column width=”1/4″][vc_raw_html]JTNDaWZyYW1lJTIwc3R5bGUlM0QlMjJ3aWR0aCUzQTEyMHB4JTNCaGVpZ2h0JTNBMjQwcHglM0IlMjIlMjBtYXJnaW53aWR0aCUzRCUyMjAlMjIlMjBtYXJnaW5oZWlnaHQlM0QlMjIwJTIyJTIwc2Nyb2xsaW5nJTNEJTIybm8lMjIlMjBmcmFtZWJvcmRlciUzRCUyMjAlMjIlMjBzcmMlM0QlMjIlMkYlMkZ3cy1ldS5hbWF6b24tYWRzeXN0ZW0uY29tJTJGd2lkZ2V0cyUyRnElM0ZTZXJ2aWNlVmVyc2lvbiUzRDIwMDcwODIyJTI2T25lSlMlM0QxJTI2T3BlcmF0aW9uJTNER2V0QWRIdG1sJTI2TWFya2V0UGxhY2UlM0RHQiUyNnNvdXJjZSUzRHNzJTI2cmVmJTNEYXNfc3NfbGlfdGlsJTI2YWRfdHlwZSUzRHByb2R1Y3RfbGluayUyNnRyYWNraW5nX2lkJTNEb3JpZ2lvdXRkbzA1LTIxJTI2bGFuZ3VhZ2UlM0Rlbl9HQiUyNm1hcmtldHBsYWNlJTNEYW1hem9uJTI2cmVnaW9uJTNER0IlMjZwbGFjZW1lbnQlM0RCMDA1MDRJNkxHJTI2YXNpbnMlM0RCMDA1MDRJNkxHJTI2bGlua0lkJTNEMTk2YmUxY2YwNTE4NDgwZjRmOWVhNzYxMWY4MGZmNzklMjZzaG93X2JvcmRlciUzRHRydWUlMjZsaW5rX29wZW5zX2luX25ld193aW5kb3clM0R0cnVlJTIyJTNFJTNDJTJGaWZyYW1lJTNF[/vc_raw_html][/vc_column][vc_column width=”1/4″][vc_raw_html]JTNDaWZyYW1lJTIwc3R5bGUlM0QlMjJ3aWR0aCUzQTEyMHB4JTNCaGVpZ2h0JTNBMjQwcHglM0IlMjIlMjBtYXJnaW53aWR0aCUzRCUyMjAlMjIlMjBtYXJnaW5oZWlnaHQlM0QlMjIwJTIyJTIwc2Nyb2xsaW5nJTNEJTIybm8lMjIlMjBmcmFtZWJvcmRlciUzRCUyMjAlMjIlMjBzcmMlM0QlMjIlMkYlMkZ3cy1ldS5hbWF6b24tYWRzeXN0ZW0uY29tJTJGd2lkZ2V0cyUyRnElM0ZTZXJ2aWNlVmVyc2lvbiUzRDIwMDcwODIyJTI2T25lSlMlM0QxJTI2T3BlcmF0aW9uJTNER2V0QWRIdG1sJTI2TWFya2V0UGxhY2UlM0RHQiUyNnNvdXJjZSUzRHNzJTI2cmVmJTNEYXNfc3NfbGlfdGlsJTI2YWRfdHlwZSUzRHByb2R1Y3RfbGluayUyNnRyYWNraW5nX2lkJTNEb3JpZ2lvdXRkbzA1LTIxJTI2bGFuZ3VhZ2UlM0Rlbl9HQiUyNm1hcmtldHBsYWNlJTNEYW1hem9uJTI2cmVnaW9uJTNER0IlMjZwbGFjZW1lbnQlM0RCMDc4WEI2QldYJTI2YXNpbnMlM0RCMDc4WEI2QldYJTI2bGlua0lkJTNEMzY4MmU3YzM0NmMyMTRlMjIxZjk0Nzg3ZjMxOTJiZDMlMjZzaG93X2JvcmRlciUzRHRydWUlMjZsaW5rX29wZW5zX2luX25ld193aW5kb3clM0R0cnVlJTIyJTNFJTNDJTJGaWZyYW1lJTNF[/vc_raw_html][/vc_column][vc_column width=”1/4″][vc_raw_html]JTNDaWZyYW1lJTIwc3R5bGUlM0QlMjJ3aWR0aCUzQTEyMHB4JTNCaGVpZ2h0JTNBMjQwcHglM0IlMjIlMjBtYXJnaW53aWR0aCUzRCUyMjAlMjIlMjBtYXJnaW5oZWlnaHQlM0QlMjIwJTIyJTIwc2Nyb2xsaW5nJTNEJTIybm8lMjIlMjBmcmFtZWJvcmRlciUzRCUyMjAlMjIlMjBzcmMlM0QlMjIlMkYlMkZ3cy1ldS5hbWF6b24tYWRzeXN0ZW0uY29tJTJGd2lkZ2V0cyUyRnElM0ZTZXJ2aWNlVmVyc2lvbiUzRDIwMDcwODIyJTI2T25lSlMlM0QxJTI2T3BlcmF0aW9uJTNER2V0QWRIdG1sJTI2TWFya2V0UGxhY2UlM0RHQiUyNnNvdXJjZSUzRHNzJTI2cmVmJTNEYXNfc3NfbGlfdGlsJTI2YWRfdHlwZSUzRHByb2R1Y3RfbGluayUyNnRyYWNraW5nX2lkJTNEb3JpZ2lvdXRkbzA1LTIxJTI2bGFuZ3VhZ2UlM0Rlbl9HQiUyNm1hcmtldHBsYWNlJTNEYW1hem9uJTI2cmVnaW9uJTNER0IlMjZwbGFjZW1lbnQlM0RCMDAzWEoxT0RNJTI2YXNpbnMlM0RCMDAzWEoxT0RNJTI2bGlua0lkJTNENGQ4MzYzN2Y5OTRlNDYwNWI1MzljMWFlZTI0ZGU2ZGElMjZzaG93X2JvcmRlciUzRHRydWUlMjZsaW5rX29wZW5zX2luX25ld193aW5kb3clM0R0cnVlJTIyJTNFJTNDJTJGaWZyYW1lJTNF[/vc_raw_html][/vc_column][/vc_row][vc_row][vc_column width=”1/4″][vc_raw_html]JTNDaWZyYW1lJTIwc3R5bGUlM0QlMjJ3aWR0aCUzQTEyMHB4JTNCaGVpZ2h0JTNBMjQwcHglM0IlMjIlMjBtYXJnaW53aWR0aCUzRCUyMjAlMjIlMjBtYXJnaW5oZWlnaHQlM0QlMjIwJTIyJTIwc2Nyb2xsaW5nJTNEJTIybm8lMjIlMjBmcmFtZWJvcmRlciUzRCUyMjAlMjIlMjBzcmMlM0QlMjIlMkYlMkZ3cy1ldS5hbWF6b24tYWRzeXN0ZW0uY29tJTJGd2lkZ2V0cyUyRnElM0ZTZXJ2aWNlVmVyc2lvbiUzRDIwMDcwODIyJTI2T25lSlMlM0QxJTI2T3BlcmF0aW9uJTNER2V0QWRIdG1sJTI2TWFya2V0UGxhY2UlM0RHQiUyNnNvdXJjZSUzRHNzJTI2cmVmJTNEYXNfc3NfbGlfdGlsJTI2YWRfdHlwZSUzRHByb2R1Y3RfbGluayUyNnRyYWNraW5nX2lkJTNEb3JpZ2lvdXRkbzA1LTIxJTI2bGFuZ3VhZ2UlM0Rlbl9HQiUyNm1hcmtldHBsYWNlJTNEYW1hem9uJTI2cmVnaW9uJTNER0IlMjZwbGFjZW1lbnQlM0RCMDFBR0MwNlZZJTI2YXNpbnMlM0RCMDFBR0MwNlZZJTI2bGlua0lkJTNEMTI2MWE3ZGI3ZGFkYmU4YTdlZmM1OTU2NDg0NmI5Y2IlMjZzaG93X2JvcmRlciUzRHRydWUlMjZsaW5rX29wZW5zX2luX25ld193aW5kb3clM0R0cnVlJTIyJTNFJTNDJTJGaWZyYW1lJTNF[/vc_raw_html][/vc_column][vc_column width=”1/4″][vc_raw_html]JTNDaWZyYW1lJTIwc3R5bGUlM0QlMjJ3aWR0aCUzQTEyMHB4JTNCaGVpZ2h0JTNBMjQwcHglM0IlMjIlMjBtYXJnaW53aWR0aCUzRCUyMjAlMjIlMjBtYXJnaW5oZWlnaHQlM0QlMjIwJTIyJTIwc2Nyb2xsaW5nJTNEJTIybm8lMjIlMjBmcmFtZWJvcmRlciUzRCUyMjAlMjIlMjBzcmMlM0QlMjIlMkYlMkZ3cy1ldS5hbWF6b24tYWRzeXN0ZW0uY29tJTJGd2lkZ2V0cyUyRnElM0ZTZXJ2aWNlVmVyc2lvbiUzRDIwMDcwODIyJTI2T25lSlMlM0QxJTI2T3BlcmF0aW9uJTNER2V0QWRIdG1sJTI2TWFya2V0UGxhY2UlM0RHQiUyNnNvdXJjZSUzRHNzJTI2cmVmJTNEYXNfc3NfbGlfdGlsJTI2YWRfdHlwZSUzRHByb2R1Y3RfbGluayUyNnRyYWNraW5nX2lkJTNEb3JpZ2lvdXRkbzA1LTIxJTI2bGFuZ3VhZ2UlM0Rlbl9HQiUyNm1hcmtldHBsYWNlJTNEYW1hem9uJTI2cmVnaW9uJTNER0IlMjZwbGFjZW1lbnQlM0RCMDAxNDlESUJFJTI2YXNpbnMlM0RCMDAxNDlESUJFJTI2bGlua0lkJTNEMGRmMmRmNTdlOGZkM2QyNzYyYzMyNWE4OTJiNWU4NmIlMjZzaG93X2JvcmRlciUzRHRydWUlMjZsaW5rX29wZW5zX2luX25ld193aW5kb3clM0R0cnVlJTIyJTNFJTNDJTJGaWZyYW1lJTNF[/vc_raw_html][/vc_column][vc_column width=”1/4″][vc_raw_html]JTNDaWZyYW1lJTIwc3R5bGUlM0QlMjJ3aWR0aCUzQTEyMHB4JTNCaGVpZ2h0JTNBMjQwcHglM0IlMjIlMjBtYXJnaW53aWR0aCUzRCUyMjAlMjIlMjBtYXJnaW5oZWlnaHQlM0QlMjIwJTIyJTIwc2Nyb2xsaW5nJTNEJTIybm8lMjIlMjBmcmFtZWJvcmRlciUzRCUyMjAlMjIlMjBzcmMlM0QlMjIlMkYlMkZ3cy1ldS5hbWF6b24tYWRzeXN0ZW0uY29tJTJGd2lkZ2V0cyUyRnElM0ZTZXJ2aWNlVmVyc2lvbiUzRDIwMDcwODIyJTI2T25lSlMlM0QxJTI2T3BlcmF0aW9uJTNER2V0QWRIdG1sJTI2TWFya2V0UGxhY2UlM0RHQiUyNnNvdXJjZSUzRHNzJTI2cmVmJTNEYXNfc3NfbGlfdGlsJTI2YWRfdHlwZSUzRHByb2R1Y3RfbGluayUyNnRyYWNraW5nX2lkJTNEb3JpZ2lvdXRkbzA1LTIxJTI2bGFuZ3VhZ2UlM0Rlbl9HQiUyNm1hcmtldHBsYWNlJTNEYW1hem9uJTI2cmVnaW9uJTNER0IlMjZwbGFjZW1lbnQlM0RCMDA3TkhSM0JDJTI2YXNpbnMlM0RCMDA3TkhSM0JDJTI2bGlua0lkJTNEOWQ3OTFkZTIwYTc5YWQxYzlhY2YyNWM3Y2I4ZGE5NDElMjZzaG93X2JvcmRlciUzRHRydWUlMjZsaW5rX29wZW5zX2luX25ld193aW5kb3clM0R0cnVlJTIyJTNFJTNDJTJGaWZyYW1lJTNF[/vc_raw_html][/vc_column][vc_column width=”1/4″][vc_raw_html]JTNDaWZyYW1lJTIwc3R5bGUlM0QlMjJ3aWR0aCUzQTEyMHB4JTNCaGVpZ2h0JTNBMjQwcHglM0IlMjIlMjBtYXJnaW53aWR0aCUzRCUyMjAlMjIlMjBtYXJnaW5oZWlnaHQlM0QlMjIwJTIyJTIwc2Nyb2xsaW5nJTNEJTIybm8lMjIlMjBmcmFtZWJvcmRlciUzRCUyMjAlMjIlMjBzcmMlM0QlMjIlMkYlMkZ3cy1ldS5hbWF6b24tYWRzeXN0ZW0uY29tJTJGd2lkZ2V0cyUyRnElM0ZTZXJ2aWNlVmVyc2lvbiUzRDIwMDcwODIyJTI2T25lSlMlM0QxJTI2T3BlcmF0aW9uJTNER2V0QWRIdG1sJTI2TWFya2V0UGxhY2UlM0RHQiUyNnNvdXJjZSUzRHNzJTI2cmVmJTNEYXNfc3NfbGlfdGlsJTI2YWRfdHlwZSUzRHByb2R1Y3RfbGluayUyNnRyYWNraW5nX2lkJTNEb3JpZ2lvdXRkbzA1LTIxJTI2bGFuZ3VhZ2UlM0Rlbl9HQiUyNm1hcmtldHBsYWNlJTNEYW1hem9uJTI2cmVnaW9uJTNER0IlMjZwbGFjZW1lbnQlM0RCMDA3SVMyS1hNJTI2YXNpbnMlM0RCMDA3SVMyS1hNJTI2bGlua0lkJTNENjcyYmQ1OTgxYWU5NmJjN2RlZTcwZDkzYmRkNmIxM2ElMjZzaG93X2JvcmRlciUzRHRydWUlMjZsaW5rX29wZW5zX2luX25ld193aW5kb3clM0R0cnVlJTIyJTNFJTNDJTJGaWZyYW1lJTNF[/vc_raw_html][/vc_column][/vc_row]- Published in All Blog Posts, Articles, Bushcraft, Bushcraft General, Mountain General, Personal, Skills, Tools and Equipment
COURSE REPORT: Woodcrafter Course July 2018
Wednesday, 01 August 2018

COURSE REPORT: Woodcrafter Course July 2018
The Woodcrafter – our original and long-established 2-day bushcraft and campcraft course – remains one of our most popular courses. The July 2018 course was a mixture of rain, sun and smoke – but everyone seemed to survive and have a great time!
The other course photos and report from the July Woodcrafter course can be found over on our new partner site – outdoorprofessional.co.uk.[/vc_column_text][/vc_column][/vc_row][vc_row][vc_column width=”1/4″][vc_single_image image=”9207″ img_size=”medium” alignment=”center”][/vc_column][vc_column width=”1/4″][vc_single_image image=”9211″ img_size=”medium” alignment=”center”][/vc_column][vc_column width=”1/4″][vc_single_image image=”9213″ img_size=”medium” alignment=”center”][/vc_column][vc_column width=”1/4″][vc_single_image image=”9210″ img_size=”medium” alignment=”center”][/vc_column][/vc_row][vc_row][vc_column width=”1/4″][vc_btn title=”Learn more at OutdoorProfessional.co.uk” color=”warning” align=”center” button_block=”true” link=”url:https%3A%2F%2Foutdoorprofessional.co.uk%2Fcampcraft-bushcraft%2Fcourse-report-woodcrafter-l1-campcraft-july-2018%2F||target:%20_blank|”][/vc_column][vc_column width=”3/4″][vc_column_text]
Upcoming Woodcrafter Course Dates
[/vc_column_text][product id=”7338″][/vc_column][/vc_row]- Published in All Blog Posts, Behind The Scenes, Bushcraft General, Course Reports, EST Framework, Skills
Can you eat mussels straight from the beach?
Thursday, 19 July 2018

Can you eat mussels straight from the beach?
Richard Prideaux looks at the dangers from eating wild and foraged mussels
When you teach people about foraging and ‘wild food’ you often run the risk of sounding negative or over-cautious about the potential hazards that come from eating shellfish, or fungi,or whatever else it is that you are solemnly warning people about. I do this with good reason – people are paying to attend on of our North Wales foraging courses to learn more about the subject, and I have a duty of care towards them as an instructor, and just as a (mostly?) decent human being. That said – there IS a difference between laying out the potential risks and telling somebody that they shouldn’t/can’t do something.
One of the areas where this is most apparent is in the realm of coastal foraging, and particularly the business of finding, gathering and eating edible mussels (usually Mytilus edulis). It’s one of the most anticipated section of the entry-level coastal foraging courses – the moment where I start talking about the culinary wonders of this grey bivalve. It starts off well, discussing byssal threads and the ethical issues of harvesting mussels (minimum landing sizes and so on) but as soon as I start to discuss the potential dangers the mood changes and the once-confident mussel foragers look increasingly alarmed.[/vc_column_text][/vc_column][/vc_row][vc_row][vc_column width=”2/3″][vc_column_text]
So, what are the dangers of eating wild mussels?
The first thing we need to get out of the way here is that there is an element of risk involved in eating EVERYTHING. That’s food from supermarkets, served to you in restaurants, grown in your own back garden or picked from the soil or plucked from a rock somewhere on the Snowdonia coastline. Improper handling, preparation and sometimes just bad luck all have a role to play and we can never guarantee that our food is ‘safe’. There are a few very good reasons why wild shellfish, and particularly bivalves, have a reputation for potentially being ‘dodgy’.
There are several interesting and diverting ways in which they can nobble you:
- Paralytic (PSP), Amnesiac (ASP), Neurotoxic (NSP) and Diarrhoetic (DSP) Shellfish Poisoning
- Viruses (particularly Norovirus, aka the Winter Vomiting Virus)
- Bacteria (such as E Coli)
- Parasites (lovely things like Cryptosporidium parvum)
- Heavy metal and chemical contamination
- Allergies and other physiological disagreements
Blimey. Why would you even bother eating foraged mussels?
The really scary ones above are the various Shellfish Poisonings. They are caused by algal blooms, which can develop in both salt and freshwater. As mussels feed by filtering nutrients from seawater they can also accumulate the toxins from any algal blooms that have developed in the water around them. Paralytic Shellfish Poisoning (PSP) is the one that tends to get most of the attention when discussing the hazards of eating mussels, and it’s not just human foragers that need to be careful – there have been several cases of dogs dying or becoming ill from eating dead crustaceans or shellfish contaminated in this way.
The two methods relied upon in commercial supply (see below for more detailed explanations) – depuration and cooking – remove some of these contaminants and organisams, but not all. Depuration does not work well with viruses and some algal toxins, and cooking only kills bacteria, viruses and parasites.[/vc_column_text][/vc_column][vc_column width=”1/3″][vc_single_image image=”9187″ img_size=”medium” alignment=”center”][/vc_column][/vc_row][vc_row][vc_column][vc_column_text]
So what about the ones in shops and restaurants?
An excellent question, and one that does need some explanation.
There are plenty of areas along the British coast that are famed for their mussels, and you can find these locally-sourced delicacies on the menus of most of the restaurants nearby (and often further afield too). They are indeed ‘grown’ in the sea, in the same waters where you might be foraging for them yourself. They are often farmed on ropes, being carefully selected for size and health and harvested in a sustainable way – in waters that are regularly checked for cleanliness and contamination.
Water that is graded as being suitable for ‘immediate human consumption’ is designated “A” status. Anything from water with “B” grading needs to be depurated for no less than 42 hours, “C” grade shellfish must be relaid in cleaner waters in the hope of removing impurities and “D” grade water is pretty hopeless (and indeed may actually be on fire…).
So the mussels you will find in restaurants or shops in the U.K. will have either been grown in A or B-grade waters, and probably have been through a process of depuration in either case.
Depuration
Depuration, the process of removing impurities, for mussels is usually done by placing them in a tank of clean seawater that is then itself circulated through a filtration and purification system. As the mussels sit in the continually-cleaned water they gradually lose any impurities that they may have acquired.[/vc_column_text][/vc_column][/vc_row][vc_row][vc_column][vc_column_text]
IS it safe to eat mussels I have foraged from the shore then?
Well… maybe. It depends on what you mean by ‘safe’. If you want a firm guarantee that the mussels that you have just plucked from the rock are free from toxins, viruses, bacteria, parasites, unwanted chemicals and everything else then you won’t get one. But if you want to be able to reduce the risks of eating foraged mussels (and indeed, lots of other coastally-harvested wild foods) then there are fairly simple precautions you can take (see below).
Just remember – a LOT of effort has gone into making sure that the ‘wild’ mussels served to you on a plate on the Menai Straits or from the Fowey estuary are ‘clean’ and safe for human consumption. Just because they are the same species and growing on roughly the same section of British coastline doesn’t mean that the ones you can (legally and ethically) harvest from the beach are “just the same”.[/vc_column_text][/vc_column][/vc_row][vc_row][vc_column][vc_column_text]
Reducing the risks in foraged mussels (and other things too)
There are a couple of oft-repeated ‘rules’ attached to mussels with regards to cooking and eating them:
- Avoid gathering them in months without an ‘R’ in them (May-August)
- Throw away any that do not open after cooking
The first rule is sometimes dismissed as being a piece of general guidance dating from a time when refrigeration was non-existent, and transporting mussels from shore to city was unwise in the hot summer months. This is, like many overly-simple explanations, complete cobblers. A much more sensible reason for avoiding shellfish during the height of the summer months (in the northern hemisphere anyway) is that this is the peak season for algal blooms, and also the time that many species are most active in their feeding – so if you avoid the summer there is a lower chance of eating something that is contaminated with a toxin.
The second rule I will come to later, but scientific research suggests that the generally-accepted belief that a mussel that does not open after being cooked is not necessarily a sign of it being unhealthy/contaminated/dead, nor that a mussel that opens up fully after being cooked is indeed healthy.
There are several simple steps that you can take to reduce (but not completely remove) the risks of eating foraged mussels:
- Avoid the summer months (see above)
- Pay attention to local news, particularly with regards to algal blooms, water contamination, and stories of unexpected illness from eating seafoods of all types
- Check the noticeboards that are displayed at harbours and access points for notifications of contamination – particularly algal blooms or chemical spills
- Avoid harbours and marinas, areas with heavy marine traffic and places where sewage (even treated) flows into the water
- Avoid picking mussels after periods of heavy rain where contaminants from the land may have been washed onto the shore
- Avoid the outflows of old mines and industrial sites (particularly Cornish tin mines etc)
- Scrub mussels under running clean water to remove barnacles etc
- Cook mussels as soon after picking as possible (and cook them well – but this still does not remove the toxins from algal blooms)
- Do not eat any mussels that do not open fully after cooking (but read this article too)
All of the above are fairly simple and aren’t that restrictive for the forager. There are also ethical and legal issues to consider – a minimum landing size (MLS) for mussels is something you will need to abide to in most cases (usually 51mm but check for your area).The Welsh Government has several useful links on this page – most apply to commercial fishing but it does show that there is a world of legislature that is attached to what may be seen as a very simple and innocent act. There is, at the time of writing, a ban on collecting mussels from the Conwy Estuary and other temporary restrictions may be in place for your area.
[/vc_column_text][/vc_column][/vc_row][vc_row][vc_column][vc_single_image image=”5318″ img_size=”medium” alignment=”center”][/vc_column][/vc_row][vc_row][vc_column][vc_column_text]
Final words of advice
This post does sounds a little bit pessimistic, but the facts cannot be argued with – shellfish can harbour some fairly nasty organisms, toxins and chemicals. Some of these are probably present in every wild mussel (E.Coli for example) but can be easily removed by cooking. Others are much less common (such as algal blooms) but their impact can be much more severe and are almost impossible to get rid of in the cooking process.
If you are sensible about where you collect mussels from, when and how you cook them then you will probably be safe – in fact the most hazardous part of your foraging trip will be the drive there and back. Like every foraging activity though you need to be aware that it is potentially hazardous, and that recognising and reducing those risks is as important as identifying the edible species in the first place. [/vc_column_text][/vc_column][/vc_row][vc_row][vc_column][product_category per_page=”12″ columns=”3″ orderby=”menu_order title” order=”ASC” category=”foraging-courses-uk”][/vc_column][/vc_row]
- Published in All Blog Posts, Articles, Bushcraft General, Foraging, Gather, Shellfish
Course report – Wild Camping Weekend June 2018
Monday, 18 June 2018

Course Report – Wild Camping Weekend
Photos and notes from our June 2018 Snowdonia Wild Camping Weekend
[/vc_column_text][/vc_column][/vc_row][vc_row][vc_column][vc_column_text]Last weekend I was joined by Richard, Allan and Amy for our 2018 Mountain Wild Camping course in the hills of Snowdonia. This course has two learning outcomes – planning and preparing for a wild camping trip in the British mountains and going through one or more iterations of the essential skills of this part of mountaincraft – finding a camping site, sourcing clean water, dealing with weather, dealing with toilet issues and everything else.We keep the group ratios fairly low on this course to make sure that we don’t have too much of an impact on the mountain environment, and to ensure a better experience for the course participants.[/vc_column_text][/vc_column][/vc_row][vc_row][vc_column width=”1/3″][vc_single_image image=”9011″ img_size=”medium” add_caption=”yes” alignment=”center”][/vc_column][vc_column width=”1/3″][vc_single_image image=”9016″ img_size=”medium” add_caption=”yes” alignment=”center”][/vc_column][vc_column width=”1/3″][vc_single_image image=”9031″ img_size=”medium” add_caption=”yes” alignment=”center”][/vc_column][/vc_row][vc_row][vc_column][vc_column_text]
Day One
We met up at one of our favourite North Wales eateries- the excellent and friendly Moel Siabod Cafe and sat down with the maps to discuss our options. This is an intrinsic part of the course, and route planning and the logistics of plotting a circular or linear route needed to be looked over. We went through the options of walking from the cafe itself, of catching a bus to a different valley or even some convoluted system involving shuttling cars back and forth to walk between two points. In the end we settled on a circular route, starting from a little further down the road. The combination of time available and a mixed forecast (rain/wind and poor visibility at either end of the trip with a relatively dry and settled overnight period) led us to choosing a route that kept us at a fairly low altitude for the first part of the day before climbing up to somewhere a little more remote later on.
After going through our respective kit choices – and a shake-down of my own kit to show how I could remove 300g or so of unnecessary weight (my pack weight as a leader was around 13kg ‘dry’, and about 16kg ‘wet’/including food and water) – we set off into the hills.
The first section followed the track (Sarn yr Offeiriad) over the hill from Capel Tan-y-Garth to Dolwyddelan, climbing up through oak woodland and skirting the remains of slate quarries before descending back down amidst deep, dark forests and mossy boulders. We diverted off into some overhanging trees for lunch, hiding from the rain and going through a ‘Hudsons Bay Start’ by testing out stoves, filters and a few other key bits of kit before we traveled too far from civilisation and the option to fix/solve any problems caused by faulty or missing kit.
As we arrived at the edge of the village of Dolwyddelan the skies cleared, the sun came out and we took the opportunity to dry our bags and waterproofs out for half an hour in the beer garden of Y Gwydyr. Years of walking in wet places have taught me that if you have the opportunity to ‘reset’ and dry off equipment you should always take it – you’ll be glad of it when you’re sorting through your kit inside an otherwise dry tent later that evening!
The next section of path took us up behind Castell Dolwyddelan and into the woods under the southern flank of Moel Siabod. We dodged fallen trees, performed a river crossing or two and started to discuss the plans for the evening – camp low alongside a lake and risk the midges but avoid the wind, or go high and hope to find a flat, sheltered spot? We chose the latter option and strode on into the bogs and tussocks of Cwm Edno.
We headed out for a small stand of trees partway along the cwm, hoping to find a flat spot in the lee of the pines. In the end we found a near-perfect spot; close-cropped grass, relatively flat and with a decent water source not too far away. Crucially we were also well out of sight of roads and habitation where we could practice a true leave-no-trace ethic and leave only some flattened grass as signs of our overnight stay.
With a few hours left until sunset we pitched the tents, cooked dinner and watched the clouds scud by over the Moelwyns and Moel Siabod.
Our camping spot was about 1 km short of the crash site of Douglas Dakota EI-AFL at Bwlch Y Rhediad. This airliner crashed into the side of the mountain here in 1952, killing all 23 passengers and crew on board.[/vc_column_text][/vc_column][/vc_row][vc_row][vc_column width=”1/3″][vc_single_image image=”9039″ img_size=”medium” add_caption=”yes” alignment=”center”][/vc_column][vc_column width=”1/3″][vc_single_image image=”9036″ img_size=”medium” add_caption=”yes” alignment=”center”][/vc_column][vc_column width=”1/3″][vc_single_image image=”9015″ img_size=”medium” add_caption=”yes” alignment=”center”][/vc_column][/vc_row][vc_row][vc_column][vc_column_text]
Day Two
The night passed peacefully, with some gentle rain at around 5am finally forcing me to close the tent porch. The weather was deteriorating though, with the forecast rain and stronger winds looking almost certain. The visibility had also dropped down to a few hundred metres and the low clouds scraped over the top of Carnedd y Cribau just to our north – time for a quick breakfast and careful packing of kit to make sure everything important stayed dry!
After striking camp, and making sure that we had left nothing behind, we set off once again into the marsh and tussocky grass on the floor of the cwm, heading for the sanctuary of the sides of Carnedd y Cribau – dry ground, shorter grass and easier walking with heavy packs.
Next up was a gentle rollercoaster of rocks, small ponds and handrailing a fenceline over to Bwlch Rhiw’r Ychen in slowly worsening weather and visibility down a dozen metres or so. This continued as we climbed up to the summit of Moel Siabod, strong winds buffeting us from the south-west and turning this section of the trip into something verging on Type-2 fun.
We topped out on the 872m summit, hanging around long enough to touch the top of the cairn and grab a photo before starting the descent back to Capel Curig, dropping below the clouds and enjoying the views down over Plas y Brenin and the rest of the valley.[/vc_column_text][/vc_column][/vc_row][vc_row][vc_column width=”1/3″][vc_single_image image=”9042″ img_size=”medium” add_caption=”yes” alignment=”center”][/vc_column][vc_column width=”1/3″][vc_single_image image=”9013″ img_size=”medium” add_caption=”yes” alignment=”center”][/vc_column][vc_column width=”1/3″][vc_single_image image=”9043″ img_size=”medium” add_caption=”yes” alignment=”center”][/vc_column][/vc_row][vc_row][vc_column][vc_column_text]The Mountain Wild Camping Course is slightly unusual in our range of skills courses in that most of the content is not taught in the abstract – it’s done for real. We’re not discussing key subjects with theoretical scenarios, we’re doing things in the same environments that the course participants will be visiting and working in. We’re plotting a route into the mountains of Snowdonia, responding to the conditions that are presented to us and practicing good mountaincraft to keep ourselves safe.
[/vc_column_text][/vc_column][/vc_row]- Published in All Blog Posts, Course Reports, Mountain General
Why tracking doesn’t work for misper SAR in the UK
Wednesday, 13 June 2018

Why tracking doesn’t work for Misper SAR in the UK
(And why every SAR team member needs to learn basic tracking skills)
Here we go… this post will attract a minimum of two types of response:
1. “you don’t know what you’re talking about, if your skills were as good as mine you could follow a flea across a glacier”
2. “tracking is too slow/doesn’t work/is overrated”
Well, quite.
Both views have some validity, and that’s the point of this post.
Tracking, within the context of SAR/non-combat scenarios, is often represented by evangelists who want to present tracking as a panacea to locating any human OR by those who have sworn off it having tried the techniques (sold to them on a course) on a live operation and found that it just slows everything down and eats up resources. Each side will defend their own hilltop to the last man – neither attitude being actually that helpful to achieving the end goal.
[/vc_column_text][/vc_column][/vc_row][vc_row][vc_column][vc_column_text]
Looking for Jim
Let’s consider Jim. Jim wasn’t actually called Jim, wasn’t necessarily a him and didn’t necessarily have this motivation – but Jim is roughly based on a real person and a real job.
******
Jim knows this forest well and runs here regularly. He likes to drive into the forest, park at one of the secluded public car parks and head off into the woods for a 5-10km run along the paths and forest roads.
It’s 06:44 and he has just locked the car and has set off on the trail leading to the lake. It’s a last-minute decision but it’s a trail he knows well.
At 08:44 Jim’s wife is wondering what time he will be back. At 11:30 she is really starting to get worried and at 12:37 she tentatively rings 999 and asks for the Police.
By 14:00 a police officer has contacted her to see if Jim has made contact yet. By 15:00 a PolSA (Police Search Advisor) has started to co-ordinate the early response to this incident, and by 17:00 a police officer in a vehicle has discovered Jim’s car in the secluded car park. It’s sat safely amongst the slamming of car doors and shouts of dog walkers, families with kids on bikes and mountain bikers returning or leaving their vehicles at the beginning or end of their forest adventures.
At 17:32 a message is sent through SARCALL to the local volunteer search and rescue team and the incident moves to the next level of response.
******
It’s a fairly standard missing person callout – someone without any previous indications of despondency, medical distress or other factor goes out into a relatively remote area for a short activity and just doesn’t return to their vehicle, and a steady but measured response unfurls from the emergency services – allowing for various scenarios but also not assuming immediately that Jim is dying in a ditch, and it’s most likely to be a miscommunication between Jim and his wife, and Jim is happily doing something blissfully unaware of the multi-agency search developing in the forest.
The volunteer Search and Rescue (volSAR) team will follow their own protocol for calling the team members together, establishing a search control/staging area and gathering other assets – dogs, helicopters, even drones. A Search Manager will speak with the PolSA, Jim‘s wife and possibly anyone else involved in the response thus far. This will lead the Search Manager to come up with a variety of scenarios in the following categories:
- Jim is in the area, but stationary and possibly in medical distress (or worse)
- Jim is in the area but mobile (either in a good cognitive state or otherwise)
- Jim is somewhere completely different (Rest of World)
Search Managers may be good but they are not omniscient so they must focus on the first two categories – Jim is somewhere out there in an area they can search with the resources they have now, and the resources they are likely to have in the future.
So they work out a search area, based on a combination of barriers to travel, previous search incident data for profiles similar to Jim, his own patterns of behaviour and fitness and what can be accomplished in the next few hours and days. They have a Last Known Point (LKP) – Jim‘s car, as he HAD to be there in order to park it and run off somewhere. He did this unseen by anyone else (as far as the Search Manager can know) but it gives them an Initial Planning Point (IPP) to set a radius around and begin the process of planning search areas, calculating probability and the other wizardry and dark arts of Search Theory.
The next steps are a combination of good personal skills exercised by both SAR team members on the ground and their party leaders and data gathering/handling. Search parties are deployed to an area or areas with a brief of what Search Control expects them to do – it might be a ‘hasty’ (fast search along trails and tracks to ensure that the misper isn’t lying in plain sight) or an area search of a section of woodland or open ground marked out on the map. They perform their search brief, return to control and pass on the information they gathered. This feeds back into the search plan and a new tasking might be generated.
Rinse, and repeat. Until either Jim is found or a decision is made to stop searching for Jim.[/vc_column_text][/vc_column][/vc_row][vc_row][vc_column width=”1/3″][vc_single_image image=”8781″ img_size=”300×300″ alignment=”center”][/vc_column][vc_column width=”1/3″][vc_single_image image=”8973″ img_size=”300×300″ add_caption=”yes” alignment=”center”][/vc_column][vc_column width=”1/3″][vc_single_image image=”8972″ img_size=”300×300″ add_caption=”yes” alignment=”center”][/vc_column][/vc_row][vc_row][vc_column][vc_column_text]
Deploying the trackers
The above is probably familiar to anyone involved in misper SAR around the world. A person leaves their car in a busy parking area, heads off into increasingly ‘wild’ terrain and doesn’t return. They had to leave SOME sign of their passage surely, so couldn’t trained trackers be deployed to go out, find those signs of passage and link them together into SOME kind of narrative?
When it comes to looking for humans and the physical signs they leave behind on the ground (training humans to search by scent has been largely unsuccessful and unpleasant for all involved) there are two things a tracker will hope to find:
- Prints (foot or occasionally hand, often referred to as a subject-print) – including partial prints, vague smears on muddy banks and impressions left in soft surfaces
- Physical sign – everything from vegetation bent at unnatural angles and broken off in unusual ways, foliage turned over the wrong way by a trailing foot or hand and even broken cobwebs and a thousand other clues
Finding signs of some human passage through an area isn’t that hard – in a few hours you can train somebody to look for the obvious signs of a track in most terrain. It’s the noise-to-signal ratio that matters – which of these dozen prints or physical signs belong to your misper and which are just the dogwalkers and hikers?
In the above scenario any SAR tracker deployed as part of the search would either hope to find a print or series of prints that they could, with good certainty, assign to Jim and use for tracking further down the trail.
In an ideal world they would be able to find out exactly what brand, model and size of running shoe Jim wore that day, if they had any unique wear patterns and even what clothing he was wearing, which snacks/gels he carried and anything else he might discard by the trailside. They might even be able to get a calibrated photograph of a print from somewhere at Jim‘s home.
It isn’t an ideal world though – and Jim‘s wife doesn’t know what shoes he wore other than “the blue ones”. He’s a size 11, but sometimes 10. He probably took a water bottle but maybe not. She can’t find his expensive GPS watch she bought for him last Christmas though… And so it goes. Information dribbles in over time and analysis is made as to how accurate or useful it is.
On the ground
The gravel area around the car has been heavily trod since Jim was declared missing. Several members of the public parked close by and walked either side of the car, the police poked around the vehicle when they first found it and again when they forced entry to see if there was any clue inside to Jim‘s whereabouts. The volSAR team members had a good poke around too. Any hope of discovering a sterile print is probably lost – but what about further out?
As the laid surface of the car park ends it turns back to mud and soil and there is a chance of finding a print at the start of the various trails that radius out from the parking area. There are plenty of partial prints – from the public, police and volSAR. They are layered down into the damp soil and the most recent start to obscure the previous ones. There is a bottleneck at the start of most trails and the prints cluster together. It takes time and careful examination to find a few candidates that match the vague criteria for a Jim-print: running shoe, roughly UK size 10-11 and laid roughly twelve hours previously. With several possible trails and a limited number of trackers they must make a decision about where to move to next.
Meanwhile the search parties move along the trails, sweep through open areas at a regular spacing and gradually reduce the Probability of Area (POA, the likelihood that Jim is in that bit of woodland or open ground) for their tasked areas. They trample and crush, make new trails through vegetation and turn untouched wilderness into a footpath – but move far ahead and faster than the tracker teams.[/vc_column_text][/vc_column][/vc_row][vc_row][vc_column][vc_single_image image=”8974″ img_size=”large” add_caption=”yes” alignment=”center”][/vc_column][/vc_row][vc_row][vc_column][vc_column_text]
Limited Resources
The enemy for Search Managers is not nature herself or the elements – it’s depletion of limited resources:
Time and Daylight
Jim could be lying somewhere in a poor medical condition and getting worse by the second. Eventually he will reach a point where his recovery is unlikely and then expire. All searches run the possibility of becoming a recovery rather than a rescue if too much time passes before the search subject is located. A slow and methodical search would probably find that misper EVENTUALLY, but the whole point of SAR is to try and locate that person and help them.
The sun is also setting over in the west and it’s not unusual for volSAR to not be called on until the end of the day – to allow enough time for the misper to be located by the initial response, or just wander home under their own steam. As soon as darkness falls the whole job has become harder – reducing the effectiveness of the searchers and potentially compromising their safety.
Personnel Availability
Voluntary SAR teams all suffer the issue of availability of their team members. You don’t join unless you are able to help and attend callouts, but the 24/7 nature of volSAR means that not everybody will be able to attend every callout. Work, family, health and even finances can keep a team member away for part or all of a search and a volSAR team that boasts 50 members might be only able to field 15-25 at one time. Those team members on the ground also have a limited time they can search for – whether due to fatigue/operational effectiveness or just the demands of their ‘real’ lives. Eventually every volSAR team member will need to return home and a Search Manager cannot guarantee how long they will have that team member for. A good Search Manager will start to stack up potential reinforcement and replacements from neighbouring teams as soon as it looks like a search will run for that long.
Skills
Specialist search teams are a boon for any Search Manager, but use of them can pull resources away from other parts of the operation. The moment the search moves to near-water (T6 or T7 terrain) then a decision needs to be made about whether that area is left unsearched or to redploy part of the search teams for water search – something that cannot be done without several team members plus specialist equipment and PPE.
Dogs are another exhaustable resource – they can only work for so long, and although they can cover a large acreage quickly they can still only ‘search’ part of the area at once.
So with the above resources dwindling, does a dedicated tracking cell within a volSAR team actually work? Where and when would they deploy – prior to the hasty teams and when the minimal amount of damage had been done to what trail remains? Are trackers a specialist search asset to be deployed from the SAR toolkit like Swiftwater Rescue Technicians and dogs?
You’re burning daylight and with a limited number of searchers available for the next few hours is it appropriate to separate out a few tracking-trained team members to faff around on the fringes with elastic bands and sticks?[/vc_column_text][/vc_column][/vc_row][vc_row][vc_column width=”1/2″][vc_single_image image=”8975″ img_size=”medium” add_caption=”yes” alignment=”center”][/vc_column][vc_column width=”1/2″][vc_single_image image=”8976″ img_size=”medium” add_caption=”yes” alignment=”center”][/vc_column][/vc_row][vc_row][vc_column][vc_column_text]
The cohesive approach
Although we teach tracking as a distinct skill from search techniques as part of the EST Framework courses I do not think the two can be completely separated. By the very nature of the skills required a good searcher can be a good tracker, and vice versa. The skills of Land-SAR search (searching the cube, staying in formation, personal safety) are all essential skills for a SAR-tracker, but an understanding of the importance of certain patterns (or indeed, breaks in those patterns) can highlight certain things to a tracking-trained searcher.
When a tracker is either looking for a specific print or any relevant sign of passage then she or he can pick them out from the background scenery and analyse them – if they are also searching then they can do that in-context and feedback information to their Party Leader of Search Control.
Basic tracking skills and an understanding of both the benefits and limitations of those skills within a SAR context should be seen as an essential skill for any volSAR ground team member (and indeed, understood by Search Managers and Search Coordinators).
Any sign of Jim?
What if every team member on the ground in this search had been given some basic training in tracking (e.g. how to extrapolate an entire print from several partial prints, or to spot the signs of passage by an adult human through dense vegetation etc) and had been deployed by a Search Manager who also understood this?
What if those initial hasty parties had been on the lookout not only for an adult male runner somewhere within their search radius, but also slowing down to check likely track-traps such as the edges of puddles or choke points between trees? Or if they had performed their first search around the edges of the car park, looking for candidates for a Jim-print?
This is how it SHOULD be done, but rarely is. Tracking is often seen as a separate skill or occasionally an afterthought when previous efforts are proving fruitless – but it should be part of the mindset of any volSAR deployment where the misper could possibly leave sign of their passage. Too much emphasis is often put on looking for the body of the misper, not a 20% partial print that could become the next LKP and shift the whole search in a positive direction.
How to deploy tracking in a SAR operation
This is part of the guidance that we give to candidates on the Level 3 Search Operations Management Course but is relevant for anyone involved in planning search operations and deployment of SAR assets for missing person search:
- Tracking awareness should be seen as a vital skill for all trained searchers deployed on the ground and training should reflect this, challenging team members and preventing skill-fade whilst promoting personal skill development.
- Search teams should be equipped and prepared for tracking re-deployment in the field.
- Acquiring information for tracking-trained search teams should be a vital part of witness and family interview techniques and efforts made to isolate footwear type and shape – social media photos, prints at home and so on.
- Tasking of search parties should reflect the potential usefulness of tracking, and time allowed for an initial search around the IPP for potential print candidates.
- Be ready to re-deploy search teams to another area/track if they discover a potential trail on the ground – this highlights the need for Search Managers to have a good awareness of the limitations of tracking and the relative importance of the information being fed back in to Search Control.
For most applications tracking should be seen as a vital SAR skill, not a specialism and subset of strange folk with feathers sticking out of their gear and castration rings on a trekking pole. Of course training contact time is limited for volSAR teams, but once those skills have been gained they can be maintained fairly easily.
SAR Tracking isn’t THAT hard
Unlike some of my clients, nobody is going to be shooting at you whilst you are tracking within a SAR context. Your search subject is unlikely to be actively trying obscure their tracks or slow pursuers down with traps and IEDs, and they aren’t a small and fast mammal scurrying across a forest floor without even turning over a dead leaf.
Humans (well, ones not trying to avoid capture) are pretty lazy and bumbling. We step into soft mud, scrape our feet across mossy logs and boulders and trample over leaves and twigs crushing them into the floor under our bulk. We wade through long grass and vegetation turning the leaves and blades of grass over to flag our passage and even discard plastic and paper objects from our pockets as we walk.
It’s why our Level 1 Tracking Technician course is run over only 3 days, and that also includes crossover with navigation skills and interoperability with other organisations and a final exercise – tracking shouldn’t be seen as a mysterious and ethereal skill, but nor should it be dismissed out of hand because your deployment plan doesn’t allow for it.[/vc_column_text][/vc_column][/vc_row][vc_row][vc_column][vc_column_text]
TL;DR
Tracking is good and useful within a misper SAR context in the UK, but is often misrepresented by poor deployment and inflexibility of existing deployment procedures. There is also a lack of understanding by Search Managers who see it as an ineffective delay in the search operation and don’t ask pertinent questions when speaking to informants and witnesses. Tracking-awareness should be a vital part of any SAR search party members and be an intrinsic part of the training programme.
Tracking also has many limitations, and more so in the densely-populated UK where volSAR teams have to try and identify a potential subject-print early on in the search rather than hoping to the find the ‘sign of passage’ in the wilderness and following the resultant trail.
It’s also not that hard, and with a bit of training most competent SAR party members can become effective trackers.[/vc_column_text][/vc_column][/vc_row]
- Published in All Blog Posts, Articles, Bushcraft General, Emergency and Safety, EST Framework, Mountain, SAR, Skills, Tracking
Wild Garlic Allium ursinum
Wednesday, 18 April 2018

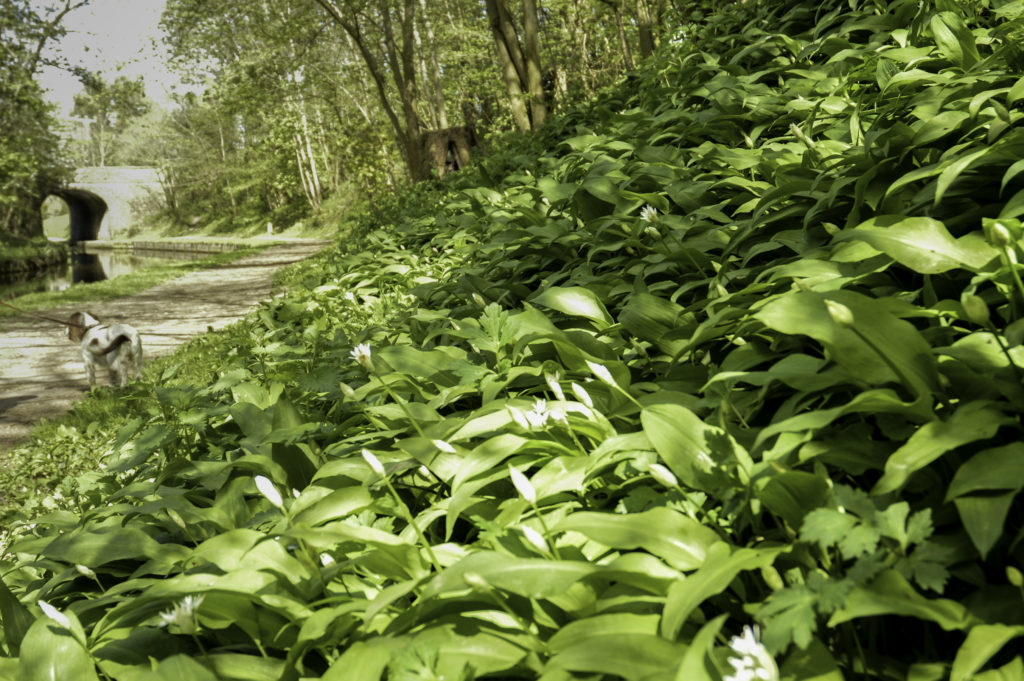


Bestseller
Coastal Foraging
The Coastal Foraging Walk from Original Outdoors is an introduction to edible plants, seaweeds, shellfish and other wild foods on the beaches of North Wales.
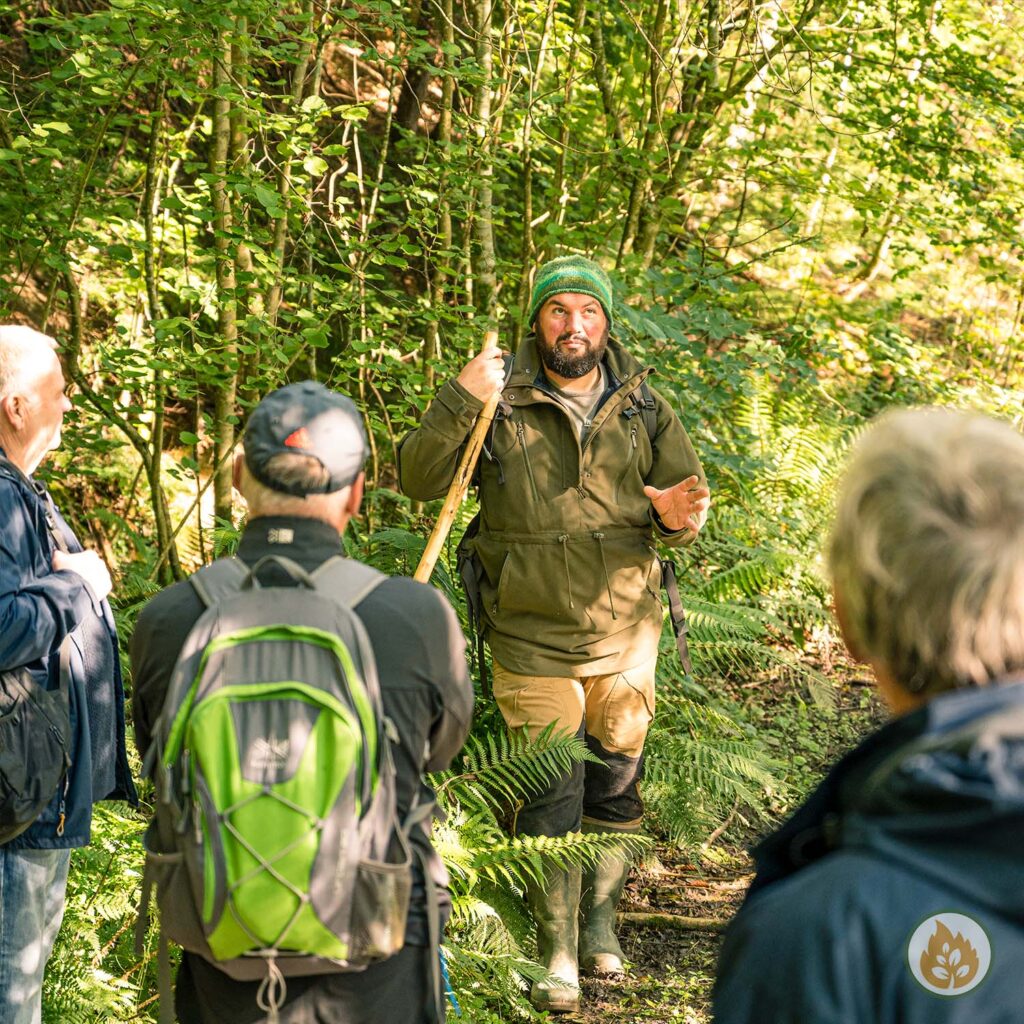
Bestseller
Foraging and Wild Food
The Foraging and Wild Foods Course from Original Outdoors is an introduction to edible plants, fungi and other wild foods in the fields and woodlands of North Wales. It is, by far, our most popular course.
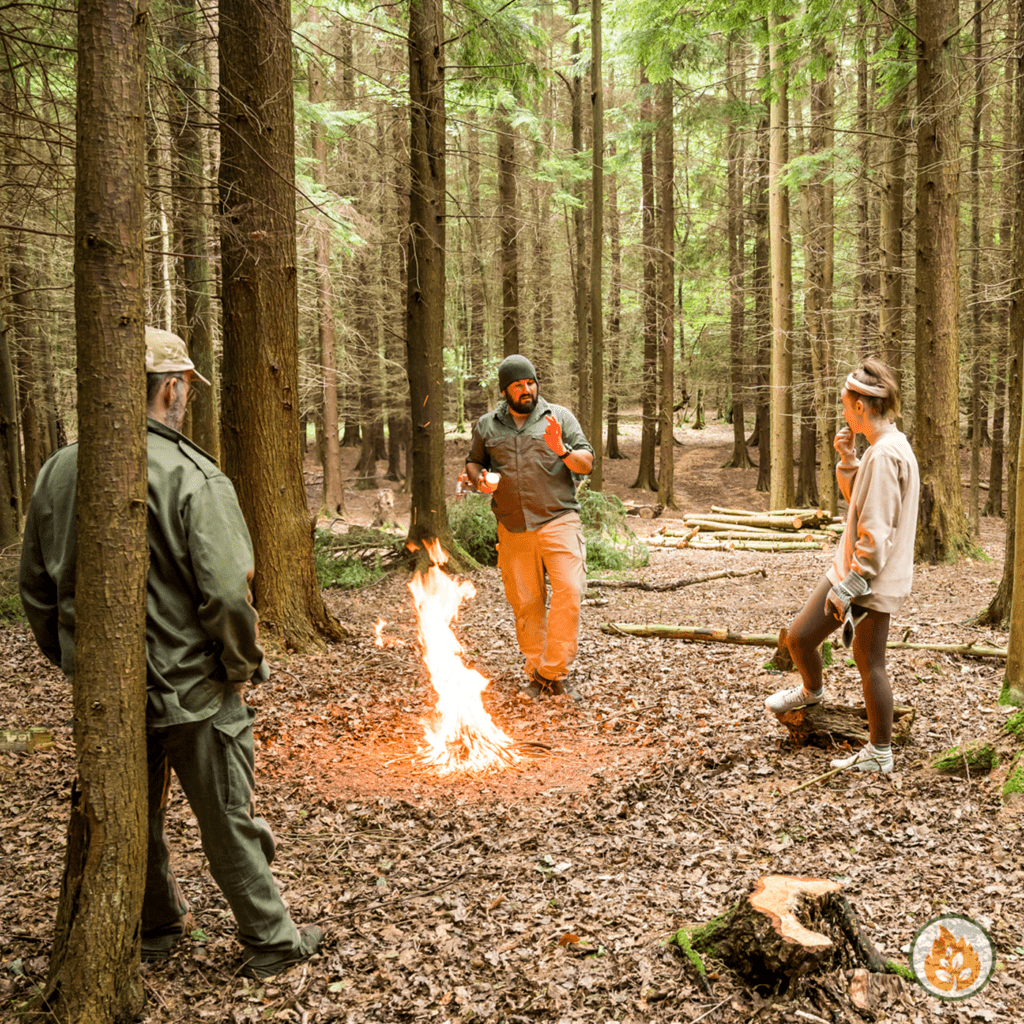
New for 2023
Modern Bushcraft
Bushcraft and Wilderness Skills courses for the modern age. Courses that focus on the equipment, skills and mindset for practising bushcraft in the 21st century.

Bespoke
Private Training
All of our standard public courses are available to book as private events for individuals or groups. We have availability all year round and can recommend timings and locations to suit your needs.

Welsh shoreline foraging – Porth Trecastell
Throughout the year we get asked to help out with events and projects related to wild food and foraging -...
Read More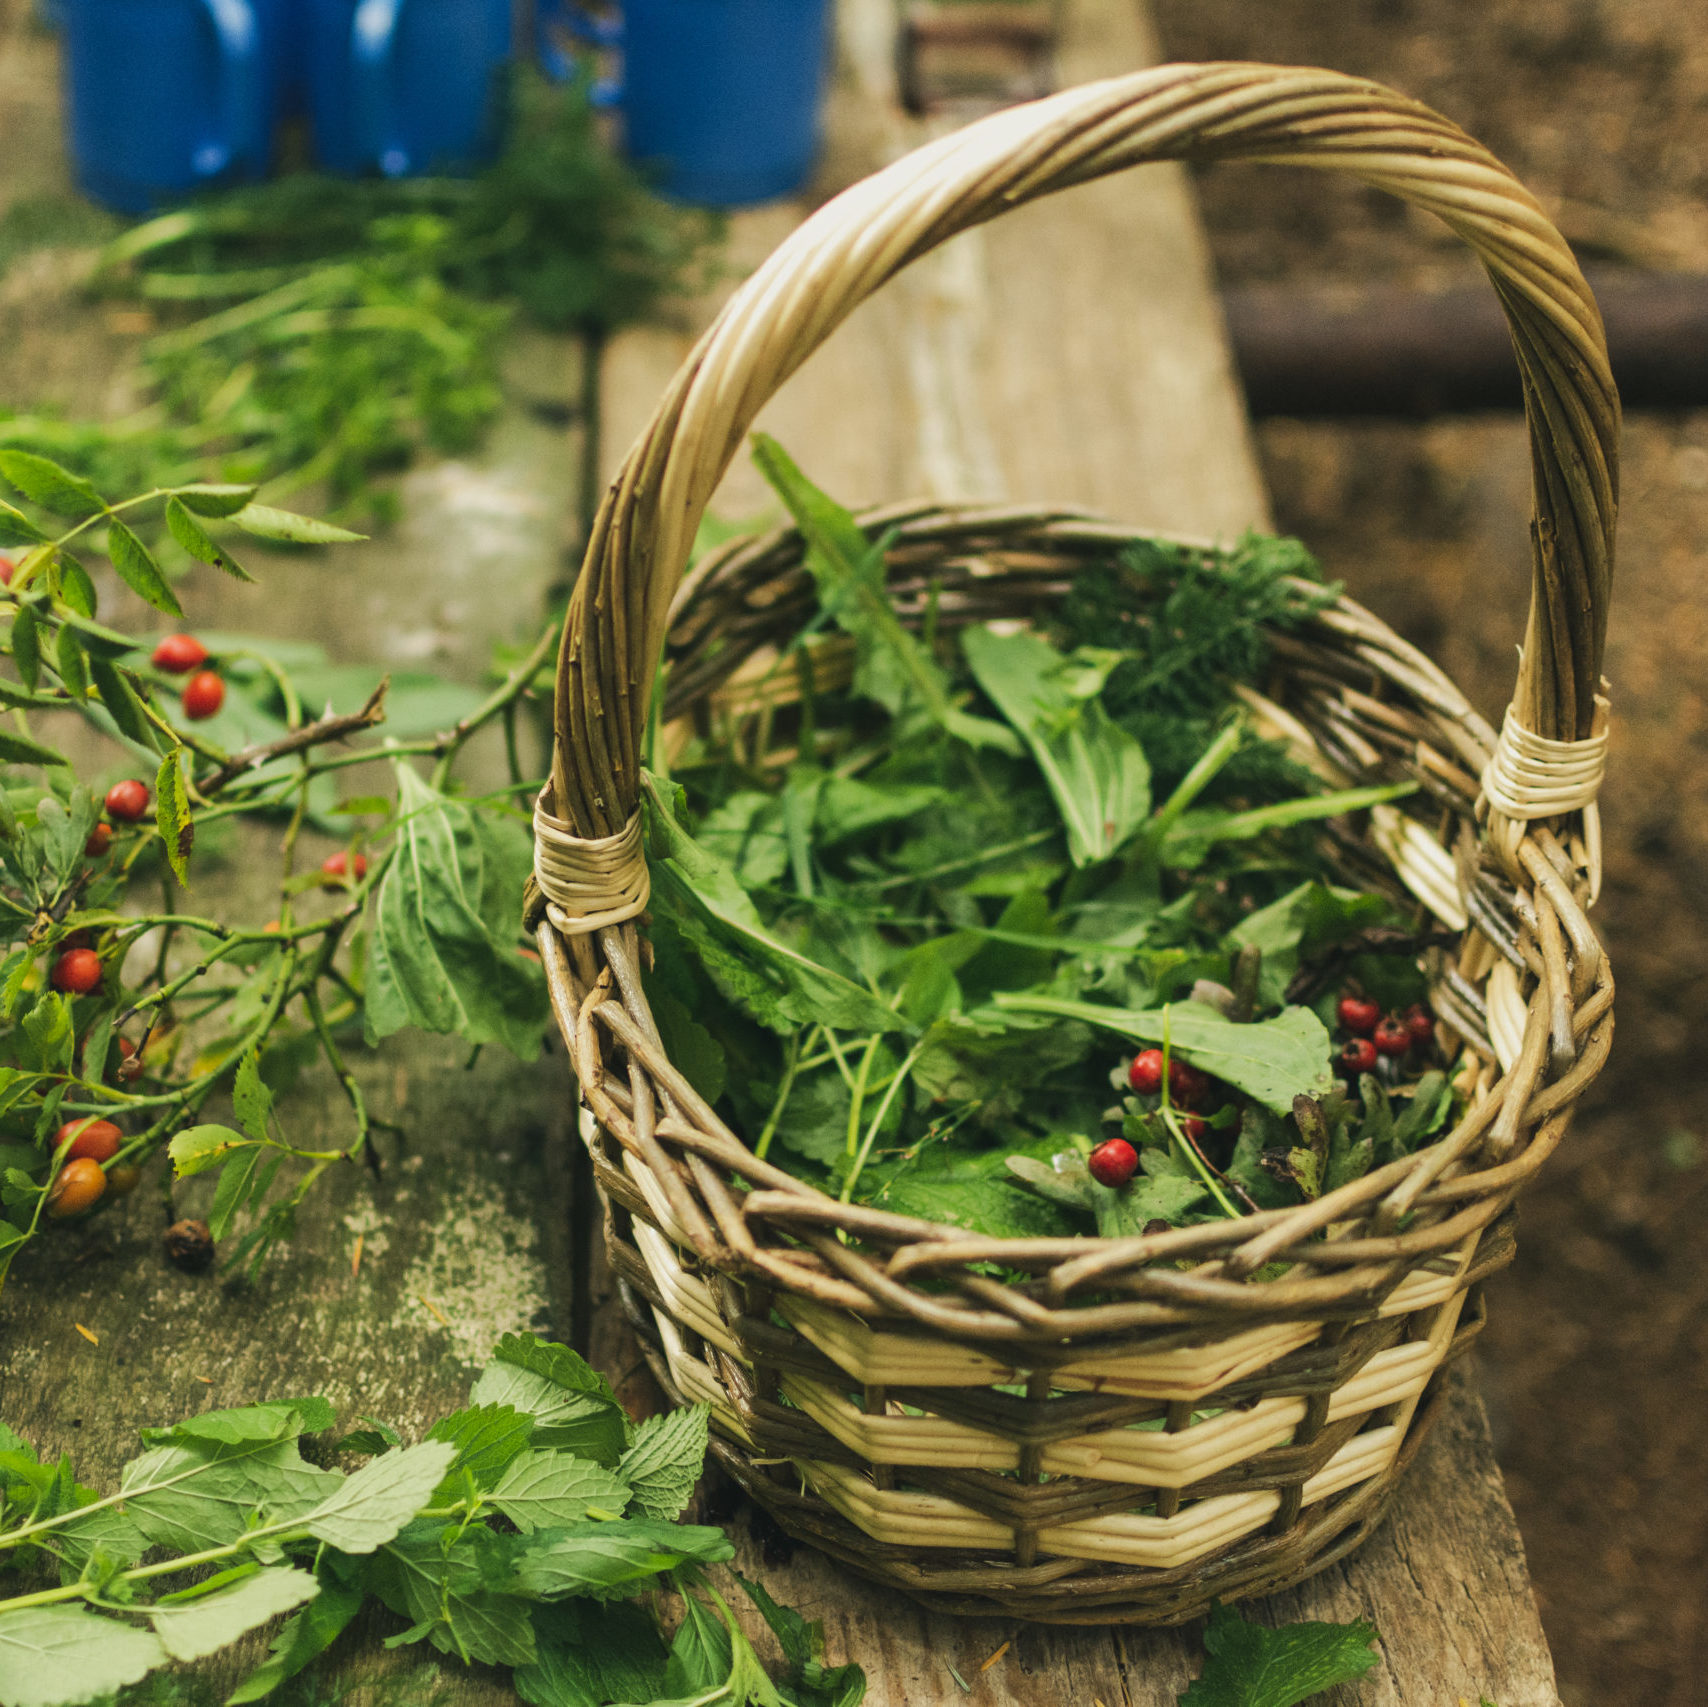
How to use Magic Map
Something that we always talk about on our foraging courses is the law. This isn’t in a general “don’t do...
Read More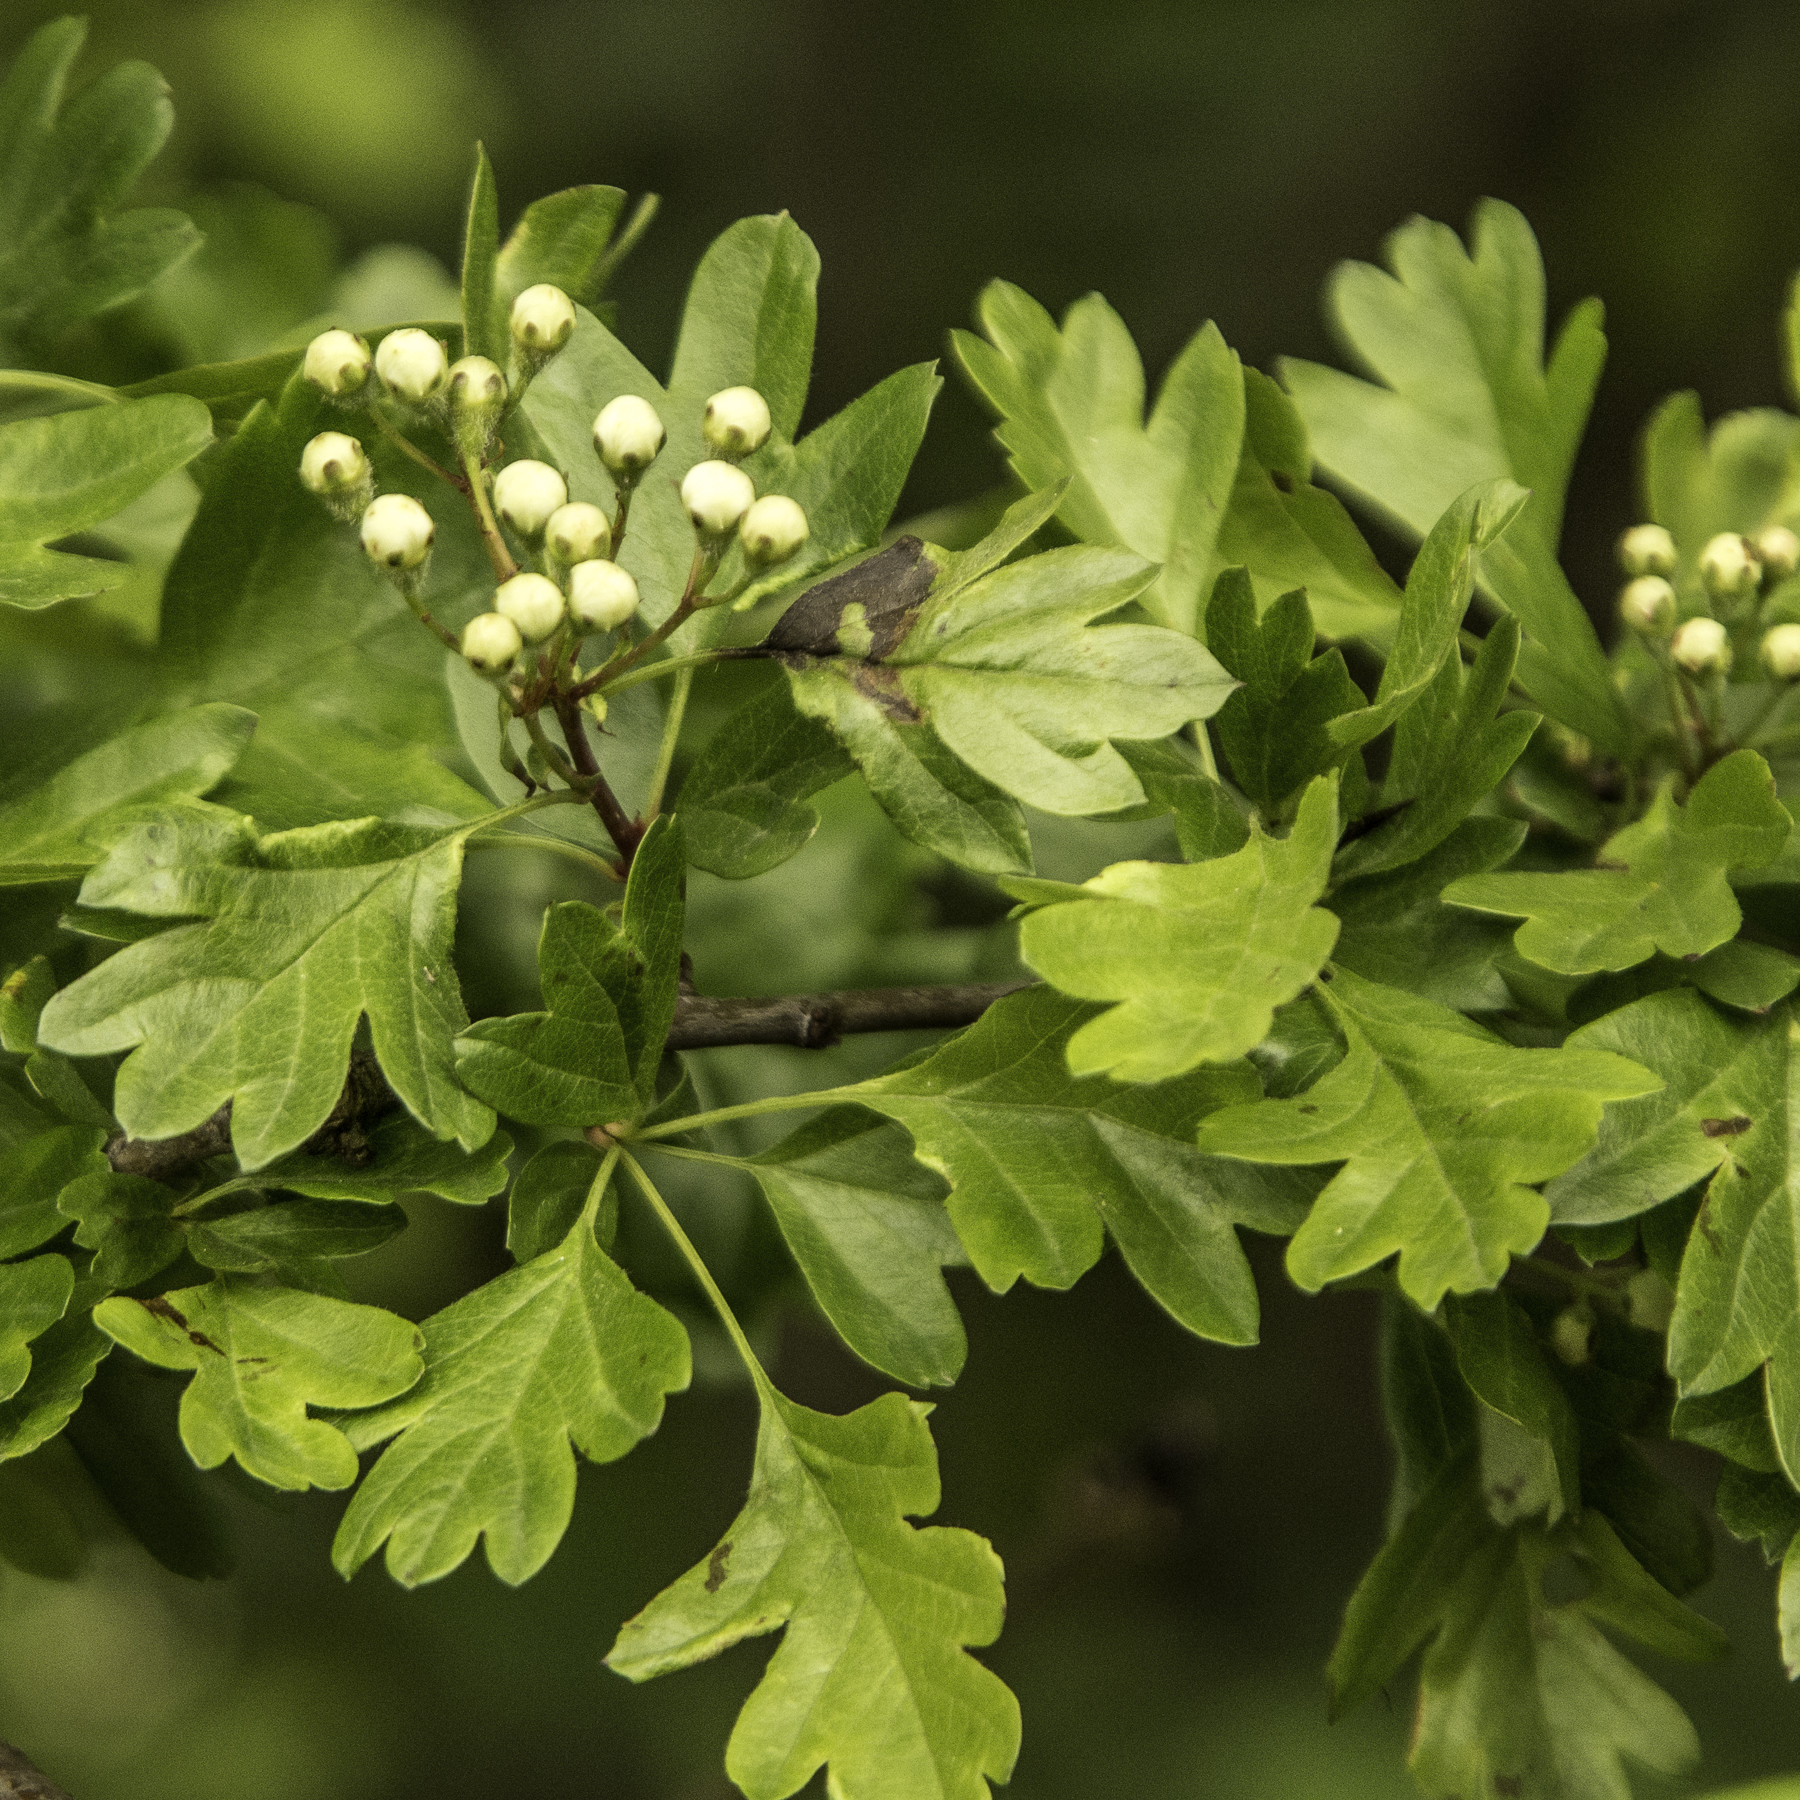
Ne’er cast a clout til May be out
Where does this phrase come from and what does it have to do with that spiky shrub that's found in...
Read More- Published in Edible plants, Flowers, Gather, Herbs and Roots, Plants
GPS, Smartphones and Operational Security – is Strava the only problem?
Wednesday, 07 February 2018

[vc_row][vc_column][vc_single_image image=”8035″ img_size=”full” alignment=”center”][/vc_column][/vc_row][vc_row][vc_column][vc_column_text]
GPS, Smartphones and Operational Security – is Strava the only problem?
[/vc_column_text][/vc_column][/vc_row][vc_row][vc_column][vc_column_text]
The recent hullabaloo over the Strava heatmap reminded me of a strange case from a few years ago…
If you have any kind of interest in GPS, fitness apps, unusual maps or just technology news then you were probably at least vaguely aware of a story about the fitness app Strava and some analysis of the heatmap they published last month. This publicly-viewable heatmap of anonymised user data isn’t new – but the last update was from 2015 data. The 2017 data release included over 1 billion activities and 10 terabytes of raw data. The total distance clocked up was 27 billion KM – 180 times the distance from the Earth to the sun. It’s an impressive piece of user-generated information and it’s quite good fun to see which are the most popular routes to the summit of Snowdon, or the tracks made by people swimming, kayaking or SUP’ing in Llyn Padarn.
There’s also potentially a bit of a security risk – but that’s something I’ve got prior experience of, and it’s still a potential problem for those who work in ‘sensitive’ areas of the world.
The security issues raised over the Strava heatmap started off with Nathan Ruser, an analyst with the Institute for United Conflict Analysts:
Strava is arguably the most popular fitness app in the world, and members of the armed forces are no strangers to running, cycling and swimming to keep fit for their roles at work. It’s no surprise that many of them around the world (both on deployment and at home bases) use the app in the same way every other user does (me included). It’s almost certain that nobody in those roles is using Strava on operations, but running around the perimeter track of the base you’re deployed to is probably OK, right?
Well… although the data in the Strava heatmap is anonymised it does show the outline of that perimeter track. And all of the other tracks, and the access paths between accommodation blocks and admin areas. On bases that sometimes aren’t meant to exist, at least not officially. It’s something that the military forces of the world have probably been vaguely aware of, but it looks like it hasn’t been raised as a specific operational security (opsec) issue until now. I would put good money on there having been some rapid editing of operational procedures with regards to apps, smartphones and how those working and training in operationally-sensitive areas handle their own data. Knowing that the running app on your phone is going to share your movements with the enemy is something of a sobering thought. Strava have released a statement about the issue, and some advice for military personnel.
It’s not just fitness apps – a lot of people are surprised when I show them this link – if you have a Google account (all Android phone users and most of the western world probably do) then there is a good chance your daily position is being logged and uploaded to the Google servers. They even let you see your own personal location timeline – HERE.[/vc_column_text][/vc_column][/vc_row][vc_row][vc_column][vc_separator][/vc_column][/vc_row][vc_row][vc_column width=”1/3″][vc_column_text]
Strava released their global heatmap. 13 trillion GPS points from their users (turning off data sharing is an option). https://t.co/hA6jcxfBQI … It looks very pretty, but not amazing for Op-Sec. US Bases are clearly identifiable and mappable pic.twitter.com/rBgGnOzasq
— Nathan Ruser (@Nrg8000) January 27, 2018
[/vc_column_text][/vc_column][vc_column width=”1/3″][vc_column_text]
If soldiers use the app like normal people do, by turning it on tracking when they go to do exercise, it could be especially dangerous. This particular track looks like it logs a regular jogging route. I shouldn’t be able to establish any Pattern of life info from this far away pic.twitter.com/Rf5mpAKme2
— Nathan Ruser (@Nrg8000) January 27, 2018
[/vc_column_text][/vc_column][vc_column width=”1/3″][vc_column_text]
#stravaheatmap even helps to deanonymize map data: Military site in Germany pic.twitter.com/lpqLEJgS11
— DocMalloc (@DocMalloc) January 30, 2018
[/vc_column_text][/vc_column][/vc_row][vc_row][vc_column][vc_separator][/vc_column][/vc_row][vc_row][vc_column][vc_column_text]
But it’s not just smartphones and Strava – there’s another problem
This whole story reminded me of something that happened with a client of ours a few years ago. It has been long enough, and the story anonymous enough, for me to share it here – especially as it is probably still an overlooked opsec issue.
The advertised public courses on the Original Outdoors site probably only make up 40% of what we actually do. The rest is private training, consultancy and working with individuals and organisations to do something specific. A lot of that work doesn’t make it to the blog or our social media pages because we work under confidentiality agreements and our respect for the privacy, commercial sensitivity and sometimes opsec of those clients. We have worked with private military and security contractors on various things over the years and more than once doing work with GPS devices and navigation training.
There was one training session where I worked with a small group, all seasoned contractors with military backgrounds and who had been deployed to combat areas several times with their previous and current employers. I was about to deliver a session on GPS use and particularly the difference between routes, tracks, POIs and waypoints. One of the contractors handed me his GPS device – a Garmin model with no external connectivity – just an SD card and a port for attaching a data cable. Whilst scrolling through the menu screens and showing the rest of the group we discussed the relative merits of a standalone GPS versus a smartphone with a GPS/mapping app. The opinion of the group was that ‘dumb’ devices that didn’t transmit data to the wider world were more secure and ‘safer’ than smartphones.
Then I opened up the track history of that particular device.
There were several recorded tracks from the country the contractor had recently worked in, including from their base of operations out to various work sites on oil pipelines. Plus a long one that led from their compound to an airport, then another airport, then back to the UK.
Then along several motorways until it arrived at the contractor’s house. Where it squiggled around a bit whilst the GPS hunted for a signal until the battery died – presumably in their kitbag, forgotten until they next went to work.
This wasn’t from their most recent deployment either – they had more recent tracks, both ‘in-country’ and at home in the U.K.[/vc_column_text][/vc_column][/vc_row][vc_row][vc_column][vc_column_text]
Leaving your home address on the battlefield
Can you imagine what was going through that person’s head, realising that they had been carrying a map to their home (and family) around in a device strapped loosely to their belt or their chest rig?
They probably went through a ritual every time they left the gate of the compound to make sure they were as anonymous as they could be, and to separate their work life from their home life as much as they possibly could. They were very careful in how they used social media, and followed strict guidelines from their employer and colleagues about maintaining operational security – all whilst carrying around a map leading directly to everything they held dear in life.
As you would expect, this led to a discussion about deleting tracklogs from GPS devices and a greater understanding of exactly what information their GPS was gathering. I know that particular company has changed their procedures following that training session, and I make it part of the regular briefings when working with similar clients. I now have to mention Strava and fitness apps too I suppose…
It’s very similar to the Strava heatmap issue – a device of convenience being a little too convenient, and the data it gathers giving away more than you would like it to. Just like the Strava problem it can be avoided by understanding the technology used, and diving into the settings of the device to make sure it is only recording your position when you need it to, and that if it is sharing your location with the wider world you turn it off.[/vc_column_text][/vc_column][/vc_row][vc_row][vc_column][vc_column_text]
The Simple Advice
If you’ve read through this blog post and are wondering if it’s something that might affect you then here is the simple advice I give to clients when the subject comes up:
- If it’s a device that doesn’t transmit anything (most GPS devices without wifi or a sim-card slot) then make sure that you start and stop any track logs, don’t just let them run continuously
- If the device transmits information (smartphones, newer GPS devices, smartwatches etc) then pay careful attention to all of the settings of the app/device you are using. Most have the facility to turn off location sharing, or opt-out of sharing anonymised location data
- Be aware of apps running in the background that could be sharing your location – like Google Maps (see your location timeline here)
Being careful with potentially sensitive information is nothing new to those working in the military and security fields – but as technology and the way we use it continues to evolve we need to be more vigilant about what we share – and also what is being shared by those who work with us.[/vc_column_text][/vc_column][/vc_row][vc_row][vc_column width=”1/2″][vc_facebook][/vc_column][vc_column width=”1/2″][vc_tweetmeme share_via=”originaloutdoor” share_recommend=”originaloutdoor” share_hashtag=”stravaheatmap”][/vc_column][/vc_row][vc_row][vc_column width=”1/3″][product id=”7294″][/vc_column][vc_column width=”1/3″][product id=”7253″][/vc_column][vc_column width=”1/3″][product id=”7241″][/vc_column][/vc_row]
- Published in All Blog Posts, Articles, Land Navigation, Personal, Skills
VIDEO: Choosing an Air Rifle Scope
Thursday, 14 September 2017

Choosing an Air Rifle Scope
Over the last 12 months or so we have made a couple of visits to Tonys Camo in Saltney to take advantage of his generosity and create some short videos on buying an air rifle, choosing an airgun caliber and how to zero a scope.
In this video I ask Tony about buying a scope for an airgun, what all of those numbers mean and how much you should spend on a scope.
This is the last video from the footage we have shot so far – but we will return soon to film more!
- Published in All Blog Posts, Articles, Bushcraft General, Original Outdoors Tutorials, Videos
Do I need to bother with bow drill?
Thursday, 07 September 2017

Bow Drill Skills: Are they worth learning?
One of the skills most associated with the world of ‘bushcraft’ is that of making fire by friction. The image that normally accompanies that description is somebody crouching over a contraption that looks like a fiddle crossed with a rolling pin, furiously sawing back and forth with (ideally) smoke billowing from the base of the device.
This is the ‘bow-drill’ (Bow Drill, Bowdrill, Firedrill, Fire Fiddle etc etc) method and has become inextricably linked with the popular image of bushcraft and survival skills.
We teach this method on our bushcraft courses, and it is often something that clients look forward to and specifically request when we have a free moment in the itinerary and ask them “what next?”.
So we break out some pre-prepared bow drill sets and get down to making some embers…
Richard Prideaux demonstrating bow drill technique
I’ve found over the years that the course participants normally pick up three very important things from seeing the demonstrations then having a go for themselves:
– It’s a lot harder than it looks to get a consistent rotation of the drill without something going awry
– It’s physically demanding and needs patience
– Success is not guaranteed
With skill, patience and the right materials an experienced user can normally get an ember with less than a minute of actual ‘drilling’ action but it is dependent on several variables all lining up correctly to achieve that.
Why do people want to learn how to do it?
Here are 3 direct quotes about fire by friction/bow-drill from instructors that I have heard over the years:
“This is the most important outdoor skill you can learn”
“If you lose all of your equipment this will save your life”
“If you can’t do this then you are not a real outdoorsman”
A quick trawl through the various bushcraft/wilderness skills Facebook groups, forums, YouTube channels and magazines will come up with statements and comments that might not be as succinct as those above but are along the same lines. Then there are the hundreds of articles, blog posts and videos offering tips and techniques that will improve your chances of success. “Bow Drill” is now one of the keywords of bushcraft, along with “knife”, “axe” and “Ray Mears”. You can even purchase knives with divots in the handle so that you can use it as a bearing block (the top of the ‘drill’) in a dire survival situation.
There is undoubtedly some merit to the bow drill firelighting technique:
– It mostly makes use of materials from the environment, not items carried
– Components can be replaced as they wear out or are damaged
– Does not require electricity, flammable liquids/gas or metal components to use
It is also a truly ‘primitive skill’ and would have been understood by our paleolithic ancestors (or indeed indigenous people around the world today). In a world before lighters, ferrocerium rods or even steel then fire by friction would have been a skill passed down throughout a community and as important as making a blade or finding edible plants.
For the modern outdoorsperson and enthusiast it is touted as being an “essential bushcraft skill” (see instructor quotes above) and it is both expected by bushcraft course participants and a requisite for all good bushcraft and wilderness skills course providers.
Are Bow Drill skills that useful?
Yes.
No.
Maybe.
It depends.
Deciding if something is actually useful is of course dependent on the intended use. In a world where we do have lighters, matches, ferrocerium rods, chemical firelighting, electronic firelighting (you can have a lot of flammable fun with wire wool and a battery) and dozens of ways of keeping them dry the Bowdrill set becomes a little redundant.
But what if you lose all of your other gear?
There is another quote from an eminent instructor that I think answers this quite eloquently:
“If you are stupid enough to lose your lighter and firestriker and get all of your matches wet then you are probably too stupid to learn how to bow drill”
A real survival situation is something you try to avoid by making good decisions and with careful preparation. If you lose your lighter your fallback shouldn’t be to rip the laces out of your boots and start whittling a drill – it should be to call yourself an idiot and then go get the other lighter from your pack. Or the firesteel on your belt or clipped to your pocket. Because you brought multiple firelighting methods, right?
If you are travelling somewhere that it is quite possible that you will find yourself in a situation where lighting a fire will make a big difference to your immediate health or safety then you need to carry a way of making fire.
If you are travelling somewhere that you will have to light a fire to cook on, purify water or perform other basic tasks then you will need to carry MULTIPLE methods of making fire.
Accidents happen. Kit is lost on river crossings or can fall overboard. You might be separated from your pack or kit due to unforeseen circumstances. Things break or get lost due to carelessness. We’re human and things happen. But in the modern age we have so many cheap, lightweight and reliable firelighting methods that there aren’t many reasons not to carry more than one way of making a spark, a flame or an ember.
If I am hiking, canoeing or otherwise moving or working in an environment where fire is either required or desireable I will have on my person or in my kit:
1. Ferrocerium rod and striker (clipped to trouser pocket loop or belt)
2. Disposable lighter with ferro (‘flint’) striker (normally in pouch on belt or in pocket of PFD if canoeing)
3. Lifeboat/windproof matches (2 or 3 packs in various places in rucksack)
I also normally carry some prepared tinder or similar either in waterproof plastic bags or in a waterproof form (such as strips of bicycle innertube).
So if I lose my firesteel or it breaks in two then I can use my lighter. If I lose that too then I can still light a fire using the matches and warm myself whilst simultaneously deciding if I need to re-examine the decision-making process that led to me losing all of my other kit…
But what if it’s unplanned?
There are of course situations where you can find yourself thrust unexpectedly into a genuine survival situation. However, outside of contrived and survival TV shows like Naked and Afraid or Alone the number of possible scenarios where you will need to make a fire and you have arrived there with no other equipment whatsoever are pretty slim:
The Plane Crash
If you were a passenger on the plane then chances are that you hit the ground somewhere close to, if not actually inside, the aircraft itself. A big pile of jagged metal, flammable liquids and materials and batteries, electrical components and probably SOME survival equipment like flares etc. You have plenty of options to explore before you need to start trying fire by friction.
The Stranded Vehicle
In this scenario it is a broken or stuck car or truck somewhere far from external help. It might be deep in winter or high summer in the desert, but as with the downed aircraft scenario you are basically sat in a big shelter/survival kit. It is powered by flammable liquid and needs a battery to keep the engine and ancillary components running. Also – if you are for some reason travelling through such a remote area why haven’t you thrown in a few emergency items for just this scenario?
The River/The Sea
It’s not beyond the realms of possibility for even an experienced kayaker or canoeist to find themselves washed on a beach or riverbank watching their very expensive canoe or kayak, stuffed with their camping and safety kit, drifting away downstream or on a current. Dressed only in a drysuit (at best), some kind of footwear and a PFD (Personal Flotation Device) what are they going to do? Well, if you have decided that yes, a fire is the thing that you need then you should just grab the small firelighting kit from the pocket of your PFD or belt and get cracking on looking for some dry kindling. You didn’t think of this possibility and have found yourself far from help, paddling alone with no provision for possibly falling out of the canoe? Well, natural selection is still in effect, and your corpse might provide food for another creature at least.
The scenarios could continue, but they all come down to either:
1. You will rarely travel without there being SOME other way of making fire around you
2. If you are travelling in a way that you won’t have other items around you – carry fire WITH you.
The root of all of this is that fire by friction and making a bow drill set should be a long way down your list of solutions when the need for a fire arises. It is fiddly and time consuming to make (especially if you need to make natural cordage), requires a lot of skill to use and success is NOT GUARANTEED. It is also quite wasteful of calories and can be very demoralising if not successful. It can be hard enough to get right when well-fed in ideal conditions under a parachute shelter in some pleasant woodland. There are normally aggravating factors in a survival situation, such as injury, lack of food/water and (if fire is required) the risk of hypothermia. Would you be better off building a simple shelter and getting out of the wind, off the cold ground and conserving body heat and energy?
What if I just want to learn how to do it?
That’s fine. It is very rewarding the first time you get an ember, and I admit that I really enjoy watching someone battle through the multiple failures to get to their first glowing coal in the notch of the hearth board. The point of this post is to highlight the difference between an IMPORTANT SKILL and one that is fun to learn and achieve, not to put you off learning how to do it for yourself.
It is also good to learn a skill that connects us with our ancestors and to start off with a pile of wood and maybe some cord and end with a roaring fire. The first time you see it it looks like a magic trick, and I suspect that is part of the reason that so many are interested in learning how to do it for themselves. The first time I saw it I immediately wanted to try for myself – a very similar thing happened the first time I saw someone turn a bowl on a lathe, shoot a bow or play Tomb Raider (a good indicator of my age/generation!).
So, should I bother to learn how to make and use a bow drill set?
This is normally where the demonstration of the bow drill comes to on our courses. After watching several people fail, succeed, get frustrated and learn patience with the technique the mood of the group can be a little less enthusiastic than it was. At this point I go through the points above – where are you going to use this technique? Is it as easy as you thought it would be? Are other methods easier/more reliable? What is your motivation for learning this skill?
The final decision is of course down to the individual user and it is up to you to form your opinions. I’ll leave you with a few things to consider:
- Are your fireskills good enough to reliably make a fire from a bow-drill ember every time?
- If you’re travelling somewhere you will need to light a fire are you carrying enough backup methods?
- If you lose your kit will you still have a firelighting method on your person?
- What’s your motivation for learning this technique?
- Do you need to improve your skills elsewhere too?
[divider]


- Published in All Blog Posts, Articles, Bushcraft, Bushcraft General, Personal, Skills
Private Expedition Training in North Wales
Tuesday, 05 September 2017

Private Expedition Training with Mike and Wayne
In the winter of 2016 I was contacted by a gentleman (Mike) who was enquiring about the possibility of some bespoke private training. Funnily enough, Mike had found us through the review of the Katadyn Gravity Camp Water Filter we wrote last year. You never know how things will work out…
After a brief conversation Mike explained that he and one or two others were interested in the idea of a week of navigation and expedition skills training with Original Outdoors, with a mix of woodland and mountain environments.
We discussed a few different ideas over the winter months and settled on a syllabus that included:
– map/compass navigation
– natural navigation
– route planning
– resource and logistics for expeditions
– campcraft in different environments
– emergency techniques
The venues for the course would be our basecamp in North Wales on the edge of the Vale of Clwyd and the Carneddau mountains in Northern Snowdonia.
Bespoke training courses are sometimes tricky to pull together. The client/s normally have a general sense of what they want to learn, but I always need to drill down into what the client’s vision is. Are they heading off on a trip to a specific place or environment? Do they need to perform certain tasks when they get there? Will they be able to resupply en-route or does everything need to be packed in? What about medical evacuation and calling for help?
The thing is – planning an expedition or trip for 3 days or 3 months is a similar process. It’s all a matter of scale and understanding the task. For courses like this I can only teach so many practical skills, the rest is all about decision making and having a strategy for dealing with the problems one is likely to encounter. So any bespoke expedition training has to cover as much about planning and contingency as it does about compass work and choosing a tent over a hammock and tarp.
A lot is down to personal preference too – and that cannot be taught, only experienced. The huge range of outdoor gear available these days means that there are nearly millions of combinations of gear one can choose from. Gas stove or meths? Stove or fire? Tarp and bivvy or tarp and hammock? Boots or trail shoes? I know experienced outdoors-people that would argue for hours over those combinations, and each one certain that they had the right idea.
So the week went along roughly as planned, with a minor change of plan to avoid some poor weather. I’ve pulled together some photos of the trip with Mike and Wayne, plus a short video showing what we got up to.
If you have your own idea for some private training or a trip then please do not hesitate to get in touch with us.
[divider]
[divider]


- Published in All Blog Posts, Bushcraft, Bushcraft General, Camping, Course Reports, Mountain, Mountain General, Personal, Skills, Videos
How to save yourself – a tale of survival from a friend
Monday, 03 July 2017

How to save your own life
A tale of everyday survival from a friend
If you have attended one of our courses or engaged me in conversation about the idea of survival training or prepping for potential survival situations then you will probably remember my having some fairly robust opinions on the whole subject. One of the points I often try to raise is that real survival situations – as opposed to heading out to ‘rough it’ with minimal gear – sneak up on you. You can’t see the situation building up in the distance, with a sweeping fanfare of your personal inner soundtrack heralding the arrival of your ‘moment’. The time when you get to put your training and preparation into action will probably just blindside you and throw you deep into a world of hurt – sometimes literally.
If you read up on real survival situations and those who have survived them (and more importantly, those who did not) then there is the common theme of being in denial about the whole situation. It isn’t just panic, although that plays a part – there is also an element of lethal familiarity.
If you spend extended periods in and around dangerous and life-threatening environments then the psychology of denial will help bury those risks and lead you to actions and behaviour that will betray you when the ‘bad thing’ actually happens. Inappropriate actions under threat can be anything from driving headlong into the raging river because it’s your regular route home and the water “can’t be THAT deep” to actively trying to push your rescuer underwater when your drowning reflexes kick in.
The way to combat these potentially lethal responses to danger is via two routes – awareness and training.
Survival Awareness
By being aware of your surroundings, the potential hazards and being realistic about how likely the various potential calamities are you can develop an appropriate response. Live in an area prone to earthquakes? You can read up on the current advice on what to do in case of a quake and what items you should have in your ‘earthquake survival kit’. Do you regularly travel in remote and wilderness areas? Then remote-area first aid training and equipment specific to wilderness first aid should be high on your list of priorities.
Survival Training
Television shows and gear manufacturers would have you believe that survival training is all about running up and down mountains, swimming in icey waters and knocking up a pile of useful equipment entirely from twigs and berries – but in nearly a decade of survival training with civilians, businesses, SAR, emergency services and the military the truth is a little less exciting.
Survival training can be split into two areas – prevention and reaction. Prevention is everything you do to make sure that you don’t end up in a survival situation, from ensuring your navigation skills are up to scratch to having a realistic approach to equipment and personal admin. Reaction is what you do in the seconds, hours and days following the ‘bad thing’ occurring. That kind of training is about building constructive automatic responses to life threatening situations and re-coding your brain so that your reflexes save your life and don’t kill you or endanger those around you.
Very recently a friend sent me an article she had written for somewhere else, and with her kind permission I have included it in this blog post. It perfectly illustrates all of the points raised above:
- Survival situations hit you quickly and often with little warning
- You won’t be as prepared as you think you might be
- Training and constructive reflexes will help you get past the inital adrenaline-filled moments
[divider]

The scene of the incident – the rope ladder has since been added
November 2015 – somewhere alongside a canal in the south of England
It was about midnight, -1ºC, nobody around, and I was due on an early shift the next morning. I’d spotted it was getting frosty so went out to the car to cover the windscreen so I could get away quicker in the morning.
I was wearing jeans with long boots underneath, a heavy fleece top, and was carrying my handbag.
As I returned to my boat, walking pretty briskly, my foot skidded on an icy metal panel and I fell flat with one arm – the one holding my bag – out in front of me. The weight of the bag and the fact that I was on a wet frosty wooden pontoon meant I just kept sliding. Strangely, I had two clear thoughts that I can still remember – 1) “I’ve fallen over”, closely followed by 2) “I’m under the water”.
Thankfully my keys were in my hand and I managed to fling them up onto the pontoon so that was one less thing to worry about.
It took a second for the feeling of cold to kick in, but sure enough, off went the gasping. I clearly owe a lot to my Wilderness First Aid training as we’d covered the gasp reflex and I knew in theory that it should stop soon – but now that I was actually in that situation did I risk waiting, or try to get out?? Because my clothes were so heavy with the water and there was no straightforward way out, I decided to test the theory. I held onto the pontoon, which thankfully I could just reach, and waited.
Sure enough, my breathing gradually came back under control.
Right then, I thought. NOW I’ll get out.
My first decision was that I needed 2 hands. Bye bye, handbag… Ideally I’d have got rid of my shoes but they were long leather boots which were under my jeans and it would have taken too long to struggle with them, so they stayed.
Even with both hands free it was far less easy than I’d anticipated. I was trapped in a small triangle of water between the bow of the boat and 2 pontoons at right angles to each other. The boat has smooth high sides, and the metal was frosty and there was no way I could climb up. I couldn’t touch the bottom of the canal – and frankly probably wouldn’t want to…
 The pontoon was a floating one and when I tried to heave myself up onto it my legs just swung up underneath it, so I had nothing to push off. I tried that 3-4 times, and was aware I was getting very cold and tired and probably didn’t have the strength to try again if I failed again.
Over my head I could just reach the rope that moors the boat to the pontoon. I held onto it for a few seconds’ rest while I considered my options.
I could shout for help, but it was very late and I probably wouldn’t be heard, plus I was so cold I doubt I’d have got much noise out, yet I could end up out of breath or swallowing water. I decided this was last-resort Plan C.
I could go under the pontoon because I knew there was a ladder on the other side. However, having got my head above the water, I didn’t fancy going back under again. It was very dark and I didn’t want to risk being stuck under the pontoon or attempting to surface in the wrong place. That route became Plan B.
That left me with the option that did get me out – a gargantuan effort to flick my legs out of the water and cling sloth-like upside-down to the rope overhead. I managed to do that, and then to flip myself from there onto the pontoon.
Relief!! I made it!!
The relief didn’t last long, though. I was shivering violently, and realised I needed to get the wet clothes off fast. With numb and trembling fingers I managed to strip the heavy fleece off on the front deck, retrieve my keys (Yes!!) from where I’d managed to throw them earlier, get inside, and towel down and get a dressing gown on.
This being a boat, the indoor temperature was about 10ºC so I needed to get a fire lit in the stove, which took a little bit of doing in the chilled and weary state I was in.
As the room warmed up, I took stock. My arms, legs and ribs were bruised, battered and pretty sore from the various attempts to climb out.
I couldn’t phone anyone because my phone was in my back pocket, full of water, and useless.
I’d lost my purse and all my bank cards, driving licence etc, plus my work pass, as they were in the bag. I went back out with a net and fished for it, but no luck. In fact, despite the canal being only about 7’ deep and the bottom visible depending on the weather, and knowing precisely where I let it go, I’ve never found it – mystery!
I was about to head to bed when I heard a funny noise, like someone blowing a loud and prolonged raspberry. Just to add insult to injury, the ‘Key Buoy’ keyring I had attached to my keys suddenly activated, and shot out a huge flashing orange balloon which proceeded to mock me for the next 3 days. “Well, that’s a lot of use NOW!”, I shouted at it. I may have added some other words too.
I was on time for my early shift…
[divider]
The RNLI is currently promoting a safety campaign that should be required reading for anybody who ever goes near water (so, pretty much everyone): How To Float
- Published in All Blog Posts, Articles, Bushcraft General, Emergency and Safety, Mountain General, Personal, Skills
Wild Camping in Snowdonia during a storm!
Tuesday, 20 June 2017

Wild Camping in Snowdonia
Wind, rain and a microadventure in Snowdonia
Rhian and I head off one evening for a wild camp on the side of Moel Siabod in northern Snowdonia
[clear]
[clear]
- Published in All Blog Posts, Articles, Behind The Scenes, Bushcraft General, Camping, Microadventures, Mountain, Mountain General, Skills, Videos
How to put together a first aid kit for the outdoors
Tuesday, 20 June 2017

How to put together a first aid kit outdoors
Wilderness personal medical kits
How do you put a first aid kit together for the outdoors? Or a bushcraft first aid kit? Are first aid kits for mountain biking different to ones for kayaking?
Carrying a first aid kit in your rucksack or in your personal kit is pretty difficult to argue against. The problem is – how much do you carry, and what exactly do you carry? Once you start going down the road of visualising every possible emergency medical scenario and wanting to ‘be prepared’ for it. Before long you end up carrying several kilograms of equipment that in all likelihood you will never use – but you somehow feel that you need to.
The reality is actually a lot simpler. There are two important points to remember for outdoor emergency first aid:
- Training is the absolute most important thing you can put your time and money into. Knowledge weighs nothing and the most important lifesaving techniques require good personal skills but little to no equipment.
- If you are on your own in the middle of nowhere then the options open to you self-treatment are actually very limited.
With that mildly-sobering thought in mind – how do you put together a first aid kit for the outdoors?
The answer is dependent on several factors:
- The environment you are travelling too/through and specific hazards it may contain
- The length of trip
- Distance/time to evacuation and medical care in case of emergency
- The number of people (and animals) in the party
- The existing medical conditions of those in the party
- The training and skill level of those in the party
- The activities you are performing
- Your carrying capacity (rucksack, canoe, vehicle, porters etc)
For example – the medical kit for a 5-week sailing voyage to the Lofoten islands would be different to that of a solo lightweight backpacker on a 3-day summer trip in the Cairngorms. For the former a Bag Valve Mask (BVM) and full suture kit would be appropriate but would a little ridiculous for the solo hiker.
I have used various medical kits in my work over the years. In my time in a Mountain Rescue team I carried a small personal first aid kit that contained a minimal number of items and drugs – but it was designed to be pooled with the other kits carried by fellow rescuers to form a larger and more comprehensive kit. I supplemented this with items purchased myself such as Tuffcut shears and nitrile gloves. When working as a remote-area medic as support on long-distance races and outdoor challenges I was either carrying a very comprehensive kit issued by the company employing me, or I was given a budget to supply my own equipment at my own specification. I have also put together my own for various trips, plus also kits for Original Outdoors staff and freelance contractors to use when working with our own clients. Each case has been slightly different…
The easy answer to “what’s the best outdoor first aid kit?” is – they all are. The real skill is choosing or building one that suits where you are going, what you are doing and what you’re doing when you get there. To that end I’ve put together a video on the decision-making process that I go through for any trip or scenario, and the items I carry in one of my personal kits:
[clear]
[clear]
First Aid Kit Contents
The list below is based on the items shown in the video, with links to buy them directly from Amazon. Some of the brands or sizes are slightly different or only a few representations of what I carry. The items are not listed in order of importance, just to roughly match the order from the video.
I’ve also put a link to the Lifesystems first aid kit which is a very similar off-the-shelf kit that I can personally recommend – even if it’s used as a base to add other items to.
[divider]
[two_third]
Nitrile Gloves
Get them in any colour other than red or black – you need to be able to see if blood suddenly appears on them when giving a primary or secondary survey as it will steer you towards a major bleed you may have missed.
[/two_third]
[one_third_last]
[/one_third_last]
[divider]
[two_third]
Resus Face Shield
An item of personal safety that should be somewhere easy to reach but can also make your CPR technique more effective.
[/two_third]
[one_third_last]
[/one_third_last]
[divider]
[two_third]
Anti Bacterial Wipes
Great for cleaning up after dealing with a minor wound and preventing your kit contaminating everything it touches.
[/two_third]
[one_third_last]
[/one_third_last]
[divider]
[two_third]
Alcohol Hand Gel
Be aware that carrying alcohol in your first aid kit may cause issues when travelling to countries where alcohol is banned or severely restricted
[/two_third]
[one_third_last]
[/one_third_last]
[divider]
[two_third]
Normasol Sachets
Sterile topical solution in sachets for careful application over wider areas.
[/two_third]
[one_third_last]
[/one_third_last]
[divider]
[two_third]
Sterile Eye Wash Pods
Sterile topical solution in pods for washing foreign bodies from eyes.
[/two_third]
[one_third_last]
[/one_third_last]
[divider]
[two_third]
Fabric Adhesive Dressing Strip
Adhesive dressing strip on a roll for making custom plasters/band-aids for tricky areas like between fingers.
[/two_third]
[one_third_last]
[/one_third_last]
[divider]
[two_third]
SteriStrips
Temporary adhesive suture strips for wound closure.
[/two_third]
[one_third_last]
[/one_third_last]
[divider]
[two_third]
Blister Plasters
Being able to treat or manage a blister can make the difference between carrying on or turning around to go home
[/two_third]
[one_third_last]
[/one_third_last]
[divider]
[two_third]
Non-Adherent Dressings
General use dressings without any adhesive.
[/two_third]
[one_third_last]
[/one_third_last]
[divider]
[two_third]
Triangular Bandage
I have yet to use one of these as a sling, but they are quite useful for holding other dressings on or wrapping over wide areas.
[/two_third]
[one_third_last]
[/one_third_last]
[divider]
[two_third]
Wound dressings (Various sizes)
Absorbent wound dressings in various sizes
[/two_third]
[one_third_last]
[/one_third_last]
[divider]
[two_third]
Travel Mirror
Great for reaching places that the eyeball can’t!
[/two_third]
[one_third_last]
[/one_third_last]
[divider]
[two_third]
Glucose Gel
Glucose gel for hypoglycemic emergencies.
[/two_third]
[one_third_last]
[/one_third_last]
[divider]
[two_third]
Round-Tip Scissors
Small scissors with rounded ends for safety
[/two_third]
[one_third_last]
[/one_third_last]
[divider]
[two_third]
TuffCut Shears
Tough shears for emergency clothing removal
[/two_third]
[one_third_last]
[/one_third_last]
[divider]
[two_third]
Tweezers
For removal of small foreign bodies
[/two_third]
[one_third_last]
[/one_third_last]
[divider]
[two_third]
Microlance Needles
Tiny sterile needles for making small holes to drain blisters etc
[/two_third]
[one_third_last]
[/one_third_last]
[divider]
[two_third]
Disposable Thermometer
Of limited use in a first aid environment but helpful for long-term monitoring of a patient
[/two_third]
[one_third_last]
[/one_third_last]
[divider]
[two_third]
Tick Removal Card
For safe removal of ticks
[/two_third]
[one_third_last]
[/one_third_last]
[divider]
[two_third]
CAT Tourniquet
Not for general carry and must be trained in use
[/two_third]
[one_third_last]
[/one_third_last]
[divider]
[two_third]
SAM Splint
Useful but heavy and other items can be improvised to replace it.
[/two_third]
[one_third_last]
[/one_third_last]
[divider]
[two_third]
Lifesystems Mountain Leader First Aid Kit
A comprehensive and well-designed outdoor first aid kit.
[/two_third]
[one_third_last]
[/one_third_last]
- Published in All Blog Posts, Articles, Bushcraft General, Emergency and Safety, First Aid, Mountain General, Personal, Skills, Tools and Equipment, Videos
Crib Goch – a realistic view!
Sunday, 30 April 2017

[vc_row][vc_column][vc_column_text]
Crib Goch – A realistic view
Scrambling on Crib Goch with a GoPro
The knife-edge ridge of Crib Goch is a legendary route in the mountains of Snowdonia – and for good reason. In parts it really is less than a metre wide and with a drop on either side long enough to really make you regret falling off.
The thing is, most videos showing a traverse of Crib Goch make it out to be steeper, narrower and longer than it really is. Fisheye lenses and shaky camera placements will always give videos a certain look, and it gives an unrealistic view of what walking along Crib Goch is actually like.
A few weeks ago I strapped a GoPro Hero4 to my rucksack shoulder strap and set off across the ridge with a group of clients. In the video below I have sped through the boring sections and focused on the areas of the ridge that need more attention…[/vc_column_text][/vc_column][/vc_row][vc_row][vc_column][vc_video link=”https://youtu.be/2ve03WrLXjo” align=”center”][/vc_column][/vc_row]
- Published in All Blog Posts, Articles, Behind The Scenes, Mountain, Skills, Videos
UK Knife Law Explained
Sunday, 05 March 2017
UK Knife Law Explained for the Outdoors
UK legal carry law discussed with a former police officer
What can I carry in the UK? Is my knife illegal? What knife can I carry for bushcraft?
The above is a good example of questions we’re asked with regards to knives, axes and what we can carry for working in the outdoors in the U.K.
We of course discuss all of this on our bushcraft courses, but sometimes it’s easier to listen to a discussion than a lecture. For that reason I got one of our instructors, Kevin Field, to talk through his understanding of the current UK knife laws and how they might affect a bushcrafter or other outdoor enthusiast or professional.
Kevin was formerly a police officer, and I am an experienced outdoor instructor – but neither of us is a solicitor and we cannot give formal legal advice. The content in the video is our best understanding and interpretation of the current laws, but it is down to each one of you to do your own research and make sure that what you have in your pocket or bag is legal for your situation.
UK Knife Law Key Points:
- The legal length for a non-locking, folding blade is 3inches/7.62cm
- A knife with legal length can still be deemed an offensive weapon if it can perceived as such by someone else
- Locking folding knives, fixed blade knives and knives longer than 3inches/7.62cm are all illegal for carry in a public place without a further defence
- It is the duty of the person carrying the knife to know and understand the law – ignorance is not a defence
- Access land and public footpaths are also public places
- More information can be found on the gov.uk website
So what can I carry?
Well, the broadest answer is a folding blade, without a locking mechanism of no more than 3inches/7.62cm. That leaves you with something like the Victorinox Swiss Army Knife – however, even though it is not illegal necessarily to carry this as a knife, you could still be accused of carrying an offensive weapon.
The actual wording is:
“It is an offence for any person, without lawful authority or good reason, to have with him in a public place, any article which has a blade or is sharply pointed except for a folding pocket-knife which has a cutting edge to its blade not exceeding 3 inches.” [CJA 1988 section 139(1)]
There are specific defenses listed for the carry of knives outside of the definition above – including use for work, for religious reasons or as part of a national costume. The crucial part here is “without lawful authority or good reason”. What constitutes a ‘good reason’ is very subjective, and can depend on everything from how you act and behave with that item in public to how a member of the public perceives it. It is also not limited to knives, but hatchets, folding saws, ice axes and other sharp/bladed articles that an outdoor enthusiast may use.
Whilst it is impossible to give cast-iron guarantees and advice on what knife or other item you may carry, and how you can carry it, there are some generic situations where it is common for knives to be carried in public space:
- A small, folding locknife with a serrated blade on the harness of a climber or the PFD of a canoe/kayaker for the purpose of cutting through rope, webbing or line in an emergency
- A fixed-blade bushcraft knife being used by somebody camping on land where they have legal permission to do so, and ensuring it is being used safely and responsibly
- A multitool with a locking blade in the toolkit of a mountainbiker at a trail center
- A long filleting knife in the tacklebox of an angler on a pier where the public has access
All of those are fairly common scenarios, and there is a very good chance that a police officer, the Crown Prosecution Service and potentially a judge agreeing that it is a ‘good reason’ for that item to be carried or used in public, in that way, at that time.
But what if that climber still has that knife in their pocket when they sit down to a bowl of goulash in the Siabod Cafe later that day? Or if that bushcrafter forgets they have a knife on their belt when they pop into Tesco on the way home? Could the mountainbiker get into an argument with a stranger whilst adjusting their derailleur and threaten the stranger with the knife on the multitool? Can the angler drop into the pub when walking back home, dropping their tacklebox under the table?
The short answer to all of the above is that they are much more likely to have committed an offence. By making poor decisions, not paying attention to how they are handling the potentially illegal item in their kit and being complacent or just foolish they have moved outside of their (potential) legal defence.
One also needs to consider if they are trespassing, which in itself is a civil matter not a criminal one – but if you are found to be in possession of an offensive weapon then it can possibly become armed trespass.
There are so many variables that it possible to turn any hypothetical scenario into a situation where a law has been broken.
Seriously, what can I carry?
The best advice I can give – as an instructor and somebody who was once the victim of knife crime – is to make sure that the knife, axe, saw or whatever you are carrying is:
- appropriate to the activity you are conducting, or about to/have been conducting and there is no other practical way to transport that item
- not being used or carried in a manner which can cause distress or alarm to a member of the public
- not likely to be accidentally carried on from your place of lawful use and activity to a public place (on the belt of your trousers etc)
- not an item otherwise prohibited from being carried or owned (including flick knives, butterfly knives etc)
- transported and stored in a way that cannot be misconstrued as being a weapon (i.e. in a rucksack in the boot of a vehicle, not in the cupholder next to you)
You also need to ask yourself if you REALLY do need to carry that item. Is there a ‘good reason’ for carrying a machete-like survival tool on the PYG Track of Snowdon? Do you need to have a £500 craftsperson-made bushcraft knife on your belt at the local game fair? Do you actually need a knife to go foraging, or will a pair of scissors or secateurs be more appropriate? There is a world of outdoor media, from Instagram to old episodes of Ray Mears shows on Youtube that may trick the unwary into thinking that anything is allowed because you’re being ‘outdoorsy’…
So please, make sure that if you are carrying a knife or bladed item in the U.K., no matter what the style or length, that you are aware of the rules and laws around the use and carry of those items. More importantly, you should also be aware of how your behaviour and actions could be seen by another person. You know that you are a safe, responsible person who is a student of wilderness skills and want to try out your new knife and axe – but has the person walking their dog just seen a threatening-looking scruffy person heading into the woods with camouflage gear and a Rambo-knife?
[divider]
Full Video
[divider]
Axes and Saws
[divider]
Zombie Killer Knives
[divider]
- Published in All Blog Posts, Articles, Bushcraft General, Foraging, Law and Ethics, Mountain General, Videos
How to camp in the woods – a time lapse tale!
Sunday, 05 March 2017

How to camp in the woods
Setting up tarps and living by firelight with Kevin Field
In this short time lapse bushcraft instructor Kevin and I set up two DD Hammocks 3mx3m tarps, light a fire between and settle down for the night in a simple woodland camp.
The next morning we carefully and quickly pack things back down, making sure that we properly extinguish the fire and return the forest floor to its previous state.
[divider]
[divider]
For this camp we rigged the two tarps in similar ways, with ridgelines stretched taut between trees. The fire was a long, thin fire designed to give out heat along the length of our shelters and provide space to cook on.
The easiest way to tidy up in the morning after a camp like this starts when you first arrive the night before:
- Identify the area you need for your fire and shelters/tarps
- Clear the floor area of any leaf litter or debris, back to bare soil
- Set up your tarps or shelters, with consideration to wind direction
- Gather enough firewood for the night before you light the fire
- Light the fire, cook your food and enjoy the evening
- The next morning, consider if you actually NEED a fire
- Make sure that the fire is properly extinguished, even if it burnt out the night before
- Clear away any burnt wood, then scatter ashes across the forest floor by hand
- Once the shelters and your equipment have been safely stowed away you can scatter the leaf litter back across the forest floor. If done properly it should look like you had never been there!
- Published in All Blog Posts, Articles, Bushcraft General, Original Outdoor Moments, Videos
The role of Mountain Rescue
Saturday, 05 November 2016

The role of Mountain Rescue?
What job should UK mountain rescue teams be doing?
Below is a quote from the wife of a UK Mountain Rescue team member, posted on the Facebook page of a regional newspaper on a story about Police pay:
[pullquote style=”left” quote=”dark”]They farm more and more of the “unpleasant” work out to organisations such as mountain rescue teams who have to pick up the dead bodies from farm and road accidents. If they are not happy, leave and become self employed and find out how hard the real world is.[/pullquote]
It’s an interesting one. Should MR teams be retrieving bodies from farm accidents? Are police forces ‘farming out’ work to unpaid civilian volunteer teams?
The history of UK mountain rescue teams is usually rooted in a community response to incidents happening in their area. The first teams came about following the rise in popularity of mountaineering without a system of rescue and medical care being in place that could deal with the inevitable accidents. Mountaineering clubs gradually improved the skills and equipment they held through the early 20th Century, formalising first with the First Aid Committee of Mountaineering Clubs, which later became the Mountain Rescue Committee. The efforts of groups of mountaineers and clubs, often working alongside the RAF Mountain Rescue teams set up to deal with the rescue and recovery of downed aircrew, became the MR teams that are busy in the hills and mountains of the UK still. The underlying principle that linked them all is that they are “saving lives in wild and remote places” – the mission statement of Mountain Rescue England and Wales (although now missing from their website).
The role many of the teams under the Mountain Rescue England and Wales banner today is varied. The busiest teams in the U.K., such as Llanberis MRT work almost solely on callouts involving lost, missing or injured walkers, climbers and other mountain-goers. Occasionally they deal with other incidents in their are where their technical expertise is crucial in accessing those areas. The gradual rise in callouts over the last decade have been attributed to many things, from the increased popularity and success of tourism promotion or the new possibilities for finding hiking friends and groups that social media has allowed. Mobile phones, cheaper outdoor equipment or just more people wanting to experience the mountains for themselves have also been blamed. Whatever the reason, the busiest teams are generally getting busier.
The quieter teams tend to be away from the popular mountain and outdoor recreation areas. They may have hundreds or thousands of square miles of wild and remote terrain in their ‘patch’, but the operational tempo is a lot lower, numbering in single figures for some teams. However these teams still work to a professional standard, with the same equipment and the same unpaid volunteers trained to a level unmatched anywhere by a salaried job in the U.K.
UK rescue teams have become involved in high and low-profile incidents away from the mountains for many years now. Missing person searches in rural and urban areas, flooding and severe weather events, murder inquiries, technical rope and water rescues, crashed aircraft and a lot more besides that isn’t always public knowledge. A quick read through the newsfeed of Mountain Rescue England and Wales shows a number of non-mountain incidents peppered amongst the usual lost or injured walkers and climbers. Like the fire service, UK mountain rescue has evolved into a set of teams that perform a role the other emergency services cannot. Where this started is difficult to unpick though – how and why did mountain rescue drift away from the mountains and onto the streets and fields?
I think for most teams they could see something happening in their community, and they knew they had the skills and personnel to help. It may be a missing child or vulnerable person, or somebody in a situation that could be resolved using techniques honed in the wilderness. In the first instances at least. For some teams (and I must stress the ‘some’) the potential diversity in their role was a way of improving their awareness and getting some publicity for their relatively quiet teams. It’s all a question of cash…
Like all modern charities each mountain rescue teams have to run like a business, even if everybody involved is an unpaid volunteer giving dozens of hours each month (or week!). Their customer is the general public, whom they rescue without charge and (normally) without criticism. The customer pays for this service through fundraising and donations. Not everybody pays, but those who do drop a pound coin into the collection tin or bequeath hundreds of thousands of pounds to rescue teams essentially fund their operations. A small amount is now given to teams by various government funds, but the vast majority of rescue teams in England and Wales does comes from the general public. The problem is – who are you giving money to? Is it the team that you see fundraising in the local town centre but have otherwise never heard of, or the one you saw on the evening news the night before as the reports came in of a daring rescue of a family in terrible weather? I bet it’s the latter. If you live somewhere decidedly flat and travel to climb, hike or otherwise play in the mountains then you may donate to a team that covers the are you visit more often, but generally speaking the teams that receive the most donations are the ones with the highest profiles.
Some teams are quite literally millionaires, or very close. The operational costs of a rescue team can be from £50,000 to over £100,000 depending on what that team needs and what they buy for team members, and that is usually without the hidden costs that are absorbed by team members and their families. Fuel, personal equipment, lost work time and so on. All teams need those donations and you can donate to a more central fund, but this is a relatively new concept still and you can still see the differences in the funds each team raises on the Charity Comission website. It must be said however that the busiest team is not necessarily the richest – Llanberis Mountain Rescue team and Ogwen Valley Mountain Rescue Organisation share a border and have a similar number of incidents when averaged out over a number of years – but OVMRO are decidedly better off than LMRT. So is it public profile or incident frequency that leads to more donations? Or is the type of incidents responded to that tips the balance?
And does it matter? No. A team isn’t raising money to buy a yacht or to give back to shareholders – a team raises money to buy equipment, train personnel, maintain buildings and do something that nobody else can do.
I have some (limited, and gradually becoming less relevant) experience of this. I was a team member, then Training Officer then Deputy Team Leader of a North Wales Mountain Rescue team, and briefly Operations Officer for the regional association. During the time I was there the team evolved from mainly performing missing person searches in rural and semi-rural areas with the occasional rescue or recovery of a hiker, climber or other person in the mountains. The team actually covered the biggest area of any team in England and Wales, and also responded to requests for assistance from police forces in neighbouring English counties. A quick calculation gives me an area of approximately 8,000km² at the time I joined – later shrunk by the formation of lowland SAR teams in those counties. During my time there the team developed and improved it’s technical rope and water rescue skills and got involved in some ‘interesting’ incidents as a result – flooding and water incidents, rope rescues in quarries and steep slopes on the edge of town centres, major missing person searches that dominated the headlines for months and sever weather incidents like heavy snow. For a couple of evenings one winter the North Wales Mountain Rescue teams were effectively the only ambulance response available for most areas – the local ambulance trust just didn’t have vehicles that could respond. Another evening I sat for hours (snowed in) in the farmhouse, an Airwave radio set in one hand, a couple of phones in another and a laptop on my knee and coordinated the response of several teams in North Wales as they were rescuing stranded motorists from cars on lonely mountain passes, evacuating residents from remote houses and generally being selfless and saving lives. Other colleagues spent days in the North Wales Police control room acting as a point of contact and giving expert advice to all other agencies and performing a role nobody else there could do.
And that’s the answer – Mountain Rescue teams (and their Lowland equivalents) do work that the other emergency services just cannot. If every MRT in the UK decided to close up tomorrow there would be hole in the provision of care, rescue and emergency response that the other services cannot fill. By proving time and again they cannot be matched and by doing what they do well, with professionalism and with virtually no cost to the taxpayer they are bound to be called on to work away from the mountains – and they will respond because that’s what they do, and it helps them continue to do it. You cannot blame emergency services for calling on a resource that is professional, trustworthy, versatile and, crucially, free to fill in the gaps of what they can do. You cannot also blame teams for capitalising on the increased and diverse range of callouts to raise their profile and get more donations. It’s a symbiotic relationship that both parties created – if mountain rescue teams hadn’t continually offered their services and proven that they could do what others could not then they wouldn’t be called to do those things now.
To close, to be critical of frontline emergency services officers because they have expressed concerns over the way they are being used is missing every point. Their disquiet with the role they perform has little to do with the role that UK Mountain Rescue teams have come to perform. Responding to events away from the traditional theatre of mountains, crags and moorland IS the modern face of Mountain Rescue in the UK, it just varies from team to team. To tell them to “leave and become self employed and find out how hard the real world is” ignores the fact that nobody is forcing MRT members to be part of their team – just as nobody forces you to run your own business.
Mountain Rescue teams do something incredible, and so do police officers. If you attack either because of your (voluntary situation), you’re an idiot.
- Published in All Blog Posts, Articles, Bushcraft General, Mountain General
Doug’s Green Woodworking Books
Tuesday, 25 October 2016

Doug’s 5 Favourite Green Woodworking Books
As part of my work with Original Outdoors, Richard asked me about the Green Woodwork books that I thought were worth recommending to everyone and which ones were my favourites. This lead me down a road of looking out many of my old favourites and looking at them again in a new light and asking myself what made a really good green woodwork book. Should it be instructional, inspirational or just a great read? The original list was way longer than the 5 Richard asked for but after a long process of reading and re reading I came up with my list of 5 favourites.
What is green woodwork?
Before I start out on telling you all about the books I should probably try and tell you all what I think green woodwork is as this effects which books I choose. Green woodwork at it’s most basic level is all about using timber when it is fresh. As wood is kept it dries out and becomes harder. By using green wood it makes it easier to cut and shape and thus eliminates the need for power tools and makes it possible to make everything from spoons to houses with only pretty basic tools. This amazing diversity of possible projects is part of what has kept me interested in green woodwork for the past 10 years or more and I hope that it will mean that there is something here for everyone to enjoy.
[divider]
[two_third]
Swedish Carving Techniques (Willie Sundqvist)
An absolutely fabulous book that was first printed in English in Feburary 1990 and has been a much sought after book for a very long time. After a long time out of print it was re issued in the last year or so making it once again accessible for a reasonable price. Bushcrafters and Green Woodworkers alike have sought this book out and used the information inside to improve their skills with axe and knife.
This book is packed with information on tools, their care and sharpening, safe use of both axe and knife as well as some projects and a lot of information on carving spoons (something of a passion for me). The book is well written and really inspired me to improve my work with the most basic tools available to me. Many green woodwork books talk about numerous devices and tools and this one really goes back to basics and in these cash strapped times it’s a great place to start off green woodworking as the tools are basic and many people have something that they can use tucked away in their shed or cupboard that they can use to start with.[/two_third]
[one_third_last][/one_third_last]
[divider]
[two_third]
The Encyclopedia of Green Woodworking (Ray Tabor)
This book has a bit of everything you can think of that is to do with green woodwork. It really does deal with everything from planting your own trees to the finished products that you can make. Most importantly the thread that runs through this book is about the wood itself. The properties of green wood and the problems that using green wood causes can be serious for your final projects. A bowl or spoon that has a big crack in it won’t be a lot of use when you go for your bowl of soup. This book really is about understanding the need for using green wood and then working around the problems that that causes and even using those properties to your advantage.
Almost everything you would want to know about green woodwork in on book. A great reference book and one that I refer to a lot.
[/two_third]
[one_third_last][/one_third_last]
[divider]
[two_third]
Living Wood: From buying a woodland to making a chair (Mike Abbott)
Mike Abbott has long been known as one of the people who made green woodwork popular in our modern day. Mike has written may great books but I think this one is my favourite. This book isnt just an instruction manual it also tells a story of how Mike started out in Green woodwork and how he came to be a full time green woodworker. He talks about his experiences and the development of green woodwork. The book includes plans for shave horses and pole lathes as well as details of how to make an amazing green wood chair, Mike has specialised in green wood chairs and the pole lathe for most of his working life..[/two_third]
[one_third_last][/one_third_last]
[divider]
[two_third]
Woodland Crafts in Britain: An account of the traditional uses of trees and timbers of the British countryside (H L Edlin)
A bit of a departure from the other books as there are no instructions on any of the crafts included within it. This book is special to me as it was the first to show me the breadth of what I was starting to get into. This book was something I bought second hand for 50p and I would certainly recommend buying it yourself. Sadly it’s out of print to my knowledge but there are plenty of sellers on the internet that sell second hand books and I really hope you can find a copy of it.
The book covers a great deal from timber felling and the uses of timber for fuel and charcoal to all the craft uses for timber generally laid out in order of species of timber that best suits the crafts. Edlin describes the crafts and the people that carried out these jobs in a readable way that left me wanting to find out more about many of these crafts. Not an instructional book like the ones before but great bed time reading and highly inspirational.[/two_third]
[one_third_last] [/one_third_last]
[divider]
The Bodgers Gazette – Newsletter for the Association of Pole-lathe Turners and Green Woodworkers.
OK so this one is a bit of a cheat because this one isn’t really a book. However it is an amazing publication and something I think anyone interested in Green Woodwork should get and read.
It is only available to members of the Association of Pole-lathe Turners and Green Wood workers but it’s beautifully produced and has loads of great stuff in it. The Quarterly Bodgers Gazette comes as part of membership of the Association and that’s only £20 a year and also includes the chance to attend the Bodgers ball where hundreds of green woodworkers get together and show their skills and wares. It also allows you to take advantage of special offers that are open to members like the combined insurance policy for demonstrators and teachers of GWW.
The Gazette itself includes articles written by the members. These are about all different aspects of green woodwork from the goings on of local groups to specific skills and instructions on how to do different projects or make specific items. In a particular favourite edition of mine called Tales from the wood (this is a collection of some of the best articles) I found an article that described how to turn a green wood bowl on a home made lathe using your own body to power it. The article was written by Robin Wood and was the start of an obsession for me and I’m still trying to turn the perfect bowl a good few years later.
I recently managed to buy a CD with copies of all the bodgers gazettes on it and I’m still trying to wade through all the information on it and I don’t think I’ll get through it any time soon and then I have to try it all out!.
Learn more at: www.bodgers.org.uk
[divider]
You can see more of Doug’s work on his Heartwood Treen page HERE.
- Published in All Blog Posts, Articles, Books, Bushcraft General
VIDEO: How to zero an airgun scope
Thursday, 20 October 2016

How to zero an airgun scope
Setting the sights on your target
Tony from Tony’s Camo and Airgun Centre in Saltney comes back for this second video on the use of airguns. In the shooting range adjacent to his shop he shows me how he teaches people to setup the telescopic sight on an air rifle, for consistent and accurate shots.
A scope isn’t strictly required for accurate shots with an air rifle, but it does make the job a lot easier and allows for greater consistency.
The steps for zeroing an air rifle scope at 25 yards
- Find a safe and legal place to shoot over the distance you wish to set up your scope for
- Set up a target that will clearly show where you have hit it (a piece of white paper works well)
- Mark a point on the target (a dot will do)
- Set yourself up in a comfortable and safe shooting position
- Fire three shots with the centre of the crosshairs lined up with your dot on the target
- Your group of shots will likely be off to one side and above or below your target dot
- Carefully unscrew both dust covers on the adjustment turrets on your scope
- Decide if you are going to adjust the up-and-down (elevation) or side-to-side (windage) turrets first
- Most scopes use a system where each ‘click’ as you rotate the turrets will translate to 1/4 of an inch of change in the place the pellet hits a target 100yards away
- As your range will is closer than that you will need to perform some calculations to set your scope
- For a range of 25 yards each ‘click’ will move the ‘aim point’ 1/16th of an inch, or 16 clicks will move the ‘aim point’ one inch.
- If your first three shots are half an inch below your target dot you will need to move the elevation turret 8 clicks in the direction marked on that adjustment turret
- Once you have made your adjustment fire another three shots. Your grouping should now be on the same level as the target dot, but may still be off to one side
- Repeat the above process for the side-to-side error (windage)
- If you can repeatedly shoot a pellet through the same hole at that range you have ‘zeroed’ that scope
Tony’s Tips for Successful Zeroing
- Be consistent with your choice of pellet brand and types
- Zero from a safe and stable shooting position
- Only adjust for windage or elevation at a time, not both
- Don’t try and zero on a windy day
- Take an average of three shots after each adjustment, not just one
- Only ever shoot where it is safe and legal to do so
Finally, remember that you are doing this with a potentially lethal firearm, and the responsibility is on you to make sure that you are shooting in a safe and legal manner, and that you are behaving as a safe and responsible airgun owner.
- Published in All Blog Posts, Articles, Bushcraft General, Foraging, Original Outdoors Tutorials, Videos