Early Spring Foraging in the UK


- Published in All Blog Posts, Edible Fungi, Edible plants, Flowers, Gather, Herbs and Roots, Mushrooms, Plants, Trees and Shrubs, Videos
You’ve just completed your Mountain Navigation course – what next?

[vc_row][vc_column][vc_column_text]
So you have just completed your Mountain Navigation Course with Original Outdoors…?
…what should you do next?
This blog post is primarily aimed at those who have just attended one of our Level 2 (Mountain) Navigation courses, either on a public course or as a private client. That doesn’t mean that the information below is ONLY of relevance to those who have just visited us in North Wales, but that is the intended audience.[/vc_column_text][/vc_column][/vc_row][vc_row][vc_column width=”1/2″][vc_single_image image=”11243″ img_size=”full” alignment=”center”][/vc_column][vc_column width=”1/2″][vc_single_image image=”11240″ img_size=”full” alignment=”center”][/vc_column][/vc_row][vc_row][vc_column][vc_column_text]
Getting out Again
I am in the lucky position where I not only get to earn a living from teaching navigation – I get to regularly go out and practice all of the essential skills. Navigation is a PERISHABLE SKILL and if you don’t use it, you will lose it. We can only fit so much content into the course, and some of the more complex skills will take time to fully get to grips with. Below are some exercises that you can try out at home – even if you live far from the mountains.
Pacing Squares
Find an open patch of level ground (a public playing field is ideal) and stand at one corner, facing away from the corner. Place a £1 coin on the ground and then find a magnetic bearing that runs down one side of the playing field. Once you have set the bearing, walk 100m (using the double-pacing you calculated on the course) and then stop. Turn 90° to either the left or right (whichever way takes you out into open space) and fix another bearing. Walk 100m, turn 90° again and repeat. After 4 x 100m ‘legs’ you should find yourself standing over your £1 coin. If you are not standing there then you now how a financial incentive to become very accurate with your bearings and pacing!
[clear]
Calibrate Timing
Go for a walk that starts off on the flat, then has an ascent of some type (one that you can measure both horizontally and vertically). Work out your average pace in minutes per kilometre for a measured horizontal distance of somewhere between 500m-1000m. This is almost certainly going to be somewhere between 10 min/km and 15min/km for a flat walk. Try to walk as naturally as you can and don’t rush.
Once you reach the start of an uphill section you will need to get the map out, measure both the horizontal (map) distance and the expected ascent (count contours) between where you are now and somewhere that is easily recognised when you get there (a path junction or similar). Walk the ascent as naturally as you can, and measure your time. You should then be able to calculate how much longer it took you to walk uphill than the same flat distance would have taken. For example – if you are walking at 12min/km on the flat, and a climb that covers 500m of horizontal distance and ascends 70m and it takes you 9 minutes 30 seconds to get to your finish point then it has taken you an extra 30 seconds to climb every 10m of ascent.
E.G: 500m horizontal distance = 6 minutes at 12min/km
An extra 3 minutes 30 seconds to climb 70m of vertical ascent = 30 seconds for every 10m of vertical ascent
[clear]
Navigate a Familiar Path
Take the relevant 1:25,000 Ordnance Survey map out to somewhere that is familiar to you – somewhere you can walk a linear or circular route of at least 2km. Even though the terrain is familiar to you – use the map as if you were carefully navigating. Ask yourself testing questions – “how many fencelines will you pass on your left before you reach the next road?”, 2what is that building on the other side of the river?”, “how much ascent/descent is on this route?”. You can discover a lot about your local area this way, but it will also make you much more comfortable with using the map key, paying attention to identifiable features you may pass and even spotting map errors or outdated markings.
[clear]
Tabletop Adventure
Okay, I’m not saying that a cup of tea/coffee/bovril and a biscuit is compulsory for this exercise, but it’s a good start.
Grab a map for somewhere hilly and interesting (ideally somewhere you have never visited) and start plotting some routes. Find a parking place on a roadside or in a valley and then plot a circular walk. Give yourself a limit, such as:
- “Must be able to complete in 8hrs”
- “Must include at least 800m of ascent”
- “Must be more than 10km, but less than 15km”
It can be quite good fun, and may inspire you to go out and try a few of the routes you have plotted. More importantly it will get you used to checking things like Contour Interval, measuring distance and estimating the time it will take to complete a route.[/vc_column_text][/vc_column][/vc_row][vc_row][vc_column width=”1/2″][vc_single_image image=”11245″ img_size=”full” alignment=”center”][/vc_column][vc_column width=”1/2″][vc_single_image image=”10420″ img_size=”full” alignment=”center”][/vc_column][/vc_row][vc_row][vc_column][vc_column_text]
Test Yourself, Test Each Other
If you have attended a course focusing on mountain navigation then you are probably planning to go out and USE those skills in the mountains. This, of course, is something that Original Outdoors wholeheartedly endorses.
The thing is – unless you actually put some real effort into it then it’s quite difficult sometimes to find a need to bring the compass out and navigate to a higher standard than simple contour/map interpretation. In order to prevent skillfade and losing your edge you will need to test yourself a little.
The exercises below can be done solo, but also work well if shared with someone else who is interested in improving their navigation skills and is happy to be given simple ‘tasks’ to complete.
Point to Point
Once you find yourself at a feature that you can positively identify on a map (a ‘Green’ location) you can give yourself a new destination. When I worked with you on the course I would look for a feature that is prominent in the landscape (but could be easily missed) and ask you to ‘take me HERE‘. Now you are on your own/away from an instructor you can simply repeat this process – pick a feature less than 1.5km away from where you currently stand, and then work out:
- A safe, sensible route to that destination
- how far that route is, i.e. how far will you walk
- how much ascent or descent is there between your point of departure and your destination
- how long it will take you get there, i.e. estimate what the time will be when you get there
On any navigation assessment those will be the kind of questions I will ask a student. If you are honest with yourself (don’t cheat) and you are happy to work through any errors that might develop then you can refresh and improve your skills through repetition and repeatedly hitting the point of failure.
[clear]
Imaginary Emergencies
This can done at any point along a walk through the mountains (or indeed, anywhere else) and will help focus the mind when it has drifted away to thoughts of stunning views, tired feet or an empty belly. You grab the map and say to yourself something along the lines of “what if I needed to get back down to civilisation quickly – what would I do, where would I go?“. Then look across the immediate area on the map and see what your ‘Escape Route’ would be. It might just be to reverse the route you have done, or even to continue onwards on the same path. It might however be to follow a ridge down the hill until you hit a broad valley and follow it down to the nearest road. Whatever route you choose make sure it is safe and ‘viable’, i.e. not straight over a cliff or through 74 river crossings.[/vc_column_text][/vc_column][/vc_row][vc_row][vc_column][vc_separator][vc_column_text]
The Next Course?
If you have just completed the Level 2 Mountain Navigation course then the next step is the Level 3 Advanced Navigation course – which involves an assessment day with an external examiner. There are also a few skill-specific workshops, such as the Night Navigation course or the Contour Map Workshop listed below. We also have a course on NAtural Navigation, where you learn to navigate in a very different way – using the shape of trees, the movement of the sun and stars and even the wind to navigate across a landscape.
[/vc_column_text][product_category per_page=”12″ columns=”4″ orderby=”rand” order=”ASC” category=”navigation-courses”][vc_separator][/vc_column][/vc_row][vc_row][vc_column][vc_column_text]
Offline Learning – the books we recommend
Some people prefer to learn from a text, or at least have an offline resource they can quickly refer to if they wish to look something up quickly. Below are links out to the books we recommend for learning more about mountain navigation. [/vc_column_text][vc_row_inner][vc_column_inner width=”1/3″][vc_raw_html]JTNDaWZyYW1lJTIwc3R5bGUlM0QlMjJ3aWR0aCUzQTEyMHB4JTNCaGVpZ2h0JTNBMjQwcHglM0IlMjIlMjBtYXJnaW53aWR0aCUzRCUyMjAlMjIlMjBtYXJnaW5oZWlnaHQlM0QlMjIwJTIyJTIwc2Nyb2xsaW5nJTNEJTIybm8lMjIlMjBmcmFtZWJvcmRlciUzRCUyMjAlMjIlMjBzcmMlM0QlMjIlMkYlMkZ3cy1ldS5hbWF6b24tYWRzeXN0ZW0uY29tJTJGd2lkZ2V0cyUyRnElM0ZTZXJ2aWNlVmVyc2lvbiUzRDIwMDcwODIyJTI2T25lSlMlM0QxJTI2T3BlcmF0aW9uJTNER2V0QWRIdG1sJTI2TWFya2V0UGxhY2UlM0RHQiUyNnNvdXJjZSUzRHNzJTI2cmVmJTNEYXNfc3NfbGlfdGlsJTI2YWRfdHlwZSUzRHByb2R1Y3RfbGluayUyNnRyYWNraW5nX2lkJTNEb3JpZ2lvdXRkbzA1LTIxJTI2bGFuZ3VhZ2UlM0Rlbl9HQiUyNm1hcmtldHBsYWNlJTNEYW1hem9uJTI2cmVnaW9uJTNER0IlMjZwbGFjZW1lbnQlM0QwMDA3NDI0NjA0JTI2YXNpbnMlM0QwMDA3NDI0NjA0JTI2bGlua0lkJTNEODBmOTc2MTAyMjQyNGYyNDRkYjJmNzEyYjIzZmY0YTIlMjZzaG93X2JvcmRlciUzRHRydWUlMjZsaW5rX29wZW5zX2luX25ld193aW5kb3clM0R0cnVlJTIyJTNFJTNDJTJGaWZyYW1lJTNF[/vc_raw_html][/vc_column_inner][vc_column_inner width=”1/3″][vc_raw_html]JTNDaWZyYW1lJTIwc3R5bGUlM0QlMjJ3aWR0aCUzQTEyMHB4JTNCaGVpZ2h0JTNBMjQwcHglM0IlMjIlMjBtYXJnaW53aWR0aCUzRCUyMjAlMjIlMjBtYXJnaW5oZWlnaHQlM0QlMjIwJTIyJTIwc2Nyb2xsaW5nJTNEJTIybm8lMjIlMjBmcmFtZWJvcmRlciUzRCUyMjAlMjIlMjBzcmMlM0QlMjIlMkYlMkZ3cy1ldS5hbWF6b24tYWRzeXN0ZW0uY29tJTJGd2lkZ2V0cyUyRnElM0ZTZXJ2aWNlVmVyc2lvbiUzRDIwMDcwODIyJTI2T25lSlMlM0QxJTI2T3BlcmF0aW9uJTNER2V0QWRIdG1sJTI2TWFya2V0UGxhY2UlM0RHQiUyNnNvdXJjZSUzRHNzJTI2cmVmJTNEYXNfc3NfbGlfdGlsJTI2YWRfdHlwZSUzRHByb2R1Y3RfbGluayUyNnRyYWNraW5nX2lkJTNEb3JpZ2lvdXRkbzA1LTIxJTI2bGFuZ3VhZ2UlM0Rlbl9HQiUyNm1hcmtldHBsYWNlJTNEYW1hem9uJTI2cmVnaW9uJTNER0IlMjZwbGFjZW1lbnQlM0QwOTU0MTUxMTk0JTI2YXNpbnMlM0QwOTU0MTUxMTk0JTI2bGlua0lkJTNEMDU4YTY4YTBlZWI2ZjNlMTZhYTBhMjUzZDkxZDJiYjElMjZzaG93X2JvcmRlciUzRHRydWUlMjZsaW5rX29wZW5zX2luX25ld193aW5kb3clM0R0cnVlJTIyJTNFJTNDJTJGaWZyYW1lJTNF[/vc_raw_html][/vc_column_inner][vc_column_inner width=”1/3″][vc_raw_html]JTNDaWZyYW1lJTIwc3R5bGUlM0QlMjJ3aWR0aCUzQTEyMHB4JTNCaGVpZ2h0JTNBMjQwcHglM0IlMjIlMjBtYXJnaW53aWR0aCUzRCUyMjAlMjIlMjBtYXJnaW5oZWlnaHQlM0QlMjIwJTIyJTIwc2Nyb2xsaW5nJTNEJTIybm8lMjIlMjBmcmFtZWJvcmRlciUzRCUyMjAlMjIlMjBzcmMlM0QlMjIlMkYlMkZ3cy1ldS5hbWF6b24tYWRzeXN0ZW0uY29tJTJGd2lkZ2V0cyUyRnElM0ZTZXJ2aWNlVmVyc2lvbiUzRDIwMDcwODIyJTI2T25lSlMlM0QxJTI2T3BlcmF0aW9uJTNER2V0QWRIdG1sJTI2TWFya2V0UGxhY2UlM0RHQiUyNnNvdXJjZSUzRHNzJTI2cmVmJTNEYXNfc3NfbGlfdGlsJTI2YWRfdHlwZSUzRHByb2R1Y3RfbGluayUyNnRyYWNraW5nX2lkJTNEb3JpZ2lvdXRkbzA1LTIxJTI2bGFuZ3VhZ2UlM0Rlbl9HQiUyNm1hcmtldHBsYWNlJTNEYW1hem9uJTI2cmVnaW9uJTNER0IlMjZwbGFjZW1lbnQlM0QxODUyODQ1OTg4JTI2YXNpbnMlM0QxODUyODQ1OTg4JTI2bGlua0lkJTNEMGUwZmMyZjRlNDI4Mzg3ZmFlYWY0YmZhNzY4MTY4MjIlMjZzaG93X2JvcmRlciUzRHRydWUlMjZsaW5rX29wZW5zX2luX25ld193aW5kb3clM0R0cnVlJTIyJTNFJTNDJTJGaWZyYW1lJTNF[/vc_raw_html][/vc_column_inner][/vc_row_inner][/vc_column][/vc_row][vc_row][vc_column][vc_column_text]
Practice beats theory (most of the time)
Mountain navigation is a practical skill, and the very best advice I can give you is to try and get out there and use those skills as soon as you can – even if it’s just for 30 minutes in the local park. You might get some funny looks as you stride around with a compass in hand, but these are complex skills and you will need time to practice and go through them again and again. Be honest with yourself, don’t worry if you make an error and focus on solving problems rather than being perfect.[/vc_column_text][/vc_column][/vc_row][vc_row][vc_column][vc_column_text]

- Published in All Blog Posts, Articles, EST Framework, Land Navigation, Mountain, Mountain General, Navigation, Skills
Axe Safety Basics – Simple rules for using an axe safely in the woods, at camp or at home

[vc_row][vc_column][vc_column_text]
The Basics of Axe Safety
Simple safety rules for all users of axes at camp, in the woods or at home
[/vc_column_text][/vc_column][/vc_row][vc_row][vc_column][vc_column_text]Axes are great. I use them every week, and have been swinging them around for at least 20 years. They are versatile tools, and as important as a crafting item as an outdoor safety/survival tool. I couldn’t do my job without one.
They’re also (potentially) bloody dangerous, and one misplaced swing with an axe could leave you with a bit more room in your gloves for the rest of your life, or with an extra hole in your leg (and a lot less blood in your body than you would like).
Anybody who has attended one of our North Wales bushcraft courses knows that when the cutting tools come out for the first time we spend a bit of time refreshing those safety basics. For any of our ‘safety rules’ I try and create one simple message that is unchanged throughout the sessions, something that works for users of all experience levels.
In the video below I go through what that safety rule is, and discuss a few other techniques and considerations for using an axe safely, such as The Blood Circle and how changing your body position will greatly affect how ‘safe’ your cutting action is.[/vc_column_text][/vc_column][/vc_row][vc_row][vc_column][vc_separator][/vc_column][/vc_row][vc_row][vc_column][vc_video link=”https://youtu.be/DeQ9PwLvGAo” align=”center”][/vc_column][/vc_row][vc_row][vc_column][vc_separator][/vc_column][/vc_row][vc_row][vc_column][vc_column_text]
The Three Safe Places an axe can come to a stop
The key message for that video, and the baseline standard I try and use for anytime I pick up and use an axe, is that when you are swining an axe of any size, in any way, it can only come to a complete rest at the end of that swing in one of Three Safe Places:[/vc_column_text][/vc_column][/vc_row][vc_row][vc_column width=”1/3″][vc_column_text]
In The Workpiece
[/vc_column_text][vc_single_image image=”10723″ img_size=”medium” alignment=”center”][/vc_column][vc_column width=”1/3″][vc_column_text]
In The Cutting Surface
[/vc_column_text][vc_single_image image=”10722″ img_size=”medium” add_caption=”yes” alignment=”center”][/vc_column][vc_column width=”1/3″][vc_column_text]
In The Air
[/vc_column_text][vc_single_image image=”10721″ img_size=”medium” alignment=”center”][/vc_column][/vc_row][vc_row][vc_column width=”2/3″][vc_column_text]If your swing of the axe, and any mishap or problem that might occur during it, means that your axe blade could hit something else before coming to a complete stop in one of those Three Safe Places then you need to stop and reassess what you’re about to do.
A simple change in body position, in the way you are holding the workpiece or the axe, or just slightly changing the orientation of how the axe and the workpiece are interacting will normally fix most problems.
Don’t rely on leather boots to save you – an axe will happily cut right through them.[/vc_column_text][/vc_column][vc_column width=”1/3″][vc_single_image image=”10724″ img_size=”medium” alignment=”center”][vc_single_image image=”10719″ img_size=”medium” alignment=”center”][/vc_column][/vc_row][vc_row][vc_column][vc_separator][/vc_column][/vc_row][vc_row][vc_column width=”1/2″][vc_single_image image=”10734″ img_size=”medium” alignment=”center”][vc_column_text]
Axes get put away after use
All cutting tools should have a designated place that you keep them when not actively in use, and should have a sheath/mask/cover to both protect the cutting edge of the blade, and to protect you FROM that cutting edge.[/vc_column_text][/vc_column][vc_column width=”1/2″][vc_single_image image=”10718″ img_size=”medium” alignment=”center”][vc_column_text]
Respect the Blood Circle
You need to create a safe working area around you, with enough room for you to safely work and do what you need to do with that axe. You also need to communicate that to those around you, and they need to respect your working space. [/vc_column_text][/vc_column][/vc_row][vc_row][vc_column][vc_separator][/vc_column][/vc_row][vc_row][vc_column][vc_column_text]
Ad:
[/vc_column_text][vc_column_text]
[/vc_column_text][vc_column_text]
Why is there an ad here?
We place ads on blog posts and articles that reach a wide audience, especially visitors from overseas who probably won’t get a chance to come along to one of our skills courses or trips. By running ads alongside the more popular articles and blog posts we can help cover the costs of running the website and the blog.[/vc_column_text][/vc_column][/vc_row][vc_row][vc_column][vc_separator][/vc_column][/vc_row][vc_row][vc_column][vc_column_text]
Some Safe Axe-use Techniques
[/vc_column_text][vc_single_image image=”10732″ img_size=”large” add_caption=”yes” alignment=”center”][vc_single_image image=”10730″ img_size=”large” add_caption=”yes” alignment=”center”][vc_single_image image=”10733″ img_size=”large” add_caption=”yes” alignment=”center”][vc_single_image image=”10729″ img_size=”large” add_caption=”yes” alignment=”center”][vc_single_image image=”10728″ img_size=”large” add_caption=”yes” alignment=”center”][vc_column_text]This is the video where we make a mallet from a single piece of wood with green woodworker Doug Don.[/vc_column_text][vc_single_image image=”10725″ img_size=”large” add_caption=”yes” alignment=”center”][/vc_column][/vc_row][vc_row][vc_column][vc_column_text]
It’s not rocket science
That rule should work for all axe users, in all use cases. There are many elaborate ways to use an axe for carving, shaping, splitting, snedding and felling. Different axe styles, different wood types and even different user sizes will dictate exactly which technique is best for that time and place, but all safe uses of an axe should mean that the axe only lands in one of those Three Safe Places:
1. The Workpiece
2. The Cutting Surface (or the ground)
3. The Air
[/vc_column_text][/vc_column][/vc_row][vc_row][vc_column][vc_separator][/vc_column][/vc_row][vc_row][vc_column][vc_column_text]
Related outdoor skills courses in North Wales
[/vc_column_text][product_category per_page=”12″ columns=”4″ orderby=”menu_order title” order=”ASC” category=”bushcraft-courses”][/vc_column][/vc_row]
- Published in All Blog Posts, Articles, Bushcraft General, EST Framework, Original Outdoors Tutorials, Videos
Can I pick wild flowers in the U.K.? When is it illegal?

[vc_row][vc_column][vc_column_text]
Is it illegal to pick wild flowers in the U.K? Can I pick them to eat?
A brief explanation of the laws about picking wild plants, flowers and other items in the UK
[/vc_column_text][vc_column_text]Well, this one won’t be easy.
Maybe it is actually – the relevant laws/legislation that refers to the picking and use of plants growing in the British countryside is actually quite clear. The tricky bit is knowing which ‘side of the law’ you are actually on when you bend over to pick a particular flower, leaf, fruit or fungi.
In this blog post I will do my best to explain it, pick out the relevant parts of the legislation and steer a forager, bushcrafter or ethnobotanist in what is (hopefully) the right direction.
At the bottom of this blog post is the shortened explanation (a tl;dr), but for those who want to know exactly where that came from here are some blocks of legal text:[/vc_column_text][vc_separator][/vc_column][/vc_row][vc_row][vc_column width=”2/3″][vc_column_text]
The Theft Act (1968)
Within Section 4 (Property) of the Theft Act (1968) you will find the following:
(3)A person who picks mushrooms growing wild on any land, or who picks flowers, fruit or foliage from a plant growing wild on any land, does not (although not in possession of the land) steal what he picks, unless he does it for reward or for sale or other commercial purpose.
For purposes of this subsection “mushroom” includes any fungus, and “plant” includes any shrub or tree.
This section is often quoted when discussing foraging and taking wild plants from the British countryside, and is fairly well known and easy to understand. What is less clear is the situation with regard to land owned and maintained by the local Council. Several blogs, newspaper articles and other sources have articles and posts online that mention something along the lines of:
According to the Theft Act of 1968 it is illegal to…
Pick cultivated flowers in public parks or gardens as well as plants and flowers growing on land which is maintained by the council (for example roundabouts and grass verges).
That particular quote was taken from the blog of online gardening retailer Primrose, but with no direct link to a relevant section in the Theft Act, or any other reference. Other websites will have a similar message as a byline in articles related to the legality of picking wild flowers in the UK, often following on from some related newsworthy incident.
The thing is – as far as I can see, and you should always conduct your own research of course – there is nothing in the Theft Act which specifically protects ‘Council maintained land’ when it comes to picking wildflowers or other plants. The illegal activity would most likely be the picking of flowers etc that have been planted deliberately or cultivated – for example from a floral display or flowerbed. If you were to pick one of these plants then you would be committing an offence (theft, funnily enough) – but it would be the same situation if you were to lean over into someone’s garden and pick something from their flowerbed.
[/vc_column_text][/vc_column][vc_column width=”1/3″][vc_single_image image=”10515″ img_size=”large” add_caption=”yes” alignment=”center”][vc_single_image image=”10516″ img_size=”large” add_caption=”yes” alignment=”center”][/vc_column][/vc_row][vc_row][vc_column][vc_separator][vc_column_text]
The Wildlife and Countryside act (1981)
There is much more to read in this act, and the parts that any forager, bushcrafter or ethnobotanist should pay attention to are:
Part 1, Section 13 (England and Wales, for Scotland see below)) states:
13 Protection of wild plants.
(1)Subject to the provisions of this Part, if any person—
(a)intentionally picks, uproots or destroys any wild plant included in Schedule 8; or
(b)not being an authorised person, intentionally uproots any wild plant not included in that Schedule,he shall be guilty of an offence.
(2)Subject to the provisions of this Part, if any person—
(a)sells, offers or exposes for sale, or has in his possession or transports for the purpose of sale, any live or dead wild plant included in Schedule 8, or any part of, or anything derived from, such a plant; or
(b)publishes or causes to be published any advertisement likely to be understood as conveying that he buys or sells, or intends to buy or sell, any of those things,he shall be guilty of an offence.
(3)Notwithstanding anything in subsection (1), a person shall not be guilty of an offence by reason of any act made unlawful by that subsection if he shows that the act was an incidental result of a lawful operation and could not reasonably have been avoided.
(4)In any proceedings for an offence under subsection (2)(a), the plant in question shall be presumed to have been a wild plant unless the contrary is shown.
The Scottish version was amended by the creation of the Nature Conservation Act (Scotland, 2004). It added in the word ‘recklessly’ plus a few other minor changes:
(1)Subject to the provisions of this Part, if any person—
(a)intentionally or recklessly picks, uproots or destroys any wild plant included in Schedule 8; or any seed or spore attached to any such wild plant; or
(b)not being an authorised person, intentionally or recklessly uproots any wild plant not included in that Schedule, he shall be guilty of an offence.
(2)Subject to the provisions of this Part, if any person—
(a)sells, offers or exposes for sale, or has in his possession or transports for the purpose of sale, any live or dead wild plant included in Schedule 8, or any part of, or anything derived from, such a plant; or
(b)publishes or causes to be published any advertisement likely to be understood as conveying that he buys or sells, or intends to buy or sell, any of those things,he shall be guilty of an offence.
(3)Notwithstanding anything in subsection (1), a person shall not be guilty of an offence by reason of any act made unlawful by that subsection (“an unlawful act”) if he shows—
(a)that the unlawful act was the incidental result of a lawful operation or other activity;
(b)that the person who carried out the lawful operation or other activity—
(i)took reasonable precautions for the purpose of avoiding carrying out the unlawful act; or
(ii)did not foresee, and could not reasonably have foreseen, that the unlawful act would be an incidental result of the carrying out of the lawful operation or other activity; and
(c)that the person who carried out the unlawful act took, immediately upon the consequence of that act becoming apparent, such steps as were reasonably practicable in the circumstances to minimise the damage to the wild plant in relation to which the unlawful act was carried out.
(3A)Subject to the provisions of this Part, any person who knowingly causes or permits to be done an act which is made unlawful by any of the foregoing provisions of this section shall be guilty of an offence.
(4)In any proceedings for an offence under subsection (2)(a) or for an offence under subsection (3A) relating to an act which is mentioned in subsection (2)(a) , the plant in question shall be presumed to have been a wild plant unless the contrary is shown.
Schedule 8 lists the protected species than cannot be picked or disturbed without special permission – even if you are the landowner. Happily for foragers there is nothing in there that will be of interest, but it is worth familiarising yourself with some of the more common species.
Sites of Special Scientific Interest
The Wildlife and Countryside Act (1981) did not create SSSIs – Sites of Special Scientific Interest, but it is the current legislation that oversees them. These are designated areas where extra protections exist to protect certain species or habitats, and there are almost always a list of ‘PDOs’ (Potentially Damaging Operations) that are attached to each site. These lists almost always include the ‘removal of plants’ as being a PDO – i.e. you cannot remove plants from the SSSI without other permission, no matter what the species.
This is why you will often see something along the lines of ‘you cannot pick plants from a SSSI or a nature reserve‘ in reference to foraging. [/vc_column_text][vc_separator][vc_single_image image=”10518″ img_size=”large” add_caption=”yes” alignment=”center”][/vc_column][/vc_row][vc_row][vc_column][vc_separator][vc_column_text]
The Royal Parks and Other Open Spaces Regulations (1997)
Applying specifically to the ‘Royal Parks’ and similar designated ‘Royal’ spaces, this Act built upon existing laws governing users of these urban outdoor spaces dating back over a century.
Regulation 4 (Acts for which written permission is required) refers directly to plants and fungi:
Acts in a Park for which written permission is required
4. Unless the Secretary of State’s written permission has first been obtained, no person using a Park shall—(1) interfere with any plant or fungus;
There is a LONG list here of what you cannot do, with some notable highlights:
(12) camp or erect or cause to be erected any tent or enclosure;
(13) wash or dry any piece of clothing or linen;
(24) feed or touch any deer or pelican
So if you are camping in Hyde Park, whilst washing your clothes after they were soiled by your touching of a pelican then you should certainly then refrain from interfering with a plant.
[/vc_column_text][vc_separator][/vc_column][/vc_row][vc_row][vc_column][vc_column_text]
Epping Forest Byelaws
There are a number of byelaws for the large public forest (and surrounding area) north of London. They date back to the Epping Forest Act (1878) but the most relevant part for foragers etc is:
Prohibited acts3. The doing of or attempting to do any of the following acts in the Forest is prohibited and shall be deemed to be an offence against the Epping Forest Act 1878:
Taking anything from the Forest
(4) Taking or moving any substance in or from the Forest, save with the previous written consent of the Conservators, PROVIDED that this byelaw shall not apply to the collection in any one day of no more than 12 kg of loose, dead or driftwood, of which no piece shall exceed 5 cm in diameter and 91 cm in length.Damaging trees or other growing things
(5) Damaging or injuring or climbing up or upon any tree or other growing thing in or from the Forest, save with the previous written consent of the Conservators.
Epping Forest has become notorious in UK foraging law discussion due to the annual news pieces about the actions of ‘commercial’ foragers hunting for mushrooms to sell to, or in, the restaurants of the capital. It is often, incorrectly, stated that it had ‘become illegal’ to forage in Epping Forest – in fact it has been illegal to forage there under the byelaws, and commercial foraging was already outlawed under the Theft Act 1968.[/vc_column_text][vc_separator][vc_single_image image=”10519″ img_size=”large” add_caption=”yes” alignment=”center”][/vc_column][/vc_row][vc_row][vc_column][vc_separator][vc_column_text]
Trespass and Land Access
Although often brought together with the above legislature (Theft Act, Wildlife and Countryside Act etc) the issue of trespass and access to the land has very little to do with the picking of leaves, fruit, flowers or fungi.
The only place where picking plants/removal of plants is specifically mentioned is the Countryside Rights of Way Act (2000). Under land designated as part of the CROW Act you can walk on open ground as if it were a public footpath etc, but you must behave within certain restrictions. There are several things that you ‘cannot’ do as a person exercising their rights under the Countryside Rights of Way Act, including:
SCHEDULE 2
Restrictions to be observed by persons exercising right of access
General restrictions
1(1)Section 2(1) Subject to sub-paragraph (2), section 2(1) does not entitle a person to be on any land if, in or on that land, he—(l)intentionally removes, damages or destroys any plant, shrub, tree or root or any part of a plant, shrub, tree or root,
This means that you can access the designated areas of land under the CROW Act, but as soon as you perform one of the prohibited activities in that list (including foraging) then your ‘right’ to be there evaporates and you are now trespassing.
A simpler guide to what you can and cannot do under the CROW Act can be found here.
Other than the CROW Act there is nothing else (as far as I can see) in UK law currently that refers to public access AND ‘foraging’ in the same document. This means that the question of foraging or picking wild plants ‘legally’ has two sides – what you are picking, and your right’legality to be standing in that spot to pick it.
Trespass is a very interesting topic in it’s own right (no really, I promise you) but it is worth creating a separate article – we already have explored part of it in this post about UK Wild Camping Law.[/vc_column_text][/vc_column][/vc_row][vc_row][vc_column][vc_separator][vc_column_text]
The Short and Simple Version
TL;DR
OK, if you have just scrolled down to the bottom of the article for a quick answer then here it is…
- Under the Theft Act (1968) you cannot ‘steal’ a plant that it is genuinely growing wild as long as you are not picking it/parts of it for commercial purposes
- This means that you can pick plants that are growing wild, but not from gardens, flower beds or other places where the plants are being cultivated or have been planted
- Under the Wildlife and Countryside Act (1981) you cannot uproot a plant without the permission of the landowner, you cannot pick a protected species and cannot forage from a SSSI or NNR (National Nature Reserve)
- There are places where byelaws and other laws exist that mean you cannot remove plants from those areas, no matter if it is planted or growing wild (Royal Parks, Epping Forest etc)
- Access and trespass is a separate issue
-
- So if you are picking a plant or part of it but nor uprooting it, it isn’t a protected species, you aren’t within a SSSI, NNR or other ecologically protected site, you aren’t in a Royal Park or Epping Forest or similar site with special byelaws AND it is genuinely growing wild then yes, you can legally pick that wild flower.
The ethical side of all of this is a bit fuzzier – the charity Plantlife have a campaign encouraging people to go and pick wild flowers in order to improve the general knowledge and appreciation of them. They also have a very good Code of Conduct that is worth looking at and following. Personally I broadly agree with campaigns like this – if we are to appreciate the natural environment around us then we need to interact with it and learn to value it.
We have no interest in protecting the things we don’t value, and we don’t value that which is unknown to us.
[/vc_column_text][vc_separator][/vc_column][/vc_row][vc_row][vc_column][product_category per_page=”12″ columns=”4″ orderby=”rand” order=”ASC” category=”foraging-courses-uk”][/vc_column][/vc_row]
- Published in All Blog Posts, Articles, Bushcraft General, EST Framework, Flowers, Foraging, Gather, Law and Ethics, Mountain General
How to choose the right map scale – 25k, 40k or 50k?

[vc_row][vc_column][vc_column_text]
How to choose the right map scale – 25k, 40k or 50k?
Choosing the right mapping scale for hiking and walking in the UK
[/vc_column_text][vc_column_text]Anyone who as attended one of our North Wales navigation courses will be familiar with one of the tabletop sessions dealing with the various maps available for the UK. We run these sessions during the brief indoor part of the courses (usually accompanied by a cup of something warm and caffeinated) because it is not quite as straightforward as it might appear to be.
I am of the confident assertion that in the UK we have probably the best topographical mapping in the world, especially for hillwalking, mountaineering and outdoor activities. There can occasionally be a bit TOO much choice though, and choosing the correct map scale (and publisher) for the area you are about to go adventuring in needs a little careful thought.
This post should cover the basics of choosing a map scale for the UK.[/vc_column_text][/vc_column][/vc_row][vc_row][vc_column][vc_column_text]
Mapping Scale Options for the UK
There are two mapping scales that tend to be used for walking, mountaineering and other human-powered travels across the landscape in the UK – 1:25,000 and 1:50,000 scales. The main producer of topographical maps for outdoor activities (and everything else) is the Ordnance Survey (OS), and the 1:25,000 (Explorer) and 1:50,000 (Landranger) scales are readily available at outdoor shops, online and local retailers. They also produce various digital mapping products, as well as an online mapping service and smartphone app.
Harvey Maps, founded in 1977, produce maps that cover the popular hillwalking and mountaineering areas of the UK, plus some of the designated long-distance trails and other areas. They also produce maps for cyclists, fell runners and orienteering.
Their maps differ from OS maps in that they are produced at the slightly less common 1:40,000 scale, sometimes referred to as the ‘magic scale’ as it has enough detail to navigate by whilst also covering a wide area. They also produce a 1:25,000 series called Superwalker.
1:25,000 Scale (OS Explorer Maps Series and Harvey Superwalker)
At this scale 4cm on the map is equal to 1km and public rights of way, fence/wall lines and even individual crags and large boulders. This scale is about as detailed as you would want it to be for hiking and mountain walking, but it can show TOO much detail for some users. More on that below!
1:50,000 Scale (OS Landranger Maps Series)
This is the ‘next’ level of mapping up from 1:25,000 scale. At this level 2cm is equal to 1km, and in one sense you can fit four times the area of mapped land into the same space on the paper. Roads, major paths/trails and watercourses are shown and the contour interval is always 10m.
1:40,000 Scale (Harvey Maps various)
This is the in-between scale that some people favour because it balances detail with coverage. At this scale 2.5cm is equal to 1km, and the contour interval is at 15m. Harvey Maps also include ‘extra’ contour lines that show complex terrain that would otherwise be missed by the 15m contour interval. Some fencelines and paths are shown, but not all. The features that are chosen to be included on the map are biased towards hillwalkers and mountaineers, and extra shading is included to show ‘bands’ of relative altitude.[/vc_column_text][/vc_column][/vc_row][vc_row][vc_column][vc_separator][vc_column_text]
How far do you need to see?
The obvious factor to consider when choosing a map scale is how much of an area you need to be able to see on one map sheet versus how much detail you need.
If you need to be able to see the information for a dozen kilometres or more at a time then you will need a map with a relatively small scale of 1:100,000 or smaller. This will give you a good overview of the large features of an area, but won’t show the minor details. You can distinguish between roads and the major rivers, but won’t be able to see the individual folds of a hillside or where isolated building are.
If you want to have some fine detail, but still have an overview of several kilometres at a time then something like a 1:50,000 scale map will be more appropriate. This will show contours, paths, major crags and some significant buildings but will also allow you to quickly scan across the next few hours of walking route without having to unfold/refold the map.
For finer detail and only looking at a small area at a time then a 1:25,000 scale map is about as detailed as you would want it to be. This will show individual boundary lines, smaller crags and rockfaces and areas of different ground vegetation and even bogs. It will also have A LOT of information and you may need to mentally ‘blank out’ the bits you don’t need to pay attention to so that you can focus on the relevant parts.
In the three photographs below I have placed the same compass on roughly the same line running west-east just north of Fort William. It shows the balance between having enough detail to navigate by and being able to see a larger area in one glance:[/vc_column_text][vc_single_image image=”10330″ img_size=”full” alignment=”center”][/vc_column][/vc_row][vc_row][vc_column][vc_column_text]
Contour Intervals
The ‘contour interval’ is the vertical gap between marked contour lines on the map. If a contour line reads ’90m’ and then the next one up the hill reads ’95m’ then the contour interval is 5m, and so on.
This matters when choosing a map scale as the contour lines shown can both give the navigator a lot of detail to navigate from BUT also provide too much detail and make things confusing. With that said, contour lines only show a broad trend in the shape of a landscape. Objects and lumps on the hillside that are smaller than the contour interval may not be shown. 5m is the height of a bungalow, which would be a significant obstacle to navigate around but it would not appear on a 10m-interval map.
For Ordnance Survey maps the contour interval of 1:50,000 scale is every 10m (vertically), and it can be either 5m OR 10m for 1:25,000 scale maps. For Harvey maps the contour interval is every 15m.
On the 1:25,000 OS maps that variance between it being either 5m or 10m for the vertical contour interval can be a little confusing – the deciding factor seems to be just how ‘lumpy’ the area covered is. If it’s more mountainous then the contour interval is more likely to be 10m, and for flatter, more gently rolling areas then it is more likely to be 5m.
The graphic below has two photos, each of the same ‘grid square’ (just west of Ruthin in Denbighshire). However, one photo (the left one) is from Explorer sheet 265 Clwydian Range and the other (right) is from sheet 264 Vale of Clwyd. Both are the same scale (1:25,000) and they overlap for a few kilometres in the are to the west of Ruthin and Denbigh. However – as you can see – there are two completely different contour intervals for that area, depending on which map sheet you are looking at.[/vc_column_text][vc_single_image image=”10328″ img_size=”full” alignment=”center”][vc_separator][/vc_column][/vc_row][vc_row][vc_column][vc_column_text]
How much detail do you need?
For any mapmaker there is a balance that needs to be struck between presenting information in a clear and relevant way and ensuring that the map is still usable. This isn’t just about scale, but also about choice of colour and symbols used to represent real-world features.
On the graphic below you can see the same area of the eastern flanks of Snowdon, particularly the area between Llyn Lydaw and Glaslyn.
The difference between the OS 1:50,000 and 1:25,000 mapping (left hand) is subtle, as the contour interval is the same and the colours are broadly similar. The most obvious difference is that the crags and rocky outcrop locations are more accurately mapped on the 1:25,000, and it would be possible to navigate from buttress to buttress.
On the right there are two versions of Harvey 1:40,000 scale mapping, the top one produced by the British Mountaineering Council (BMC) and the lower the Harvey standard mapping for the same area. Shading to denote bands of altitude/height really makes the ‘shape’ of the landscape jump out. It’s very clear on the upper (BMC) map, but it’s still quite apparent on the lower one.[/vc_column_text][vc_single_image image=”10332″ img_size=”full” alignment=”center”][vc_separator][/vc_column][/vc_row][vc_row][vc_column width=”1/2″][vc_column_text]
Do fences and boundary lines matter?
One significant difference between OS 1:25,000 and 1:50,000 mapping is the presence or absence of marked fencing and wall locations on the map. As these are static and almost always long-standing features of the landscape they CAN make excellent navigation aids. I have navigated to and from fence junctions numerous times, and they make great features for handrailing along when navigating between waypoints.
The three photos here show the same area of the north-eastern end of Llyn Gwynant and the hillside above. On the 1:50,000 OS map there are some significant feature but no fence or boundary lines marked. On the 1:25,000 Os map and the 1:40,000 Harvey map the fence running uphill from the river are clearly marked – although much more accurately on the 1:25,000 map. If I was navigating using the 1:40,000 map I could say that “there is a fence somewhere around here”, but if I was using the 1:25,000 map I could identify the fence and follow it uphill or downhill with confidence of my position at all times.[/vc_column_text][vc_btn title=”Sign up for our mailing list” color=”warning” align=”center” i_icon_fontawesome=”fa fa-envelope-open-o” button_block=”true” add_icon=”true”][/vc_column][vc_column width=”1/2″][vc_single_image image=”10331″ img_size=”full” alignment=”center”][/vc_column][/vc_row][vc_row][vc_column][vc_separator][vc_column_text]
More detail than 1:25,000?
There are other mapping scales on the market, but they are only readily available for certain areas of the UK, or through specialist suppliers. Harvey Maps include ultra-detailed 1:12,500 scale sections of difficult mountain areas on the reverse side of some of their 1:25,000 scale Superwalker series.
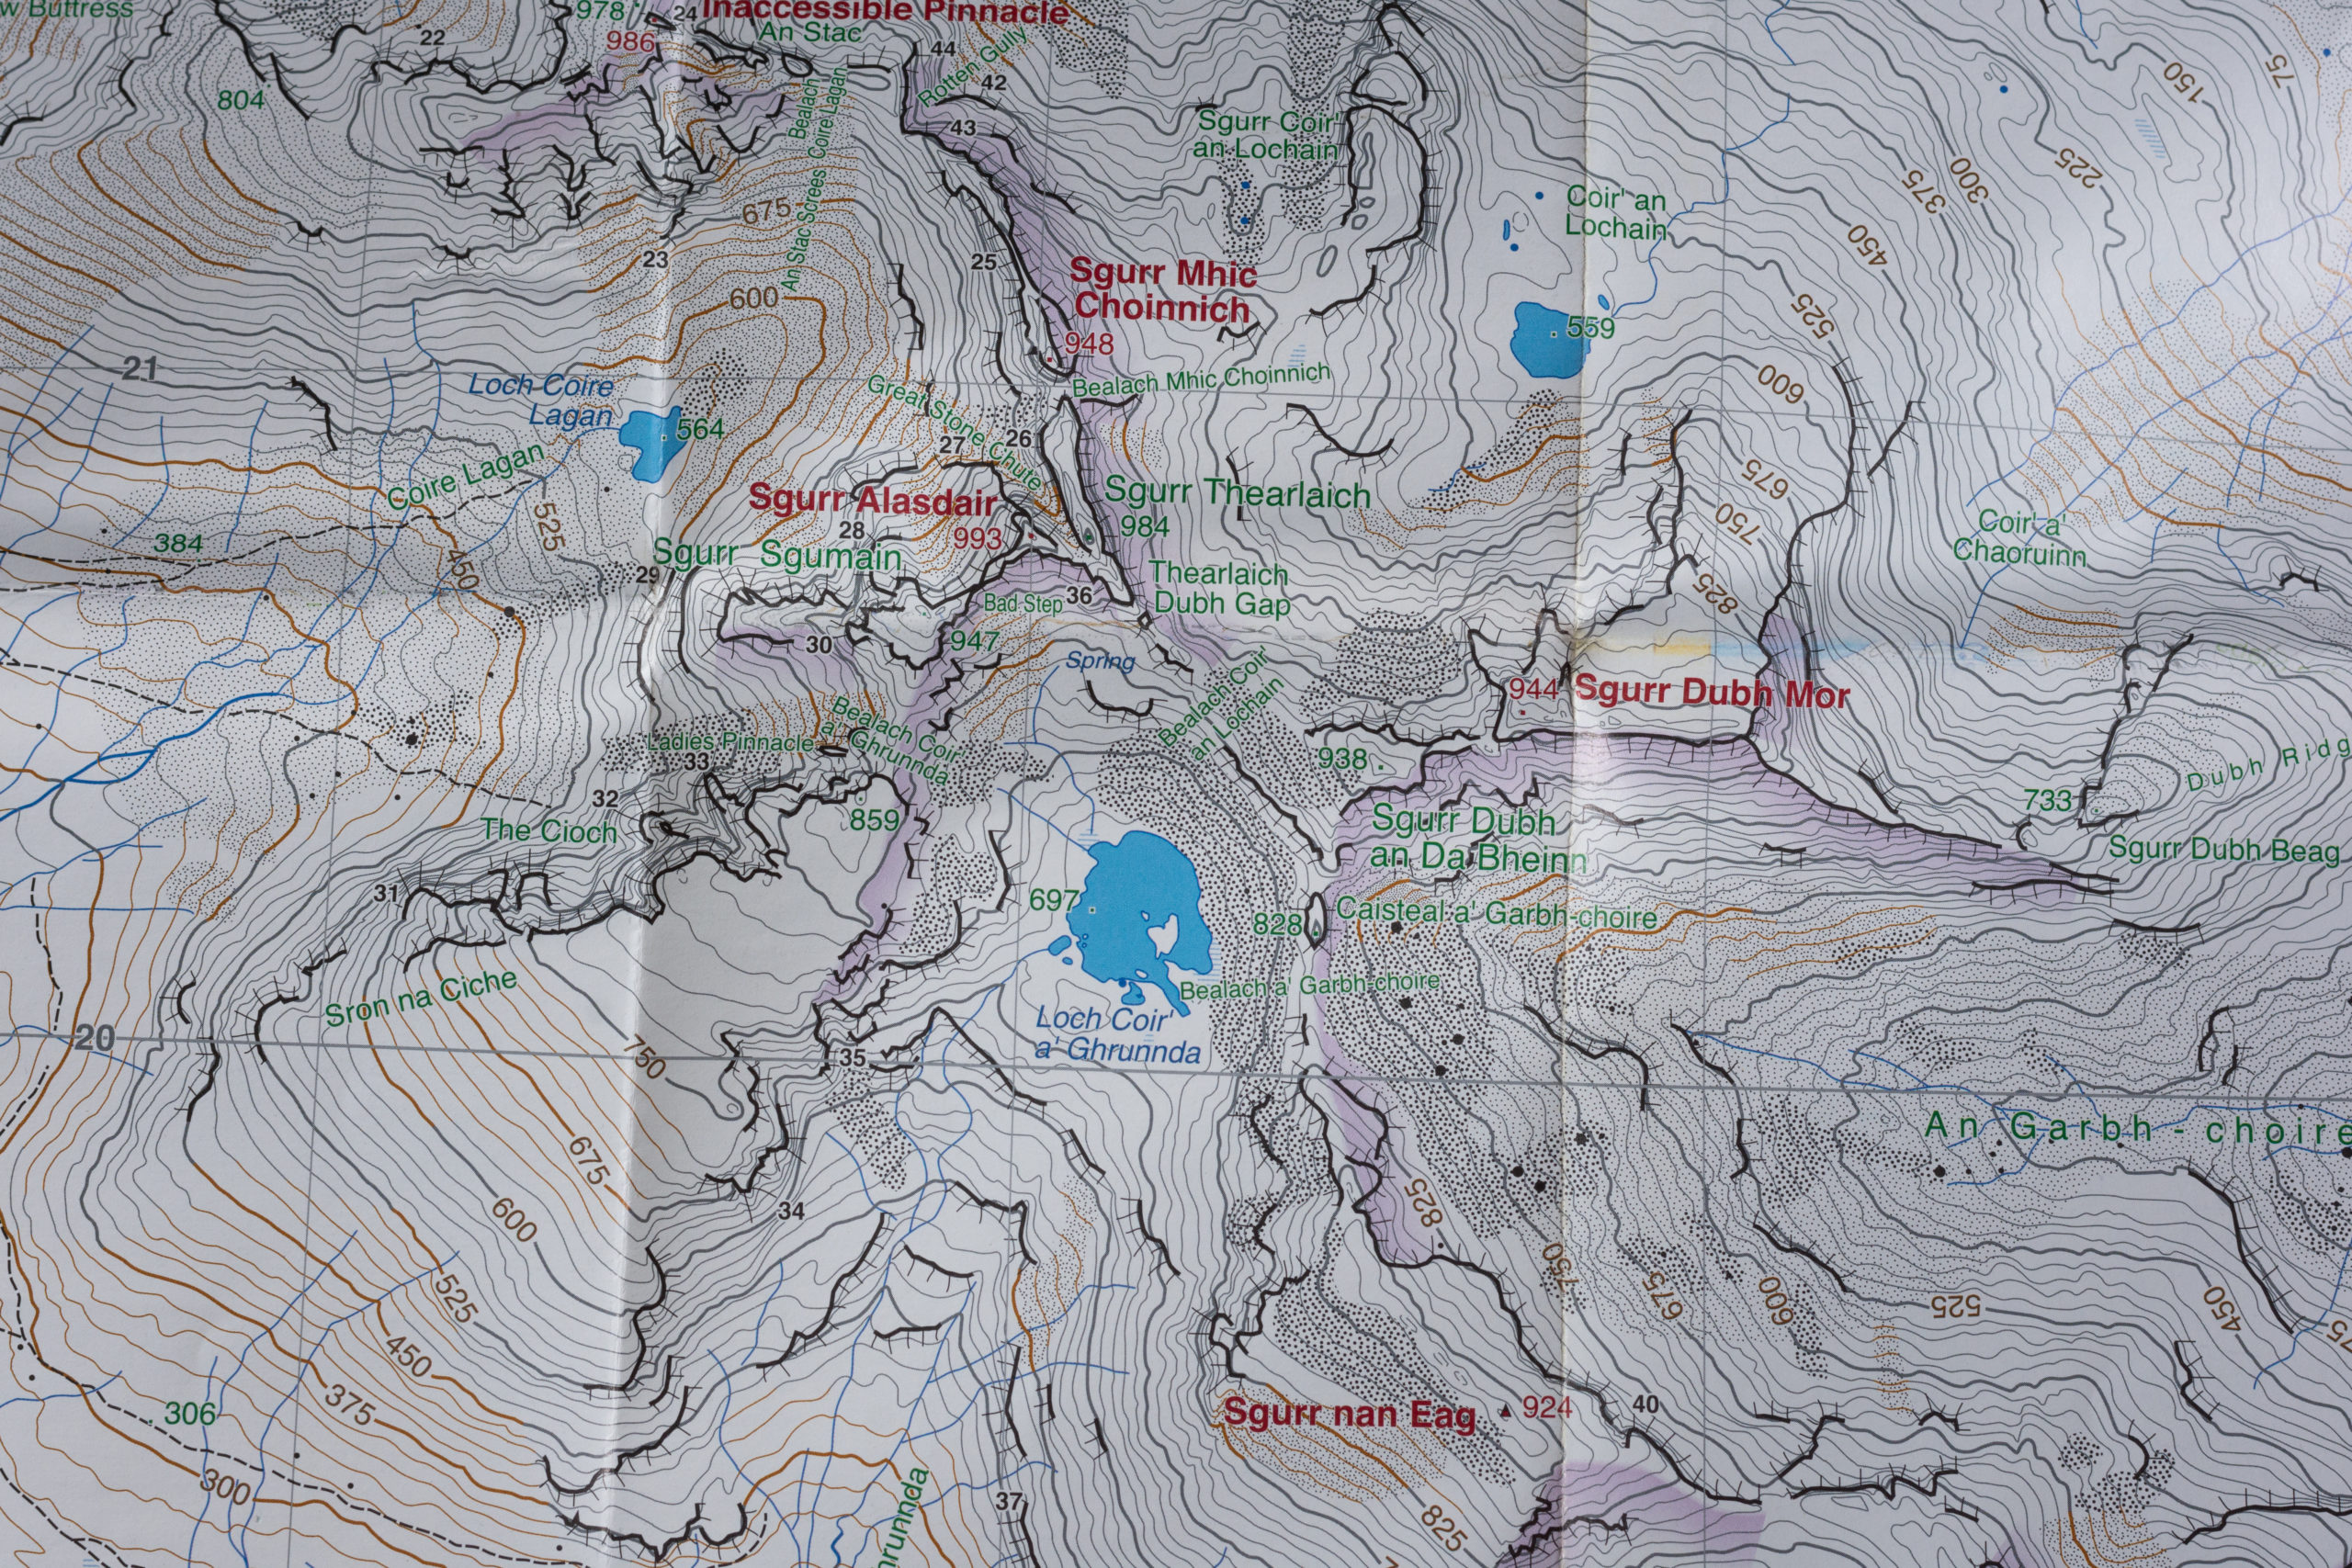
Below are three images of maps of the Cuillin range on Skye; the left one being the OS 1:25,000 map, the middle the Harvey Maps 1:25,000 and the right a cropped and zoomed shot of the relevant area of the 1:12,500 section. The three sections show the same terrain, but the 1:12,500 version is much easier to read. This can be critical when trying to navigate in poor visibility in very complex terrain, especially in places where the rocks are mildly magnetic and make compasses unreliable – like Skye!
[/vc_column_text][vc_single_image image=”10329″ img_size=”full” alignment=”center”][vc_separator][vc_single_image image=”10349″ img_size=”full” add_caption=”yes” alignment=”center”][vc_column_text]
So, 1:25,000 is the best because of the detail?
Maaaaaaaybe. I use Ordnance Survey 1:25,000 mapping for about 95% of the work I do in the UK, but there are times when I will use 1:50,000 – and that’s often in the winter.
Having extra detail and lots of features to navigate between is great for micro-navigation, but if half of those features are buried beneath a metre or two of snow then they aren’t much use – in fact, they are more of a hinderance. So when there is a thick blanket of snow on the ground I will often choose a 1:50,000 map as I am able to see the overall shape of the landscape. A blanket of snow will round off the sharp edges of a mountain and smooth out the crevices – all that is left is a broad curve, which is exactly what you see on a 1:50,000 map.[/vc_column_text][vc_column_text]
A matter of personal choice
In the vast majority of cases it won’t matter TOO much if you are carrying a 1;50,000 or a 1:25,000 map for the area – as long as it is up to date, waterproofed somehow and YOU KNOW HOW TO USE IT! 🙂
It matters most that the map shows enough detail for what you are planning to do, and that you know how to read it. If you feel that a 1:50,000 or 1:40,000 scale map has enough detail for the activity you are doing then it will be fine. If however you want to know the exact location of field edges or the a wiggle in a contour line then a 1:25,000 scale map will be more appropriate.
I use a mixture, using 1:25,000 for navigating when out on the ground, 1:50,000 for planning multi-day routes and mountain biking and other scales when necessary. I tend to use OS maps rather than Harvey Maps, but I think that is because I first learned how to read a map with a battered OS map, deep in the countryside and stumbling through muddy fields on Air Cadet camp weekends as a teenager. I know, and work with, quite a few instructors and outdoor professionals who will only use a 1:50,000 map, and it is expected that you be competent navigating off all of the common mapping scales if you undertake your Mountain Leader assessment or similar.
[/vc_column_text][/vc_column][/vc_row][vc_row][vc_column][vc_column_text]
Our UK Outdoor Navigation Courses
[/vc_column_text][product_category per_page=”12″ columns=”4″ orderby=”menu_order title” order=”ASC” category=”navigation-courses”][/vc_column][/vc_row]
- Published in All Blog Posts, Articles, Bushcraft General, EST Framework, Land Navigation, Navigation, Skills
Pacing, timing or ticking off – measuring distance when navigating on foot

[vc_row][vc_column][vc_column_text]
Pacing, timing or ticking off – measuring distances when navigating on foot
On our navigation courses we always end up coming around to the subject of distance. Indeed, it’s one of the ‘D’s of navigation and unless you intend to just stand still and survey the surrounding countryside you’ll need to deal with the problem of measuring distance both on the map and on foot at some point or another.
There are three ways that we cover in depth on the EST Framework navigation courses – ‘pacing‘, ‘timing‘ and the enigmatically named ‘ticking off‘. They each have their merits, but also a few drawbacks. Like pretty much every other navigational technique – they are just a tool in the toolkit, and it is up to you to select the right one for the right task.[/vc_column_text][/vc_column][/vc_row][vc_row][vc_column][vc_separator][/vc_column][/vc_row][vc_row][vc_column][vc_single_image image=”9983″ img_size=”full” add_caption=”yes” alignment=”center”][vc_column_text]
Pacing
When we talk about ‘pacing’ with regard to measuring distances when walking we’re actually talking about ‘double-paces’. A double-pace (DP) is just two consecutive walking strides – so if your first step is with your left foot forward then you would count every time your right foot hits the ground for your double-pace count.
When we’re relaxed and walking normally humans are quite good at maintaining a steady rhythm and stride length. This means that we can rely on that regular pacing to measure out distances along paths or across open ground with a reasonable amount of accuracy.
Measuring over 100m segments
If you know how many double-paces (DP) it takes you to walk 100m (mine is 60DP, but I regularly walk with people who could range between 55 and 75DP) then you can use that number to measure either multiples of 100m, or distances shorter than 100m.
So if I measure out a navigation leg as being 120m then it SHOULD take me 72DP to complete that distance (60DP for 100m then 12DP for 25m).
Keeping Count
When measuring out longer navigation legs there always comes a point where the number of double-paces (DP) you are counting out becomes a bit too much to keep track of – especially when you’re also trying to concentrate on a bearing or moving over rough ground. I try to keep pacing navigation legs as short as possible, and then count in ‘sets’ of 100m. So if I need to walk for 300m then I will count to 60DP three times, rather than trying to count to 180DP in one go.
Some people make use of counting aids, such as a row of beads on a length of paracord or even knitting and crochet stitch counters! I either use my fingers (at least 5 on each hand) or pick up the relevant number of rocks and throw one away every time I reach 100m.
Working out your Pacing
You need to find a 100m section of flat, easy terrain where you have clear markers at either end. Wear your normal walking boots, rucksack and clothing and walk as normally as you can from one end of your measured distance to another. Make a note of how many double-paces (DP) it took for you to get there, then turn around and walk back the other way. If all is going well then this number should be the same!
Do this another few times and take an average of the number you get to each time you complete 100m. This is now a number you can start to use to measure distances, but check it against other known distances to see if you have worked it out correctly.
[/vc_column_text][vc_row_inner css=”.vc_custom_1543437739038{background-color: #e5e5e5 !important;}”][vc_column_inner width=”1/2″][vc_column_text]
Good For…
[/vc_column_text][vc_column_text]
- Accurate measuring of distance for shorter navigation legs (less than 500m)
- Walking at variable speeds where stride length is roughly the same
- When accuracy of distance matters more than accuracy of speed
[/vc_column_text][/vc_column_inner][vc_column_inner width=”1/2″][vc_column_text]
Not So Good For…
[/vc_column_text][vc_column_text]
- Longer navigation legs
- Walking and talking at the same time
- Very steep or rocky terrain where regular pacing is impossible or lots of zig-zagging occurs
[/vc_column_text][/vc_column_inner][/vc_row_inner][/vc_column][/vc_row][vc_row][vc_column][vc_separator][/vc_column][/vc_row][vc_row][vc_column][vc_single_image image=”9982″ img_size=”full” add_caption=”yes” alignment=”center”][vc_column_text]
Timing
Timing is another accurate method of measuring distances when walking, but requires a bit more in the way of careful calculation and adjustment for different scenarios. It often works when pacing does not (longer distances, difficult ground) but in some ways it requires more mental energy.
Naismith’s Rule
William Wilson Naismith – Scottish mountaineer and founding member of the Scottish Mountaineering Club – developed a formula for calculating time over distances when walking in the mountains. It essentially says:
one hour for every 3 miles (5 km) forward, plus an additional hour for every 2,000 feet (600 m) of ascent
A slightly easier way of saying this is:
allow 12 minutes per kilometre, then add 1 minute for every 10m of ascent
The problem that may arise here is – what if you walk faster than 12 min/KM? Or slower? My own pace varies substantially either side of 5km/h depending on the terrain I am walking over, the load I am carrying and even how far I have to travel that day or the task I am completing.
Measuring your pace
As with working out your pacing – you need to find a length of easy, flat ground where you can measure against a known distance. Walk that distance (if you can find somewhere that is 1km or 500m long it will help with the maths) with your normal walking clothing and equipment and time it. Turn around and walk it again in the other direction. Do it at least 3 or 4 times and take the average. Work out how long it will have taken you to walk 1KM and make a note of this. Next – try it out against another set distance and see if you can predict how long it will take for you to complete it.
Ascent and Descent
As a general rule you add 1 minute for every 10m you will ascend within the horizontal distance (i.e. the distance you measure on the map). This accounts for both the extra distance of the slope and slowing down as you work harder to walk uphill. In some extreme cases (running etc) you may want to add in less than 1 minute for 10m, but generally speaking it’s best to adjust your horizontal pace and stick to 1min/10m of ascent.
When descending it’s often best to just stick to the horizontal (map-measured) distance and make no adjustments for the change in elevation. However – if the slope you are descending is very rocky, vegetated or steep then you might need to make an adjustment.
Calibrating for the day
Some people are happy to come up with a figure for their average pace and stick with it, but where possible I prefer to measure how quickly I am moving at the beginning of a trip then base my calculations for the rest of the trip on that figure.
So if I have, for example, a 500m section of flat-ish walking at the start of the day I will make a note of how long it takes for me to complete it then use that figure for my min/KM pace. If I walk that 500m in 4 minutes 30 seconds then it’s likely that I will be moving at 9 minutes per KM for the foreseeable future, and so on.
Next I will work out another short leg (less than 1km) and estimate how long it will take for me to complete it at that pace (still adding in 1 minute for every 10 minutes of vertical ascent).
So if I am walking at 9 minutes per kilometre, and in the next 800m on the map I will ascend 250m then my estimated travel time is going to be around 32 minutes and 12 seconds (7 minutes 12 seconds for the horizontal distance, and 25 minutes for the vertical ascent). If that estimated time is substantially wrong then something has gone wrong somewhere – if my calculations are correct then I need to adjust either the times for the horizontal or vertical distances.
Making Adjustments
The problem with using timing and average pace for measuring distance is that it relies on fixed figures in a world where there are a lot of variables. Dense vegetation, rocky ground and bogs/swamps can all substantially slow you down – and a stretch of unexpectedly good path or road can allow you to move much faster than expected. For these reasons you should always be ready to use another navigation technique such as a Catch Feature or Handrailing (see below) to make sure you spot any errors creeping in.[/vc_column_text][vc_row_inner css=”.vc_custom_1543437725664{background-color: #e5e5e5 !important;}”][vc_column_inner width=”1/2″][vc_column_text]
Good For…
[/vc_column_text][vc_column_text]
- Macro navigation or where accuracy matters less
- Walking along well-defined linear features such as paths or along fencelines
- Working out if you have enough time to complete a certain route/navigation leg
- Walking in a group where you want to be able to talk and not worry too much about counting
[/vc_column_text][/vc_column_inner][vc_column_inner width=”1/2″][vc_column_text]
Not So Good For…
[/vc_column_text][vc_column_text]
- Where high-accuracy is crucial
- When you are tired and mathematical calculations are harder
- Where the terrain constantly varies and establishing an average is difficult
[/vc_column_text][/vc_column_inner][/vc_row_inner][/vc_column][/vc_row][vc_row][vc_column][vc_separator][/vc_column][/vc_row][vc_row][vc_column][vc_single_image image=”9984″ img_size=”full” add_caption=”yes” alignment=”center”][vc_column_text]
Ticking Off
This isn’t often mentioned as a way of measuring distance, but if you think about it it’s possibly the technique you will use most often.
‘Ticking Off’ is the navigational term for the process of mentally noting features as you pass them on the ground. You can look at a map and say to yourself:
“OK, I’m going to walk along the edge of this field, cross over a boundary of some kind and then walk on the southern side of a small stream for about 300m. After that I will cross over another stream to the side, climb up a slope with 30m of ascent and then come out onto a plateau.”
That short story adequately describes the route ahead using map features that SHOULD be there on the ground, and you can use it to roughly measure distance. If you have crossed over the boundary of the field and are walking alongside the stream BUT haven’t yet come to the side-stream or the slope then you can at least narrow your position down to a 300m-long stretch of riverbank. And I am willing to bet that you would know if you were closer to the boundary or the stream crossing – so you can maybe narrow your position down to the nearest 150-100m.
Ticking Off is a very broad tool for measuring distance, but if you use it properly it will allow you to narrow things down to a rough area and create a ‘bracket’ of “I have passed this feature but haven’t passed this feature yet, so I must be somewhere between the two“.
Of course, this only works if the features you are looking for actually exist on the ground – fences move, streams dry up and sometimes there are just map errors.[/vc_column_text][vc_row_inner css=”.vc_custom_1543437706887{background-color: #e5e5e5 !important;}”][vc_column_inner width=”1/2″][vc_column_text]
Good For…
[/vc_column_text][vc_column_text]
- Terrain where there are lots of easily-identified features
- Linear routes along paths, rivers or fencelines where progress can be checked
- In good weather where position is important but high-accuracy isn’t
[/vc_column_text][/vc_column_inner][vc_column_inner width=”1/2″][vc_column_text]
Not So Good For…
[/vc_column_text][vc_column_text]
- Times where high-accuracy is important
- Where it could be easy to confuse similar features
- Where there are few definable features on the ground
[/vc_column_text][/vc_column_inner][/vc_row_inner][/vc_column][/vc_row][vc_row][vc_column][vc_separator][/vc_column][/vc_row][vc_row][vc_column][vc_column_text]
Catch Features
No matter which of the three techniques you use to measure distance – it’s wise to have a backup plan. The easiest way to implement this is to identify a ‘Catch Feature’ – something big and obvious that is just beyond the edge of your navigation leg that will immediately alert you if you have gone too far. It could be a fenceline, a river, an obvious change in slope angle (either uphill or downhill) or even a change in vegetation – the edge of a forest maybe.
This is something that you will need to identify on the map before you begin that navigation leg, and maybe even allow for when planning that section of the route. If getting your navigation planning wrong is going to put you in a dangerous situation it’s probably better to take a slightly longer route where any errors can be picked up and fixed straight away than to take the direct route and have errors go unnoticed.[/vc_column_text][/vc_column][/vc_row][vc_row][vc_column][vc_separator][/vc_column][/vc_row][vc_row][vc_column][vc_column_text]
So which is the best?
Pacing, timing and ticking off are all tools in your toolkit. Pacing has the highest accuracy in most cases, but only works well over shorter distances. Timing CAN be very accurate, but you need to put in a lot of work to get there and it’s easy for error to creep in. Ticking Off can work very well, but unless you are stood at the junction of two linear features it’s difficult to be very accurate with it.
Both Pacing and Timing seem to have about 90% accuracy – i.e. you are going to have an error of about 10% each time you use it, even if you are doing it well. 10m of error on 100m is fine, but 50m over 500m can be significant and make the difference between finding the safe descent route or walking off a cliff. No matter which technique you use it’s wise to use i tin conjunction with another navigation tactic – aiming off, a catch feature or even just feature recognition.
Over the course of a navigation-intensive mountain day I will probably use Ticking Off for 80% of the route, Timing for 18% and Pacing for maybe 2% – but that 2% might be the most critical part of the day, such as finding my way from the summit to the correct edge of the plateau for the path I want.
[/vc_column_text][/vc_column][/vc_row][vc_row][vc_column][vc_column_text]
Our Navigation Courses
[/vc_column_text][product_category per_page=”12″ columns=”4″ orderby=”rand” order=”ASC” category=”navigation-courses”][/vc_column][/vc_row]
- Published in All Blog Posts, Articles, Bushcraft General, EST Framework, Land Navigation, Mountain General, Navigation, Skills, Survival
The Six-Bundle Fire Lay

[vc_row][vc_column][vc_column_text]
The Six-Bundle Fire Lay
A stick-bundle method of lighting a fire
This fire lay requires six bundles of dry, straight dead wood and a good ignition source. It relies on good airflow at the beginning, and the fire lay ‘collapsing’ in on itself in the later stages to ensure a good bed of coals and ash to cook over.
It is also a good option for making a ‘One Match Fire’.
The thickness of the wood in each bundle increases as the fire develops, staring with match stick-sized twigs, moving through pencil-sized ones and finally finger-sized branches.
This is one of the first ways we teach new clients to arrange kindling and fire wood for a simple, reliable camp fire. It works particularly well in the areas we use to run training courses (mature Western Hemlock Spruce woodland) where there is an abundance of dry and easily-accessed materials that works particularly well with a stick-bundle fire lay. It would also work with dry/dead-standing Birch branches and some other straight, small branches.
This video is part of the training materials given to clients participating in training courses under the EST Framework
Learn more at:
OutdoorProfessional.co.uk
[/vc_column_text][/vc_column][/vc_row][vc_row][vc_column][vc_video link=”https://youtu.be/aQLeFTp6x9Y” align=”center”][/vc_column][/vc_row][vc_row][vc_column][vc_column_text]
Some of our North Wales and UK Bushcraft Courses
[/vc_column_text][product_category per_page=”12″ columns=”4″ orderby=”rand” order=”ASC” category=”bushcraft-courses”][/vc_column][/vc_row]
- Published in All Blog Posts, Articles, Bushcraft, Bushcraft General, Camping, Emergency and Safety, EST Framework, Firecraft, Skills, Videos
Extreme Low Tide Foraging – How to find the lowest tides

[vc_row][vc_column][vc_column_text]
Extreme Low Tide Foraging
How to find the lowest tides on the UK coastline
Extreme Low Tide foraging is becoming popular and one of the increasingly common requests we get for a private coastal foraging course over here in North Wales. It’s easy to understand why – when all of the most interesting and edible parts of the beach are under the water for part of every day then there’s a lot more to see when the water has retreated to its lowest point.
The UK is home to one of the biggest tidal ranges in the world – the Severn Estuary can have a difference of as much as 15m (49ft). The tidal range of one particular spot can be dependent on several factors, ranging from the shape of the bay, inlet or estuary where the range is being measured to the underwater geology and topography, and even the direction it is facing relative to the prevailing winds.
You don’t have to travel far to see a big difference between tidal ranges – the average tidal range in Colwyn Bay is about 8.5-9m whereas the range at Barmouth (only 42 miles away as the crow flies) is more like 4.5-5m. So a small building’s worth of difference in tidal range then![/vc_column_text][/vc_column][/vc_row][vc_row][vc_column][vc_single_image image=”9909″ img_size=”full” alignment=”center”][vc_column_text]A comprehensive and very complicated diagram courtesy of this Wikipedia page.[/vc_column_text][/vc_column][/vc_row][vc_row][vc_column][vc_column_text]
Why Tidal Ranges are important to the coastal forager
When looking for wild edibles on the UK coastline the REALLY good stuff spends at least part of its life under the water – the edible seaweeds, molluscs, bivalves and gastropods and of course the fish and crustaceans. As the tide drops away (the ebb) then some of these species are left stranded on the rocks and the sand of the intertidal zone (the area between the high tide and low tide marks). This makes them easy to gather (as long as you’re doing it safely, legally and responsibly) and identify, and is also safer than wading around in deep rock pools and crashing waves!
For most of the UK the tidal period is around 12 hours and 25 minutes – the period between each high tide. The UK has what is known as a semi-diurnal regime – meaning that there are usually two high tides and two low tides every day. Other regions may only experience one tidal cycle in a 24hr period, such as happens in the Guld of Mexico.
This semidiurnal regime gives the forager on the UK coastline two chances of reaching that intertidal zone on foot, although for a good part of the year only one of those chances is going to be in daylight hours!
Predicting the tides
Understanding the local tidal cycle is very important to anybody working or exploring that intertidal zone, whether it’s on land or in a boat. Fortunately – it has never been easier to access that information. There are multiple reliable websites, smartphone apps and other resources that help give reasonably accurate forecasts for the tidal cycle for any given location along the coast:
- Tide Charts/Books – These are the more traditional way of predicting a tidal cycle, and are usually sold for a 12 month period and are specific to a region of the coast. They give the tidal forecast for one specific, accurately measured location in that region (Liverpool is the spot for the North Wales tidal charts) and then a list of adjustments that you need to make for another location in the region. The ‘High Tide’ does not hit all locations along one stretch of coastline at the same time, and there can be a differenc eof several hours between one location and another.
- Tidal Forecast Websites – There are several websites that not only give reasonably accurate forecasts for a given location (usually based on popular locations like coastal towns or tourist beaches) but also give you a visualisation of that tidal cycle. Most websites only give you a forecast of up to 14 days from the current date, but some offer a premium service where you can get more detailed longe-range forecasts of the tidal cycle.
- Smartphone Apps – These are often associated with tidal forecast websites mentioned above, or at least make use of the same data. Again – they may only give up to 14 days of forecast and might be limited on locations. There are also several that I have found to be very innacurate for some locations – it’s worth checking against other sources of information before you start relying on one app or website
- Local newspapers – Many local papers for coastal regions still publish the local tide times for the coming week
- Local information boards – Many harbours and council-owned beach areas have information boards with the local tide times published somewhere.
The published tide tables I use for North Wales and Anglesey are here (Amazon link) and I often use a combination of these two websites for free online tidal predictions:
TideTimes.org.uk
Tide-Forecast.com
A strategy of using a combination of printed tide tables and online sources is probably wisest – I have the printed set in my truck and use it if I want to quickly plan a spontaneous trip to the shore.[/vc_column_text][vc_column_text]For the UK specifically there is an excellent set of FAQs and diagrams on the National Tidal And Sea Level facility here.[/vc_column_text][/vc_column][/vc_row][vc_row][vc_column][vc_column_text]
How Tides Work – a video explanation
I did consider doing our video on how tides work to help explain this point further – but then I discovered that BrainStuff had already produced on, at least a 1,000 times more interesting and concise than my ramblings would have been.
This video runs through how tides work, has a great visualisation of the ‘bulge’ of water created by the gravitational pull of the moon and a little more on the tidal cycle.[/vc_column_text][vc_video link=”https://youtu.be/5ohDG7RqQ9I” align=”center”][vc_column_text]
How Tides Work – a simple explanation
There are several factors affecting the cycle of tides on our planet, but the simplest way to think of it is to associate the tidal cycle with that of the moon in orbit around us. Imagine a ‘bulge’ of water being pulled out from the surface of the Earth towards the moon. As the earth rotates that ‘bulge’ of water can be seen by the fact that the sea ‘moves’ a little further up the shore. When the bulge disappears (i.e. moves away to another part of the Earth) it seems like the water level drops.
There are actually TWO ‘bulges’ of water, one directly under the moon and another on the opposite side of the Earth. This is where the rotational force of the moon and the Earth comes into play – the common centre of mass between the Earth and the moon isn’t in the centre of the Earth, but at a point a little clsoer to the moon.
This rotational force also has an effect on the ‘bulge’ of water, creating a second one on the opposite side from the one ‘under’ the moon.
As these two imaginary (but helpful for visualisation) ‘bulges’ pass by your area of coast then you will experience a cycle of the water rising, then receding as they come and go.
Hang on, do I need to know all of this???
Yes, I know this isn’t particularly clear AND an oversimplification, but you reach a point with trying to understand tidal cycles where your knowledge of orbital physics and rotational geometry becomes more important than your knowledge of edible coastal species.
So for the coastal forager and hunter there are a few key things you need to understand and be aware of:
- Tides are predictable and run in cycles, but gradually change from day to today, and can be very different in locations that aren’t THAT far away from each other
- There are several sources of information that will give you the tide times and ranges, but you need to be able to read them AND make sure that you are looking at the right date and location as it can make a big difference
- The tidal range changes throughout a month, and there are other factors that can affect how high or low a tide will be. Local knowledge is incredibly useful, and it is worth learning about the variables in your local area.
[/vc_column_text][vc_single_image image=”9911″ img_size=”full” alignment=”center”][vc_column_text]
The Extreme Low Tides – AKA the Spring Tides
This is the term that has started to become popular for the point in the tidal cycle where the low tide is as far down the beach as it is likely to be. More properly it is known as a ‘Spring Tide’, and occurs twice per month.
Despite the name, Spring Tides have nothing to do with the season between Winter and Summer, but probably have something to do with the way the water seems to ‘leap up’ at high tide.
Maybe.
They do occur on regular cycle, usually a day or two after a full moon OR new moon.
Why do Spring Tides happen?
If we go back to the simplified-but-helpful idea of there being two ‘bulges’ of water moving around the earth (‘under’ the moon and on the opposite side of the earth) then we can start to work out why Spring Tides occur.
The sun also has an effect on the mass of water on the surface of the earth, but much less than that of the moon. However – when the sun and the moon ‘line up’ relative to the earth then the effect of both of these bodies creates a bigger ‘pull’ than normally experienced. This happens twice per lunar month (which is approximately 29.5 days), and the noticeable effect on the Earth is that the ‘bulge’ of water is bigger/higher than at other times in that cycle. As the mass of water on the surface is largely unchanged then as more water is ‘pulled’ towards the Moon/Sun then the low tide in between the high tide will be as low as it can get – the water has gone away into the ‘bulge’ as it moved elsewhere.
This occurs a day or so AFTER a full moon or new moon, as it takes some time for the mass of water to ‘catch up’ with the gravitational forces.
Basically – when the sun and moon align there’s a bigger pull on the sea than normal, raising it slightly higher and further up the beach. Halfway between the ‘High Tides’ we get a the ‘Low Tide’, and during a Spring Tide the lowest point of the tidal range is as about as low as it can get – this, of course, is the really interesting part for the forager.[/vc_column_text][vc_column_text]
Predicting the Extreme Low Tides
As there is a regular, predictable tidal cycle it is easy enough to predict when that extreme low tide event will occur. It will be roughly 6 hours BEFORE or AFTER the highest point of a Spring Tide, and local factors (shape of the coastline and underwater features) will affect which one of these two low tides will be the lowest.
You can see it on tidal forecasting websites that show the next period of tidal cycles as a ‘wave’ diagram. You will see that the height difference between the ‘peaks’ of the wave and the ‘trough’ or ‘dip’ between those peaks changes from day to day. When the difference is greatest you are probably looking at the Spring Tide, and when the difference is at its least then you have the Neap Tide.
In printed tidal charts you can look to see the relative height of the high tide – normall listed in metres. When it is at its highest number then you are again probably looking at a Spring Tide. Some tidal charts will have a symbol or letter next to that Spring Tide, or have other information that help you calculate it for your area.
[/vc_column_text][vc_column_text]
What About Neap Tides?
Neap Tides are simply the points halfway between the Spring Tides, when those lunar and solar forces cancel each other out. During a neap tide the high tide won’t be very high, but the low tide won’t be very low either. The tidal range for any location is at its lowest during a neap tide.
[/vc_column_text][vc_column_text]
The Neap/Spring Tidal Cycle
Within a lunar month (29.5 days-ish) you will usually find two Spring Tides and two Neap Tides. The cycle might look something like this:
Spring Tide > 7 Days > Neap Tide > 7 days > Spring Tide > 7 Days > Neap Tide > 7 Days > Spring Tide
So if you have just experienced a Spring Tide, with the extreme low tide that a forager is looking for, then you will have to wait roughly 14 days until the next one. This is of course dependant on several local factors AND the fact that the tidal cycle doesn’t exactly line up with a set of 24hr periods.
[/vc_column_text][vc_separator][vc_single_image image=”9914″ img_size=”full” add_caption=”yes” alignment=”center”][vc_column_text]The above diagram shows the tidal cycle for roughly one month. Each ‘wave’ peak or trough on the chart represents one tide, with the ones under the line being low tide, and the ones above being the high tides. You can clearly see the two Spring Tides either side of a Neap Tide.[/vc_column_text][vc_separator][vc_column_text]
The Other Factors that affect Tide Height
I keep mentioning ‘other factors’ that would affect how high (or low) any given tide might be, and it’s probably worth exploring that a little further.
The Wind
A strong wind blowing onto the shore can prevent the water from being able to move away as the tide recedes, and in narrow estuaries or coves this effect can be magnified. There is a term sometimes used – “wind over tide” – which refers to times when the wind and the tide are moving in opposite directions. This is particularly dangerous for anybody trying to broach the surf or head out to sea as the wavelength (gap between waves) is much shorter than normal and they can ‘stack up’ on each other. For the forager it can mean that the carefully-planned excursion to the beach to take advantage of the low water of a Spring Tide is scuppered by a strong onshore wind pushing the water further up the beach than expected.
Coastline Shape
Coves, narrow inlets and estuaries can trap water and hold it for longer than the area of coast either side if there is a narrowing or other restriction stopping the water from draining out as the tide recedes. This can be worsened by fresh water draining into a bay or estuary, ‘filling up’ the bay as the sea tries to drain away on a falling tide. Heavy rain somewhere inland combined with a Neap Tide can actually make for an almost negligible tidal range in some places along the North Wales coast – the water from the river fills up the estuary nearly as quickly as it drains away.
[/vc_column_text][vc_column_text]
So what if I can’t wait for the Spring Tide?
If for some reason you are incredibly impatient (or, more likely, you’re only on the coast for a short period and it doesn’t align with the Spring Tides) then there are a number of options open to you. However I must stress that buggering around in even very shallow water can kill you, or at least cause serious injury. Rocks are slippery below the high water mark, they can have hidden holes or openings that can trap legs (or cause you to slip and break something) and the mud of estuaries and shallow bays can entrap you or leave you stranded on a rapidly shrinking sandbar. It’s worth taking care and planning any in-water foraging very carefully.
It SOUNDS like I am being over cautious – but if you want to hear more have a word with your local RNLI or HM Coastguard teams and see if they thing the waters edge is a perfectly safe place to be…
- Snorkeling – I have happily foraged for very fresh and healthy seaweed and had my pick of the edible molluscs,bivalves and gastropods just below the low water mark by snorkeling along with a netted bag in one hand, carefully selecting as I go. This only works in calm and clear-ish waters, but if your wetsuit is up to it and you can handle the cold you can forage on the UK coast year-round. This works best on rocky beaches or areas where there is a sudden change in water depth at the low water mark (otherwise you end up beaching yourself on the bottom most of the time).
- Waders – these are cheaper than ever and there are plenty to choose from. I like these neoprene ones from Bison, but they aren’t the toughest and have a few patches and repair marks. There is a perpetual myth that if you fall into water wearing waders they will ‘drag you to the bottom’. This isn’t quite true, and I have succesfully swam in waders with a ‘swim belt’ several times – but if they do fill with water then it makes it almost impossible to clamber back onto a rocky ledge or a ladder due to the extra weight. They’re only suitable for use up to about knee depth if you want to stay safe – and they can still get snagged or trapped on underwater hazards.
- Bare legs and wading – this is essentially the same as wading in with waders, except without the waders. The water temperature can be tolerable for most of the year, but the real hazards come from your unprotected legs (and maybe feet if barefoot or in sandals) either being injured by sharp rocks (or fishing tackle, or broken glass) or from interacting with something stingy or sharp that dwells in the water – probably jellyfish or the lovely Weever fish.
If you want to make the very most out of any coastal foraging excursion then I strongly recommend just arriving during a falling (ebb) tide, at least 2-3hrs before low tide, and following the water as it receds. This way you find things that have only just been stranded by the receding water and more likely to be healthy and better for collecting.[/vc_column_text][/vc_column][/vc_row][vc_row][vc_column][product_category per_page=”12″ columns=”4″ orderby=”menu_order title” order=”ASC” category=”foraging-courses-uk”][/vc_column][/vc_row]
Can you eat mussels straight from the beach?

[vc_row][vc_column][vc_column_text]
Can you eat mussels straight from the beach?
Richard Prideaux looks at the dangers from eating wild and foraged mussels
When you teach people about foraging and ‘wild food’ you often run the risk of sounding negative or over-cautious about the potential hazards that come from eating shellfish, or fungi,or whatever else it is that you are solemnly warning people about. I do this with good reason – people are paying to attend on of our North Wales foraging courses to learn more about the subject, and I have a duty of care towards them as an instructor, and just as a (mostly?) decent human being. That said – there IS a difference between laying out the potential risks and telling somebody that they shouldn’t/can’t do something.
One of the areas where this is most apparent is in the realm of coastal foraging, and particularly the business of finding, gathering and eating edible mussels (usually Mytilus edulis). It’s one of the most anticipated section of the entry-level coastal foraging courses – the moment where I start talking about the culinary wonders of this grey bivalve. It starts off well, discussing byssal threads and the ethical issues of harvesting mussels (minimum landing sizes and so on) but as soon as I start to discuss the potential dangers the mood changes and the once-confident mussel foragers look increasingly alarmed.[/vc_column_text][/vc_column][/vc_row][vc_row][vc_column width=”2/3″][vc_column_text]
So, what are the dangers of eating wild mussels?
The first thing we need to get out of the way here is that there is an element of risk involved in eating EVERYTHING. That’s food from supermarkets, served to you in restaurants, grown in your own back garden or picked from the soil or plucked from a rock somewhere on the Snowdonia coastline. Improper handling, preparation and sometimes just bad luck all have a role to play and we can never guarantee that our food is ‘safe’. There are a few very good reasons why wild shellfish, and particularly bivalves, have a reputation for potentially being ‘dodgy’.
There are several interesting and diverting ways in which they can nobble you:
- Paralytic (PSP), Amnesiac (ASP), Neurotoxic (NSP) and Diarrhoetic (DSP) Shellfish Poisoning
- Viruses (particularly Norovirus, aka the Winter Vomiting Virus)
- Bacteria (such as E Coli)
- Parasites (lovely things like Cryptosporidium parvum)
- Heavy metal and chemical contamination
- Allergies and other physiological disagreements
Blimey. Why would you even bother eating foraged mussels?
The really scary ones above are the various Shellfish Poisonings. They are caused by algal blooms, which can develop in both salt and freshwater. As mussels feed by filtering nutrients from seawater they can also accumulate the toxins from any algal blooms that have developed in the water around them. Paralytic Shellfish Poisoning (PSP) is the one that tends to get most of the attention when discussing the hazards of eating mussels, and it’s not just human foragers that need to be careful – there have been several cases of dogs dying or becoming ill from eating dead crustaceans or shellfish contaminated in this way.
The two methods relied upon in commercial supply (see below for more detailed explanations) – depuration and cooking – remove some of these contaminants and organisams, but not all. Depuration does not work well with viruses and some algal toxins, and cooking only kills bacteria, viruses and parasites.[/vc_column_text][/vc_column][vc_column width=”1/3″][vc_single_image image=”9187″ img_size=”medium” alignment=”center”][/vc_column][/vc_row][vc_row][vc_column][vc_column_text]
So what about the ones in shops and restaurants?
An excellent question, and one that does need some explanation.
There are plenty of areas along the British coast that are famed for their mussels, and you can find these locally-sourced delicacies on the menus of most of the restaurants nearby (and often further afield too). They are indeed ‘grown’ in the sea, in the same waters where you might be foraging for them yourself. They are often farmed on ropes, being carefully selected for size and health and harvested in a sustainable way – in waters that are regularly checked for cleanliness and contamination.
Water that is graded as being suitable for ‘immediate human consumption’ is designated “A” status. Anything from water with “B” grading needs to be depurated for no less than 42 hours, “C” grade shellfish must be relaid in cleaner waters in the hope of removing impurities and “D” grade water is pretty hopeless (and indeed may actually be on fire…).
So the mussels you will find in restaurants or shops in the U.K. will have either been grown in A or B-grade waters, and probably have been through a process of depuration in either case.
Depuration
Depuration, the process of removing impurities, for mussels is usually done by placing them in a tank of clean seawater that is then itself circulated through a filtration and purification system. As the mussels sit in the continually-cleaned water they gradually lose any impurities that they may have acquired.[/vc_column_text][/vc_column][/vc_row][vc_row][vc_column][vc_column_text]
IS it safe to eat mussels I have foraged from the shore then?
Well… maybe. It depends on what you mean by ‘safe’. If you want a firm guarantee that the mussels that you have just plucked from the rock are free from toxins, viruses, bacteria, parasites, unwanted chemicals and everything else then you won’t get one. But if you want to be able to reduce the risks of eating foraged mussels (and indeed, lots of other coastally-harvested wild foods) then there are fairly simple precautions you can take (see below).
Just remember – a LOT of effort has gone into making sure that the ‘wild’ mussels served to you on a plate on the Menai Straits or from the Fowey estuary are ‘clean’ and safe for human consumption. Just because they are the same species and growing on roughly the same section of British coastline doesn’t mean that the ones you can (legally and ethically) harvest from the beach are “just the same”.[/vc_column_text][/vc_column][/vc_row][vc_row][vc_column][vc_column_text]
Reducing the risks in foraged mussels (and other things too)
There are a couple of oft-repeated ‘rules’ attached to mussels with regards to cooking and eating them:
- Avoid gathering them in months without an ‘R’ in them (May-August)
- Throw away any that do not open after cooking
The first rule is sometimes dismissed as being a piece of general guidance dating from a time when refrigeration was non-existent, and transporting mussels from shore to city was unwise in the hot summer months. This is, like many overly-simple explanations, complete cobblers. A much more sensible reason for avoiding shellfish during the height of the summer months (in the northern hemisphere anyway) is that this is the peak season for algal blooms, and also the time that many species are most active in their feeding – so if you avoid the summer there is a lower chance of eating something that is contaminated with a toxin.
The second rule I will come to later, but scientific research suggests that the generally-accepted belief that a mussel that does not open after being cooked is not necessarily a sign of it being unhealthy/contaminated/dead, nor that a mussel that opens up fully after being cooked is indeed healthy.
There are several simple steps that you can take to reduce (but not completely remove) the risks of eating foraged mussels:
- Avoid the summer months (see above)
- Pay attention to local news, particularly with regards to algal blooms, water contamination, and stories of unexpected illness from eating seafoods of all types
- Check the noticeboards that are displayed at harbours and access points for notifications of contamination – particularly algal blooms or chemical spills
- Avoid harbours and marinas, areas with heavy marine traffic and places where sewage (even treated) flows into the water
- Avoid picking mussels after periods of heavy rain where contaminants from the land may have been washed onto the shore
- Avoid the outflows of old mines and industrial sites (particularly Cornish tin mines etc)
- Scrub mussels under running clean water to remove barnacles etc
- Cook mussels as soon after picking as possible (and cook them well – but this still does not remove the toxins from algal blooms)
- Do not eat any mussels that do not open fully after cooking (but read this article too)
All of the above are fairly simple and aren’t that restrictive for the forager. There are also ethical and legal issues to consider – a minimum landing size (MLS) for mussels is something you will need to abide to in most cases (usually 51mm but check for your area).The Welsh Government has several useful links on this page – most apply to commercial fishing but it does show that there is a world of legislature that is attached to what may be seen as a very simple and innocent act. There is, at the time of writing, a ban on collecting mussels from the Conwy Estuary and other temporary restrictions may be in place for your area.
[/vc_column_text][/vc_column][/vc_row][vc_row][vc_column][vc_single_image image=”5318″ img_size=”medium” alignment=”center”][/vc_column][/vc_row][vc_row][vc_column][vc_column_text]
Final words of advice
This post does sounds a little bit pessimistic, but the facts cannot be argued with – shellfish can harbour some fairly nasty organisms, toxins and chemicals. Some of these are probably present in every wild mussel (E.Coli for example) but can be easily removed by cooking. Others are much less common (such as algal blooms) but their impact can be much more severe and are almost impossible to get rid of in the cooking process.
If you are sensible about where you collect mussels from, when and how you cook them then you will probably be safe – in fact the most hazardous part of your foraging trip will be the drive there and back. Like every foraging activity though you need to be aware that it is potentially hazardous, and that recognising and reducing those risks is as important as identifying the edible species in the first place. [/vc_column_text][/vc_column][/vc_row][vc_row][vc_column][product_category per_page=”12″ columns=”3″ orderby=”menu_order title” order=”ASC” category=”foraging-courses-uk”][/vc_column][/vc_row]
- Published in All Blog Posts, Articles, Bushcraft General, Foraging, Gather, Shellfish
Why is foraging still so popular in the U.K?

[vc_row][vc_column][vc_column_text]
Why is foraging still so popular in the U.K?
For a decade our foraging and wild foods courses are filled – but why?
My name is Richard Prideaux, and I am a forager.
It’s not much of a confession really – through Original Outdoors I have been leading foraging courses and walks for a decade or more, as well as working as a supplier of foraged plants from a local organic estate and working with chefs and restaurants to find new ways to use wild plants, fungi and lichens in dishes served to the most discerning of clients. It is safe to say that a large part of my working life outdoors has been linked to foraging and wild food, even if peripherally on our bushcraft courses. But none of that would have been possible if there hadn’t been such a demand for information and training in this ancient activity – so with shops and food suppliers all around us, why is there such a cultural draw towards edible plants and fungi?
I have two theories on this, and they require a little unpacking. They may also be complete cobblers, but allow me to explain…[/vc_column_text][/vc_column][/vc_row][vc_row][vc_column width=”1/3″][vc_single_image image=”7768″ img_size=”medium” alignment=”center”][/vc_column][vc_column width=”1/3″][vc_single_image image=”7772″ img_size=”medium” alignment=”center”][/vc_column][vc_column width=”1/3″][vc_single_image image=”7769″ img_size=”medium” alignment=”center”][/vc_column][/vc_row][vc_row][vc_column][vc_column_text]
The TV Chef
The first is what I call the ‘Fearnley-Whittingstall Effect’. Hugh Fearlessly-Eatsitall is inextricably linked with the long-running cooking, downsizing and Dorset-promoting stable of TV shows, books, courses and eateries bearing the ‘River Cottage’ name. The first series (River Cottage) was broadcast in 1999 and featured Hugh (Ferrously-Washinghaste) embark on a life living in a gamekeeper’s cottage in the grounds of Slape Manor near Netherbury, Dorset – growing vegetables, raising livestock and trying the life of a smallholder. There was an emphasis on barter-economies, food as payment and self-sufficiency where possible in the narrative of the show. Subsequent series expanded into the wider world of smallholdings and downsizing leading to the River Cottage empire as it stands today. It is pretty undeniable that River Cottage was the big break for Hugh Ferretingly-With…(OK, I’ll stop now I promise) and led to his rise as a campaigner for everything from sustainability within the fishing industry to highlighting the standards and conditions of commercial poultry-rearing. Hjs profile and brand has genuinely done some good, and I remain a firm fan. But River Cottage wasn’t his first TV escapade – that came several years earlier in the form of A Cook on the Wild Side.
This was a wild food-adventure in two parts, the first being a tour of the countryside in a converted Land Rover (the Gastro-Wagon), hunting for and cooking edible plants, fungi and protein in the feathered, furred, finned and shelled form. This was broadcast in 1995, with the second series moving to a narrow boat cruising the waterways of Britain. This is where I think the Fearnley-Whittingstall Effect began, not with River Cottage. When I speak to clients and interested folk about foraging in the U.K, and particularly on television, A Cook on the Wild Side does seem to have found it’s way into the group consciousness about foraging but is often confused as being part of a River Cottage series. I think the second-life that TV shows have online as YouTube clips has no small part to play in this, and you can find most of the series online in some form or another. It’s over 20yrs old at this point, but the content all holds up and the accompanying recipe book is still on our list of recommended foraging books.
Hugh Fearnley-Whittingstall was obviously not the first person to really popularise foraging in the U.K. – my personal belief is that honour goes to Richard Mabey and his seminal Food For Free, first published in 1972 but the very first book I pull out of the bag when I talk about foraging field guides. His work came at exactly the right time, coinciding with the birth of the sustainability movement and the post-hippy ‘hobbitification’ of the British countryside by downsizers, small-scale farmers and those seeking The Good Life. A guide to the most commonly found edible plants, fungi, seaweeds and coastal foragables in the U.K. with background information and illustrations that just draw the reader in. It was hugely successful, and is still popular – but I think Hugh had a greater effect just by being on television. In the same way the Ray Mears did not invent the term bushcraft (or bush craft), or even write THE book on the subject – his early appearances on the BBC magazine show Tracks in 1994 led to the many shows that firmly embedded him in the national consciousness as “that bushcraft bloke”. Hugh Fearnley-Whittingstall with A Cook on the Wild Side and River Cottage did not invent the idea of foraging or wild food, or indeed first bring the idea to the modern public – but they did create the content that most people identified with.[/vc_column_text][/vc_column][/vc_row][vc_row][vc_column width=”1/3″][vc_single_image image=”7776″ img_size=”medium” alignment=”center”][/vc_column][vc_column width=”1/3″][vc_single_image image=”7775″ img_size=”medium” alignment=”center”][/vc_column][vc_column width=”1/3″][vc_single_image image=”7774″ img_size=”medium” alignment=”center”][/vc_column][/vc_row][vc_row][vc_column][vc_column_text]
An Ancient Urge?
The next theory is that of a dormant instinct embedded in all Homo sapiens (you lot). I think we can safely say that we’ve done quite well as a species – we’ve certainly killed off (literally) the competition from other hominin species over the last few hundreds of thousands of years. Reassuringly we are also deemed to be the species of “least concern” by International Union for Conservation and Nature (according to the IUCN Red List). So we have that going for us.
Our success is built on many things – language, development and use of tools, group communication and shared goals, the ability to discuss and visualise something we haven’t seen. We ‘won’ the evolutionary race (a dubious honour) through adaptation and improvisation, through problem-solving and out-thinking our stronger, faster and more resilient hominid cousins.
How long we have been doing that for is under some debate, and new evidence suggests that we may have evolved as a distinct species as much as 350,000 years ago (or even earlier, it’s not difficult to get anthropologists arguing over this). The broad point is that we have a few hundred thousand years under our belts, and the ancestors we evolved from (and alongside, there’s plenty of overlap between the timeline of species) shared a lot of our physical and mental characteristics. To achieve any of what we have we needed to fuel ourselves. This means eating, and prior to the invention of farming (probably around 20,000 years ago, depending on your definition of farming), that meant foraging.
To wander through a forest, an open scrubland, a meadow or along a river or seashore and be able to spot the edible or useful plants and the potentially harmful ones is certainly a skill, but it should be one we are still hard-wired for. There is a theory that any ability we have to visualise a mental map of things that are useful to us (our home in relation to the local shops or pub, or the layout of our workplace or home) comes from the mental maps our ancestors created to locate and memorise the ethno-botanical resources that we needed for daily life. It’s likely a paleolithic resident of the British Isles would know the likely spots to find the fungi that were good to eat after the autumn rains, or the trees that provided thorns that could be used for fishhooks. When every physical object you use or create has to come from nature you need to know where to find it – and without paper or Google maps it needs to be stored in your head.
The way we process information and ‘data’, and the biochemical system that follows on from that processing, is built on our extensive history of foraging and hunting for our food and gathering the raw materials for everything else we used. The part of our timeline where we live in communities of more than 60-100 people, grew our food in fields and penned enclosures and exchanged labour in return for food and resources provided by others is just a blip at one end. It can be argued that the way we live now is essentially an experiment, and some would also argue that we’re probably failing at it.
But what has that got to do with modern humans paying good money for a man with a beard to lead them through a forest and point at edible weeds?
Okay, so this is the theory I work to – we are interested in foraging for the same reason we enjoy sitting next to a campfire poking the embers with a stick. It is quite literally what we are built to do. We evolved to do just that, and any parallels we can find in modern human activity (Hunting for Pokemon anyone? How about chasing down other hominins over obstacles and through muddy watercourses in Tough Mudder events?) is not coincidental – we’re just finding ways to exercise our hunter-gatherer brains and exploit the chemical reward system of dopamine. We pursue the idea of foraging for the same reason we do other things that bring us closer to ‘nature’ or ‘the landscape’ – deep down we know that is where we came from and what we are part of. Any ideas we have that we are civilised urban beings separate from the mud, twigs and rain ‘out there’ is justification after the fact – we removed ourselves from nature so we need to justify it as ‘development’ and ‘progress’. We’re still just shaved apes after all.[/vc_column_text][/vc_column][/vc_row][vc_row][vc_column][vc_column_text]
A Prime Time to Forage
So that’s it. It’s based on my own experience which is 99% from the U.K., and no doubt I have some unconscious bias that makes me overlook something that is blindingly obvious to you. The places are already filling up for our 2018 Foraging and Wild Foods courses as people buy places as gift vouchers for friends and family and I have a couple of TV and media enquiries about doing consultancy on different shows (as happens every year). The interest in foraging shows no sign of slowing, and I think it comes from cultural highlighting of the subject in the right way at the right time (Sunday or Tuesday evenings at around 8pm?) married with the innate need to hunt for our resources in the wild woods.[/vc_column_text][/vc_column][/vc_row][vc_row][vc_column width=”1/3″][product id=”7241″][/vc_column][vc_column width=”1/3″][product id=”7449″][/vc_column][vc_column width=”1/3″][product id=”7604″][/vc_column][/vc_row]
- Published in All Blog Posts, Bushcraft General, Foraging, Gather
Foraging and Camp Cooking with 16 Hospitality

Foraging and Wild Food with 16 Hospitality
Last year we teamed up with 16 Hospitality for their first external training course – a day of foraging and wild food cooking in the woods.
For 2017 they wanted to push things forward a little and really challenge their learners with something even more challenging. Time for some creative thinking on our part!
After a bit of planning I came up with the following task – create a three-course meal (with two dishes per course) from 90% foraged/wild ingredients.
Oh, and cooked in the woods over an open fire.
And served in a dining room they had to build…
After a short briefing on what they needed to accomplish the group was split down into teams to light the fires, erect the dining area and start identifying the wild plants. From there it was straight into preparing the first ingredients, the game (rabbit and trout) and improvising and problem-solving as they went.
Cooking outdoors over an open fire is always a little challenging. Unpredictable cooking temperatures (and times), a lack of flat working surfaces and just keeping everything clean and maintaining food hygiene standards all need to be worked out. We have been cooking fairly complex meals in the middle of nowhere for over a decade and it’s always good fun to share our experience with those who are more used to working in kitchens and restaurants – but in this case the learners from 16 Hospitality really took to the tasks and were finding solutions to the problems quickly and without prompting.
We love working with companies like 16 Hospitality that really embrace the idea of finding new ways to teach, and of course we will always champion the idea of learning in the outdoor environment.
If you think that we can help with a training day or event for you and your team then please get in touch.
[clear]


- Published in All Blog Posts, Bushcraft General, Company News, Course Reports, Foraging
VIDEO: Choosing an Air Rifle Scope

Choosing an Air Rifle Scope
Over the last 12 months or so we have made a couple of visits to Tonys Camo in Saltney to take advantage of his generosity and create some short videos on buying an air rifle, choosing an airgun caliber and how to zero a scope.
In this video I ask Tony about buying a scope for an airgun, what all of those numbers mean and how much you should spend on a scope.
This is the last video from the footage we have shot so far – but we will return soon to film more!
- Published in All Blog Posts, Articles, Bushcraft General, Original Outdoors Tutorials, Videos
Do I need to bother with bow drill?

Bow Drill Skills: Are they worth learning?
One of the skills most associated with the world of ‘bushcraft’ is that of making fire by friction. The image that normally accompanies that description is somebody crouching over a contraption that looks like a fiddle crossed with a rolling pin, furiously sawing back and forth with (ideally) smoke billowing from the base of the device.
This is the ‘bow-drill’ (Bow Drill, Bowdrill, Firedrill, Fire Fiddle etc etc) method and has become inextricably linked with the popular image of bushcraft and survival skills.
We teach this method on our bushcraft courses, and it is often something that clients look forward to and specifically request when we have a free moment in the itinerary and ask them “what next?”.
So we break out some pre-prepared bow drill sets and get down to making some embers…
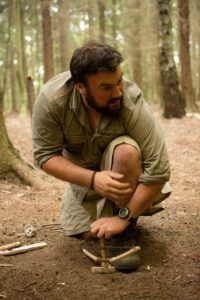
Richard Prideaux demonstrating bow drill technique
I’ve found over the years that the course participants normally pick up three very important things from seeing the demonstrations then having a go for themselves:
– It’s a lot harder than it looks to get a consistent rotation of the drill without something going awry
– It’s physically demanding and needs patience
– Success is not guaranteed
With skill, patience and the right materials an experienced user can normally get an ember with less than a minute of actual ‘drilling’ action but it is dependent on several variables all lining up correctly to achieve that.
Why do people want to learn how to do it?
Here are 3 direct quotes about fire by friction/bow-drill from instructors that I have heard over the years:
“This is the most important outdoor skill you can learn”
“If you lose all of your equipment this will save your life”
“If you can’t do this then you are not a real outdoorsman”
A quick trawl through the various bushcraft/wilderness skills Facebook groups, forums, YouTube channels and magazines will come up with statements and comments that might not be as succinct as those above but are along the same lines. Then there are the hundreds of articles, blog posts and videos offering tips and techniques that will improve your chances of success. “Bow Drill” is now one of the keywords of bushcraft, along with “knife”, “axe” and “Ray Mears”. You can even purchase knives with divots in the handle so that you can use it as a bearing block (the top of the ‘drill’) in a dire survival situation.
There is undoubtedly some merit to the bow drill firelighting technique:
– It mostly makes use of materials from the environment, not items carried
– Components can be replaced as they wear out or are damaged
– Does not require electricity, flammable liquids/gas or metal components to use
It is also a truly ‘primitive skill’ and would have been understood by our paleolithic ancestors (or indeed indigenous people around the world today). In a world before lighters, ferrocerium rods or even steel then fire by friction would have been a skill passed down throughout a community and as important as making a blade or finding edible plants.
For the modern outdoorsperson and enthusiast it is touted as being an “essential bushcraft skill” (see instructor quotes above) and it is both expected by bushcraft course participants and a requisite for all good bushcraft and wilderness skills course providers.
Are Bow Drill skills that useful?
Yes.
No.
Maybe.
It depends.
Deciding if something is actually useful is of course dependent on the intended use. In a world where we do have lighters, matches, ferrocerium rods, chemical firelighting, electronic firelighting (you can have a lot of flammable fun with wire wool and a battery) and dozens of ways of keeping them dry the Bowdrill set becomes a little redundant.
But what if you lose all of your other gear?
There is another quote from an eminent instructor that I think answers this quite eloquently:
“If you are stupid enough to lose your lighter and firestriker and get all of your matches wet then you are probably too stupid to learn how to bow drill”
A real survival situation is something you try to avoid by making good decisions and with careful preparation. If you lose your lighter your fallback shouldn’t be to rip the laces out of your boots and start whittling a drill – it should be to call yourself an idiot and then go get the other lighter from your pack. Or the firesteel on your belt or clipped to your pocket. Because you brought multiple firelighting methods, right?
If you are travelling somewhere that it is quite possible that you will find yourself in a situation where lighting a fire will make a big difference to your immediate health or safety then you need to carry a way of making fire.
If you are travelling somewhere that you will have to light a fire to cook on, purify water or perform other basic tasks then you will need to carry MULTIPLE methods of making fire.
Accidents happen. Kit is lost on river crossings or can fall overboard. You might be separated from your pack or kit due to unforeseen circumstances. Things break or get lost due to carelessness. We’re human and things happen. But in the modern age we have so many cheap, lightweight and reliable firelighting methods that there aren’t many reasons not to carry more than one way of making a spark, a flame or an ember.
If I am hiking, canoeing or otherwise moving or working in an environment where fire is either required or desireable I will have on my person or in my kit:
1. Ferrocerium rod and striker (clipped to trouser pocket loop or belt)
2. Disposable lighter with ferro (‘flint’) striker (normally in pouch on belt or in pocket of PFD if canoeing)
3. Lifeboat/windproof matches (2 or 3 packs in various places in rucksack)
I also normally carry some prepared tinder or similar either in waterproof plastic bags or in a waterproof form (such as strips of bicycle innertube).
So if I lose my firesteel or it breaks in two then I can use my lighter. If I lose that too then I can still light a fire using the matches and warm myself whilst simultaneously deciding if I need to re-examine the decision-making process that led to me losing all of my other kit…
But what if it’s unplanned?
There are of course situations where you can find yourself thrust unexpectedly into a genuine survival situation. However, outside of contrived and survival TV shows like Naked and Afraid or Alone the number of possible scenarios where you will need to make a fire and you have arrived there with no other equipment whatsoever are pretty slim:
The Plane Crash
If you were a passenger on the plane then chances are that you hit the ground somewhere close to, if not actually inside, the aircraft itself. A big pile of jagged metal, flammable liquids and materials and batteries, electrical components and probably SOME survival equipment like flares etc. You have plenty of options to explore before you need to start trying fire by friction.
The Stranded Vehicle
In this scenario it is a broken or stuck car or truck somewhere far from external help. It might be deep in winter or high summer in the desert, but as with the downed aircraft scenario you are basically sat in a big shelter/survival kit. It is powered by flammable liquid and needs a battery to keep the engine and ancillary components running. Also – if you are for some reason travelling through such a remote area why haven’t you thrown in a few emergency items for just this scenario?
The River/The Sea
It’s not beyond the realms of possibility for even an experienced kayaker or canoeist to find themselves washed on a beach or riverbank watching their very expensive canoe or kayak, stuffed with their camping and safety kit, drifting away downstream or on a current. Dressed only in a drysuit (at best), some kind of footwear and a PFD (Personal Flotation Device) what are they going to do? Well, if you have decided that yes, a fire is the thing that you need then you should just grab the small firelighting kit from the pocket of your PFD or belt and get cracking on looking for some dry kindling. You didn’t think of this possibility and have found yourself far from help, paddling alone with no provision for possibly falling out of the canoe? Well, natural selection is still in effect, and your corpse might provide food for another creature at least.
The scenarios could continue, but they all come down to either:
1. You will rarely travel without there being SOME other way of making fire around you
2. If you are travelling in a way that you won’t have other items around you – carry fire WITH you.
The root of all of this is that fire by friction and making a bow drill set should be a long way down your list of solutions when the need for a fire arises. It is fiddly and time consuming to make (especially if you need to make natural cordage), requires a lot of skill to use and success is NOT GUARANTEED. It is also quite wasteful of calories and can be very demoralising if not successful. It can be hard enough to get right when well-fed in ideal conditions under a parachute shelter in some pleasant woodland. There are normally aggravating factors in a survival situation, such as injury, lack of food/water and (if fire is required) the risk of hypothermia. Would you be better off building a simple shelter and getting out of the wind, off the cold ground and conserving body heat and energy?
What if I just want to learn how to do it?
That’s fine. It is very rewarding the first time you get an ember, and I admit that I really enjoy watching someone battle through the multiple failures to get to their first glowing coal in the notch of the hearth board. The point of this post is to highlight the difference between an IMPORTANT SKILL and one that is fun to learn and achieve, not to put you off learning how to do it for yourself.
It is also good to learn a skill that connects us with our ancestors and to start off with a pile of wood and maybe some cord and end with a roaring fire. The first time you see it it looks like a magic trick, and I suspect that is part of the reason that so many are interested in learning how to do it for themselves. The first time I saw it I immediately wanted to try for myself – a very similar thing happened the first time I saw someone turn a bowl on a lathe, shoot a bow or play Tomb Raider (a good indicator of my age/generation!).
So, should I bother to learn how to make and use a bow drill set?
This is normally where the demonstration of the bow drill comes to on our courses. After watching several people fail, succeed, get frustrated and learn patience with the technique the mood of the group can be a little less enthusiastic than it was. At this point I go through the points above – where are you going to use this technique? Is it as easy as you thought it would be? Are other methods easier/more reliable? What is your motivation for learning this skill?
The final decision is of course down to the individual user and it is up to you to form your opinions. I’ll leave you with a few things to consider:
- Are your fireskills good enough to reliably make a fire from a bow-drill ember every time?
- If you’re travelling somewhere you will need to light a fire are you carrying enough backup methods?
- If you lose your kit will you still have a firelighting method on your person?
- What’s your motivation for learning this technique?
- Do you need to improve your skills elsewhere too?
[divider]


- Published in All Blog Posts, Articles, Bushcraft, Bushcraft General, Personal, Skills
Tracking Training and Awareness with North Wales Police

Track and Sign Awareness with North Wales Police
A training and skill-sharing session with the NWP Rural Crime Team
A few months ago I was joined by police officers from the North Wales Police Rural Crime Team for a session on track and sign awareness and to discuss techniques and strategies for using tracking in their work in the countryside of North Wales.
I’ve worked with other police forces as a trainer and have run tracking courses for SAR teams and other professional users and it was a pleasure to pass on some techniques they will find useful in their work in the farming and rural community of North Wales – and also to learn a little more about how this team works.
Learning how to interpret the signs left by human activity is like learning a language – you can quite quickly pick up the basics and understand key words and phrases but it takes time to fully understand everything that is being communicated to the reader. Even a short session with an experienced tracker can start to show new things in familiar ground.
We also had the opportunity to discuss subjects such as foraging and wild food, ecology and even the equipment used by outdoor enthusiasts and how a rucksack with an ice-axe or bow saw strapped to the side might appear to an unsuspecting member of the public.
We run a one-day tracking introduction course for the general public:
http://backup.originaloutdoors.co.uk/tracking-courses-uk/
If you or your organisation would like more information or think that we can help put together a bespoke training package then please get in touch:


- Published in All Blog Posts, Bushcraft General, Company News, Mountain General, Private Training
How to save yourself – a tale of survival from a friend

How to save your own life
A tale of everyday survival from a friend
If you have attended one of our courses or engaged me in conversation about the idea of survival training or prepping for potential survival situations then you will probably remember my having some fairly robust opinions on the whole subject. One of the points I often try to raise is that real survival situations – as opposed to heading out to ‘rough it’ with minimal gear – sneak up on you. You can’t see the situation building up in the distance, with a sweeping fanfare of your personal inner soundtrack heralding the arrival of your ‘moment’. The time when you get to put your training and preparation into action will probably just blindside you and throw you deep into a world of hurt – sometimes literally.
If you read up on real survival situations and those who have survived them (and more importantly, those who did not) then there is the common theme of being in denial about the whole situation. It isn’t just panic, although that plays a part – there is also an element of lethal familiarity.
If you spend extended periods in and around dangerous and life-threatening environments then the psychology of denial will help bury those risks and lead you to actions and behaviour that will betray you when the ‘bad thing’ actually happens. Inappropriate actions under threat can be anything from driving headlong into the raging river because it’s your regular route home and the water “can’t be THAT deep” to actively trying to push your rescuer underwater when your drowning reflexes kick in.
The way to combat these potentially lethal responses to danger is via two routes – awareness and training.
Survival Awareness
By being aware of your surroundings, the potential hazards and being realistic about how likely the various potential calamities are you can develop an appropriate response. Live in an area prone to earthquakes? You can read up on the current advice on what to do in case of a quake and what items you should have in your ‘earthquake survival kit’. Do you regularly travel in remote and wilderness areas? Then remote-area first aid training and equipment specific to wilderness first aid should be high on your list of priorities.
Survival Training
Television shows and gear manufacturers would have you believe that survival training is all about running up and down mountains, swimming in icey waters and knocking up a pile of useful equipment entirely from twigs and berries – but in nearly a decade of survival training with civilians, businesses, SAR, emergency services and the military the truth is a little less exciting.
Survival training can be split into two areas – prevention and reaction. Prevention is everything you do to make sure that you don’t end up in a survival situation, from ensuring your navigation skills are up to scratch to having a realistic approach to equipment and personal admin. Reaction is what you do in the seconds, hours and days following the ‘bad thing’ occurring. That kind of training is about building constructive automatic responses to life threatening situations and re-coding your brain so that your reflexes save your life and don’t kill you or endanger those around you.
Very recently a friend sent me an article she had written for somewhere else, and with her kind permission I have included it in this blog post. It perfectly illustrates all of the points raised above:
- Survival situations hit you quickly and often with little warning
- You won’t be as prepared as you think you might be
- Training and constructive reflexes will help you get past the inital adrenaline-filled moments
[divider]

The scene of the incident – the rope ladder has since been added
November 2015 – somewhere alongside a canal in the south of England
It was about midnight, -1ºC, nobody around, and I was due on an early shift the next morning. I’d spotted it was getting frosty so went out to the car to cover the windscreen so I could get away quicker in the morning.
I was wearing jeans with long boots underneath, a heavy fleece top, and was carrying my handbag.
As I returned to my boat, walking pretty briskly, my foot skidded on an icy metal panel and I fell flat with one arm – the one holding my bag – out in front of me. The weight of the bag and the fact that I was on a wet frosty wooden pontoon meant I just kept sliding. Strangely, I had two clear thoughts that I can still remember – 1) “I’ve fallen over”, closely followed by 2) “I’m under the water”.
Thankfully my keys were in my hand and I managed to fling them up onto the pontoon so that was one less thing to worry about.
It took a second for the feeling of cold to kick in, but sure enough, off went the gasping. I clearly owe a lot to my Wilderness First Aid training as we’d covered the gasp reflex and I knew in theory that it should stop soon – but now that I was actually in that situation did I risk waiting, or try to get out?? Because my clothes were so heavy with the water and there was no straightforward way out, I decided to test the theory. I held onto the pontoon, which thankfully I could just reach, and waited.
Sure enough, my breathing gradually came back under control.
Right then, I thought. NOW I’ll get out.
My first decision was that I needed 2 hands. Bye bye, handbag… Ideally I’d have got rid of my shoes but they were long leather boots which were under my jeans and it would have taken too long to struggle with them, so they stayed.
Even with both hands free it was far less easy than I’d anticipated. I was trapped in a small triangle of water between the bow of the boat and 2 pontoons at right angles to each other. The boat has smooth high sides, and the metal was frosty and there was no way I could climb up. I couldn’t touch the bottom of the canal – and frankly probably wouldn’t want to…
 The pontoon was a floating one and when I tried to heave myself up onto it my legs just swung up underneath it, so I had nothing to push off. I tried that 3-4 times, and was aware I was getting very cold and tired and probably didn’t have the strength to try again if I failed again.
Over my head I could just reach the rope that moors the boat to the pontoon. I held onto it for a few seconds’ rest while I considered my options.
I could shout for help, but it was very late and I probably wouldn’t be heard, plus I was so cold I doubt I’d have got much noise out, yet I could end up out of breath or swallowing water. I decided this was last-resort Plan C.
I could go under the pontoon because I knew there was a ladder on the other side. However, having got my head above the water, I didn’t fancy going back under again. It was very dark and I didn’t want to risk being stuck under the pontoon or attempting to surface in the wrong place. That route became Plan B.
That left me with the option that did get me out – a gargantuan effort to flick my legs out of the water and cling sloth-like upside-down to the rope overhead. I managed to do that, and then to flip myself from there onto the pontoon.
Relief!! I made it!!
The relief didn’t last long, though. I was shivering violently, and realised I needed to get the wet clothes off fast. With numb and trembling fingers I managed to strip the heavy fleece off on the front deck, retrieve my keys (Yes!!) from where I’d managed to throw them earlier, get inside, and towel down and get a dressing gown on.
This being a boat, the indoor temperature was about 10ºC so I needed to get a fire lit in the stove, which took a little bit of doing in the chilled and weary state I was in.
As the room warmed up, I took stock. My arms, legs and ribs were bruised, battered and pretty sore from the various attempts to climb out.
I couldn’t phone anyone because my phone was in my back pocket, full of water, and useless.
I’d lost my purse and all my bank cards, driving licence etc, plus my work pass, as they were in the bag. I went back out with a net and fished for it, but no luck. In fact, despite the canal being only about 7’ deep and the bottom visible depending on the weather, and knowing precisely where I let it go, I’ve never found it – mystery!
I was about to head to bed when I heard a funny noise, like someone blowing a loud and prolonged raspberry. Just to add insult to injury, the ‘Key Buoy’ keyring I had attached to my keys suddenly activated, and shot out a huge flashing orange balloon which proceeded to mock me for the next 3 days. “Well, that’s a lot of use NOW!”, I shouted at it. I may have added some other words too.
I was on time for my early shift…
[divider]
The RNLI is currently promoting a safety campaign that should be required reading for anybody who ever goes near water (so, pretty much everyone): How To Float
- Published in All Blog Posts, Articles, Bushcraft General, Emergency and Safety, Mountain General, Personal, Skills
How to put together a first aid kit for the outdoors

How to put together a first aid kit outdoors
Wilderness personal medical kits
How do you put a first aid kit together for the outdoors? Or a bushcraft first aid kit? Are first aid kits for mountain biking different to ones for kayaking?
Carrying a first aid kit in your rucksack or in your personal kit is pretty difficult to argue against. The problem is – how much do you carry, and what exactly do you carry? Once you start going down the road of visualising every possible emergency medical scenario and wanting to ‘be prepared’ for it. Before long you end up carrying several kilograms of equipment that in all likelihood you will never use – but you somehow feel that you need to.
The reality is actually a lot simpler. There are two important points to remember for outdoor emergency first aid:
- Training is the absolute most important thing you can put your time and money into. Knowledge weighs nothing and the most important lifesaving techniques require good personal skills but little to no equipment.
- If you are on your own in the middle of nowhere then the options open to you self-treatment are actually very limited.
With that mildly-sobering thought in mind – how do you put together a first aid kit for the outdoors?
The answer is dependent on several factors:
- The environment you are travelling too/through and specific hazards it may contain
- The length of trip
- Distance/time to evacuation and medical care in case of emergency
- The number of people (and animals) in the party
- The existing medical conditions of those in the party
- The training and skill level of those in the party
- The activities you are performing
- Your carrying capacity (rucksack, canoe, vehicle, porters etc)
For example – the medical kit for a 5-week sailing voyage to the Lofoten islands would be different to that of a solo lightweight backpacker on a 3-day summer trip in the Cairngorms. For the former a Bag Valve Mask (BVM) and full suture kit would be appropriate but would a little ridiculous for the solo hiker.
I have used various medical kits in my work over the years. In my time in a Mountain Rescue team I carried a small personal first aid kit that contained a minimal number of items and drugs – but it was designed to be pooled with the other kits carried by fellow rescuers to form a larger and more comprehensive kit. I supplemented this with items purchased myself such as Tuffcut shears and nitrile gloves. When working as a remote-area medic as support on long-distance races and outdoor challenges I was either carrying a very comprehensive kit issued by the company employing me, or I was given a budget to supply my own equipment at my own specification. I have also put together my own for various trips, plus also kits for Original Outdoors staff and freelance contractors to use when working with our own clients. Each case has been slightly different…
The easy answer to “what’s the best outdoor first aid kit?” is – they all are. The real skill is choosing or building one that suits where you are going, what you are doing and what you’re doing when you get there. To that end I’ve put together a video on the decision-making process that I go through for any trip or scenario, and the items I carry in one of my personal kits:
[clear]
[clear]
First Aid Kit Contents
The list below is based on the items shown in the video, with links to buy them directly from Amazon. Some of the brands or sizes are slightly different or only a few representations of what I carry. The items are not listed in order of importance, just to roughly match the order from the video.
I’ve also put a link to the Lifesystems first aid kit which is a very similar off-the-shelf kit that I can personally recommend – even if it’s used as a base to add other items to.
[divider]
[two_third]
Nitrile Gloves
Get them in any colour other than red or black – you need to be able to see if blood suddenly appears on them when giving a primary or secondary survey as it will steer you towards a major bleed you may have missed.
[/two_third]
[one_third_last]
[/one_third_last]
[divider]
[two_third]
Resus Face Shield
An item of personal safety that should be somewhere easy to reach but can also make your CPR technique more effective.
[/two_third]
[one_third_last]
[/one_third_last]
[divider]
[two_third]
Anti Bacterial Wipes
Great for cleaning up after dealing with a minor wound and preventing your kit contaminating everything it touches.
[/two_third]
[one_third_last]
[/one_third_last]
[divider]
[two_third]
Alcohol Hand Gel
Be aware that carrying alcohol in your first aid kit may cause issues when travelling to countries where alcohol is banned or severely restricted
[/two_third]
[one_third_last]
[/one_third_last]
[divider]
[two_third]
Normasol Sachets
Sterile topical solution in sachets for careful application over wider areas.
[/two_third]
[one_third_last]
[/one_third_last]
[divider]
[two_third]
Sterile Eye Wash Pods
Sterile topical solution in pods for washing foreign bodies from eyes.
[/two_third]
[one_third_last]
[/one_third_last]
[divider]
[two_third]
Fabric Adhesive Dressing Strip
Adhesive dressing strip on a roll for making custom plasters/band-aids for tricky areas like between fingers.
[/two_third]
[one_third_last]
[/one_third_last]
[divider]
[two_third]
SteriStrips
Temporary adhesive suture strips for wound closure.
[/two_third]
[one_third_last]
[/one_third_last]
[divider]
[two_third]
Blister Plasters
Being able to treat or manage a blister can make the difference between carrying on or turning around to go home
[/two_third]
[one_third_last]
[/one_third_last]
[divider]
[two_third]
Non-Adherent Dressings
General use dressings without any adhesive.
[/two_third]
[one_third_last]
[/one_third_last]
[divider]
[two_third]
Triangular Bandage
I have yet to use one of these as a sling, but they are quite useful for holding other dressings on or wrapping over wide areas.
[/two_third]
[one_third_last]
[/one_third_last]
[divider]
[two_third]
Wound dressings (Various sizes)
Absorbent wound dressings in various sizes
[/two_third]
[one_third_last]
[/one_third_last]
[divider]
[two_third]
Travel Mirror
Great for reaching places that the eyeball can’t!
[/two_third]
[one_third_last]
[/one_third_last]
[divider]
[two_third]
Glucose Gel
Glucose gel for hypoglycemic emergencies.
[/two_third]
[one_third_last]
[/one_third_last]
[divider]
[two_third]
Round-Tip Scissors
Small scissors with rounded ends for safety
[/two_third]
[one_third_last]
[/one_third_last]
[divider]
[two_third]
TuffCut Shears
Tough shears for emergency clothing removal
[/two_third]
[one_third_last]
[/one_third_last]
[divider]
[two_third]
Tweezers
For removal of small foreign bodies
[/two_third]
[one_third_last]
[/one_third_last]
[divider]
[two_third]
Microlance Needles
Tiny sterile needles for making small holes to drain blisters etc
[/two_third]
[one_third_last]
[/one_third_last]
[divider]
[two_third]
Disposable Thermometer
Of limited use in a first aid environment but helpful for long-term monitoring of a patient
[/two_third]
[one_third_last]
[/one_third_last]
[divider]
[two_third]
Tick Removal Card
For safe removal of ticks
[/two_third]
[one_third_last]
[/one_third_last]
[divider]
[two_third]
CAT Tourniquet
Not for general carry and must be trained in use
[/two_third]
[one_third_last]
[/one_third_last]
[divider]
[two_third]
SAM Splint
Useful but heavy and other items can be improvised to replace it.
[/two_third]
[one_third_last]
[/one_third_last]
[divider]
[two_third]
Lifesystems Mountain Leader First Aid Kit
A comprehensive and well-designed outdoor first aid kit.
[/two_third]
[one_third_last]
[/one_third_last]
- Published in All Blog Posts, Articles, Bushcraft General, Emergency and Safety, First Aid, Mountain General, Personal, Skills, Tools and Equipment, Videos
How to camp in the woods – a time lapse tale!

How to camp in the woods
Setting up tarps and living by firelight with Kevin Field
In this short time lapse bushcraft instructor Kevin and I set up two DD Hammocks 3mx3m tarps, light a fire between and settle down for the night in a simple woodland camp.
The next morning we carefully and quickly pack things back down, making sure that we properly extinguish the fire and return the forest floor to its previous state.
[divider]
[divider]
For this camp we rigged the two tarps in similar ways, with ridgelines stretched taut between trees. The fire was a long, thin fire designed to give out heat along the length of our shelters and provide space to cook on.
The easiest way to tidy up in the morning after a camp like this starts when you first arrive the night before:
- Identify the area you need for your fire and shelters/tarps
- Clear the floor area of any leaf litter or debris, back to bare soil
- Set up your tarps or shelters, with consideration to wind direction
- Gather enough firewood for the night before you light the fire
- Light the fire, cook your food and enjoy the evening
- The next morning, consider if you actually NEED a fire
- Make sure that the fire is properly extinguished, even if it burnt out the night before
- Clear away any burnt wood, then scatter ashes across the forest floor by hand
- Once the shelters and your equipment have been safely stowed away you can scatter the leaf litter back across the forest floor. If done properly it should look like you had never been there!
- Published in All Blog Posts, Articles, Bushcraft General, Original Outdoor Moments, Videos
Doug’s Green Woodworking Books

Doug’s 5 Favourite Green Woodworking Books
As part of my work with Original Outdoors, Richard asked me about the Green Woodwork books that I thought were worth recommending to everyone and which ones were my favourites. This lead me down a road of looking out many of my old favourites and looking at them again in a new light and asking myself what made a really good green woodwork book. Should it be instructional, inspirational or just a great read? The original list was way longer than the 5 Richard asked for but after a long process of reading and re reading I came up with my list of 5 favourites.
What is green woodwork?
Before I start out on telling you all about the books I should probably try and tell you all what I think green woodwork is as this effects which books I choose. Green woodwork at it’s most basic level is all about using timber when it is fresh. As wood is kept it dries out and becomes harder. By using green wood it makes it easier to cut and shape and thus eliminates the need for power tools and makes it possible to make everything from spoons to houses with only pretty basic tools. This amazing diversity of possible projects is part of what has kept me interested in green woodwork for the past 10 years or more and I hope that it will mean that there is something here for everyone to enjoy.
[divider]
[two_third]
Swedish Carving Techniques (Willie Sundqvist)
An absolutely fabulous book that was first printed in English in Feburary 1990 and has been a much sought after book for a very long time. After a long time out of print it was re issued in the last year or so making it once again accessible for a reasonable price. Bushcrafters and Green Woodworkers alike have sought this book out and used the information inside to improve their skills with axe and knife.
This book is packed with information on tools, their care and sharpening, safe use of both axe and knife as well as some projects and a lot of information on carving spoons (something of a passion for me). The book is well written and really inspired me to improve my work with the most basic tools available to me. Many green woodwork books talk about numerous devices and tools and this one really goes back to basics and in these cash strapped times it’s a great place to start off green woodworking as the tools are basic and many people have something that they can use tucked away in their shed or cupboard that they can use to start with.[/two_third]
[one_third_last][/one_third_last]
[divider]
[two_third]
The Encyclopedia of Green Woodworking (Ray Tabor)
This book has a bit of everything you can think of that is to do with green woodwork. It really does deal with everything from planting your own trees to the finished products that you can make. Most importantly the thread that runs through this book is about the wood itself. The properties of green wood and the problems that using green wood causes can be serious for your final projects. A bowl or spoon that has a big crack in it won’t be a lot of use when you go for your bowl of soup. This book really is about understanding the need for using green wood and then working around the problems that that causes and even using those properties to your advantage.
Almost everything you would want to know about green woodwork in on book. A great reference book and one that I refer to a lot.
[/two_third]
[one_third_last][/one_third_last]
[divider]
[two_third]
Living Wood: From buying a woodland to making a chair (Mike Abbott)
Mike Abbott has long been known as one of the people who made green woodwork popular in our modern day. Mike has written may great books but I think this one is my favourite. This book isnt just an instruction manual it also tells a story of how Mike started out in Green woodwork and how he came to be a full time green woodworker. He talks about his experiences and the development of green woodwork. The book includes plans for shave horses and pole lathes as well as details of how to make an amazing green wood chair, Mike has specialised in green wood chairs and the pole lathe for most of his working life..[/two_third]
[one_third_last][/one_third_last]
[divider]
[two_third]
Woodland Crafts in Britain: An account of the traditional uses of trees and timbers of the British countryside (H L Edlin)
A bit of a departure from the other books as there are no instructions on any of the crafts included within it. This book is special to me as it was the first to show me the breadth of what I was starting to get into. This book was something I bought second hand for 50p and I would certainly recommend buying it yourself. Sadly it’s out of print to my knowledge but there are plenty of sellers on the internet that sell second hand books and I really hope you can find a copy of it.
The book covers a great deal from timber felling and the uses of timber for fuel and charcoal to all the craft uses for timber generally laid out in order of species of timber that best suits the crafts. Edlin describes the crafts and the people that carried out these jobs in a readable way that left me wanting to find out more about many of these crafts. Not an instructional book like the ones before but great bed time reading and highly inspirational.[/two_third]
[one_third_last] [/one_third_last]
[divider]
The Bodgers Gazette – Newsletter for the Association of Pole-lathe Turners and Green Woodworkers.
OK so this one is a bit of a cheat because this one isn’t really a book. However it is an amazing publication and something I think anyone interested in Green Woodwork should get and read.
It is only available to members of the Association of Pole-lathe Turners and Green Wood workers but it’s beautifully produced and has loads of great stuff in it. The Quarterly Bodgers Gazette comes as part of membership of the Association and that’s only £20 a year and also includes the chance to attend the Bodgers ball where hundreds of green woodworkers get together and show their skills and wares. It also allows you to take advantage of special offers that are open to members like the combined insurance policy for demonstrators and teachers of GWW.
The Gazette itself includes articles written by the members. These are about all different aspects of green woodwork from the goings on of local groups to specific skills and instructions on how to do different projects or make specific items. In a particular favourite edition of mine called Tales from the wood (this is a collection of some of the best articles) I found an article that described how to turn a green wood bowl on a home made lathe using your own body to power it. The article was written by Robin Wood and was the start of an obsession for me and I’m still trying to turn the perfect bowl a good few years later.
I recently managed to buy a CD with copies of all the bodgers gazettes on it and I’m still trying to wade through all the information on it and I don’t think I’ll get through it any time soon and then I have to try it all out!.
Learn more at: www.bodgers.org.uk
[divider]
You can see more of Doug’s work on his Heartwood Treen page HERE.
- Published in All Blog Posts, Articles, Books, Bushcraft General
How fast is the incoming tide?

How fast is the incoming tide?
Don’t get caught out on a beach
Last weekend we took the dogs for a walk at Talacre beach on the North Wales coast about 90 minutes before high tide. It’s a wide, sandy beach that shelves off into the edge of the Dee estuary at one end and guarded by dunes on the landward side. It’s a notorious spot for flooding on a Spring tide, and the car park is often closed due to risk of flooding.
I shot this short video after seeing the incoming tide swiftly and silently fill in a channel behind where we were walking, turning our patch of beach into an island (and then swallowing it a few minutes later).
In the video you can see just how quickly an incoming tide ‘moves’, covering the height of the GoPro Session camera (about 4cm high) in under a minute.
Sandy beaches, estuaries and muddy areas of coastline can quickly become cut off from the shore and eventually be covered in minutes, and you should always be aware of the tide times, movements and have a couple of escape routes planned if walking on the shoreline. In this case we just stepped through the water and to the dunes behind – but if it had been a small cove or secluded beach bounded by cliffs we could have found ourselves in serious trouble.
- Published in All Blog Posts, Bushcraft General, Videos
VIDEO: How to zero an airgun scope

How to zero an airgun scope
Setting the sights on your target
Tony from Tony’s Camo and Airgun Centre in Saltney comes back for this second video on the use of airguns. In the shooting range adjacent to his shop he shows me how he teaches people to setup the telescopic sight on an air rifle, for consistent and accurate shots.
A scope isn’t strictly required for accurate shots with an air rifle, but it does make the job a lot easier and allows for greater consistency.
The steps for zeroing an air rifle scope at 25 yards
- Find a safe and legal place to shoot over the distance you wish to set up your scope for
- Set up a target that will clearly show where you have hit it (a piece of white paper works well)
- Mark a point on the target (a dot will do)
- Set yourself up in a comfortable and safe shooting position
- Fire three shots with the centre of the crosshairs lined up with your dot on the target
- Your group of shots will likely be off to one side and above or below your target dot
- Carefully unscrew both dust covers on the adjustment turrets on your scope
- Decide if you are going to adjust the up-and-down (elevation) or side-to-side (windage) turrets first
- Most scopes use a system where each ‘click’ as you rotate the turrets will translate to 1/4 of an inch of change in the place the pellet hits a target 100yards away
- As your range will is closer than that you will need to perform some calculations to set your scope
- For a range of 25 yards each ‘click’ will move the ‘aim point’ 1/16th of an inch, or 16 clicks will move the ‘aim point’ one inch.
- If your first three shots are half an inch below your target dot you will need to move the elevation turret 8 clicks in the direction marked on that adjustment turret
- Once you have made your adjustment fire another three shots. Your grouping should now be on the same level as the target dot, but may still be off to one side
- Repeat the above process for the side-to-side error (windage)
- If you can repeatedly shoot a pellet through the same hole at that range you have ‘zeroed’ that scope
Tony’s Tips for Successful Zeroing
- Be consistent with your choice of pellet brand and types
- Zero from a safe and stable shooting position
- Only adjust for windage or elevation at a time, not both
- Don’t try and zero on a windy day
- Take an average of three shots after each adjustment, not just one
- Only ever shoot where it is safe and legal to do so
Finally, remember that you are doing this with a potentially lethal firearm, and the responsibility is on you to make sure that you are shooting in a safe and legal manner, and that you are behaving as a safe and responsible airgun owner.
- Published in All Blog Posts, Articles, Bushcraft General, Foraging, Original Outdoors Tutorials, Videos
VIDEO: How to choose an airgun

How to choose an air rifle
Buying your first airgun
Tony Dobson from Tonys Camo and Airgun Centre in Saltney kindly gave us some time to explain the basics of buying an air rifle in the UK.
The video details the different types of air rifle commonly available in the U.K. including break-barrel, underlever, CO2 and PCP rifles and their relative merits. We also touch on the information that all airgun owners and users should be aware of (see links below for more information) including the laws on using and storing airguns.
This is a relatively long video for us, but we only just touch on the information you need to know. If you are considering buying your first airgun (for target practice or hunting/pest control) you need to visit your local airgun dealer or airgun club to find accurate and up to date information for your area. Be aware that the law is different in Scotland (as of 31st October – see HERE) and that whilst you do not need a licence for an airgun under 12ft/lbs power in England and Wales you still need to stay within certain rules on the storage and use of that air rifle. The British Association of Shooting and Conservation has a very useful section for airgunners on their website.
- Published in All Blog Posts, Bushcraft General, Foraging, Original Outdoors Tutorials, Videos
How to sharpen an axe!

How to sharpen an axe!
In another of our series of tutorial videos with green woodworker (and axe hoarder) Doug Don we look at his technique for sharpening axes, using inexpensive materials and a technique that can learned easily and done safely.
It’s a longer video, but worth sitting down to watch is you want to learn how to get that razor-sharp edge on your cutting tools.
- Published in All Blog Posts, Articles, Bushcraft General, Original Outdoors Tutorials, Videos
How to make a mallet!

How to make a mallet!
Green woodworker Doug Don from Heartwood Treen shows us how to make a useful camp tool in a few minutes using a green piece of wood, a saw and an axe.
A mallet can be made quickly if you have the right tools, and can make a lot of camp tasks much easier; from driving in stakes for shelters and pot hangers to hitting the back of an axe safely to split firewood down. It’s one of those items that you won’t truly appreciate how useful it is until you have one around!
- Published in All Blog Posts, Articles, Bushcraft General, Original Outdoors Tutorials, Videos
How to make a spatula (flat spoon)

How to make a spatula (flat spoon)
In this video I spend some time in the woods with Doug Don learning how to split down and process a log into a useful kitchen implement. Even if you aren’t interested in making a spatula there is a lot of useful information in here on working with green wood, processing timber into planks and general knife, axe and drawknife safety.
We’re working with green woodworker Doug Don of Heartwood Treen for this series of instructional videos and to run green woodworking and axecraft courses for Original Outdoors in the coming months. If you want to be notified as the new videos go online please subscribe to our Youtube channel.
- Published in All Blog Posts, Articles, Bushcraft General, Original Outdoors Tutorials
Moments – Bow Drill Demonstration

A Bow Drill Demonstration
Instructor Kevin goes through an honest demonstration of lighting a fire with a bow drill set (note the thick smoke and flames just visible in the last few frames) towards the end of a Woodcrafter course.
Getting a valid ember (and eventually flame) from a bow drill set is more about preparation of materials and technique than any other factor, but it must be said that when certain survival and bushcraft TV personalities do it on TV, it always seems to take much less time and effort than every other professional and vastly experienced instructor I’ve ever worked with…
Shot on a Nikon D7200.
- Published in All Blog Posts, Bushcraft General, Original Outdoor Moments, Videos
VIDEO: How to rig a tarp

VIDEO: How to set up a tarp in the woods
Simple rigging for a DD Hammocks tarp
In a two part video I share how I set up my DD Hammocks 3m x 3m tarpaulin for wild camping and general camp use. It’s a quick, simple and versatile system that I use almost eveyr time I set this tarp up between two trees.
In Part 1 I run through the setup and packing away of the tarp in one go:
In Part 2 I go into more detail for each of the knots required to replicate this system, plus a few other tips on setting it up:
[divider]
Equipment Used:
The equipment featured in this video includes:
[two_third]
DD Hammocks 3m x 3m Tarp
A basic but tough and functional tarp, perfect for woodland camping setups and general bushcraft use. I have one that has lasted for 6 years of regular use and abuse, and is still going strong.
[/two_third]
[one_third_last]
[/one_third_last]
[two_third]
Maillon Rapide fastener
Essentially an adjustable chain link, this rigging item is a reliable and secure way of hanging the tarp from the ridgeline.
[/two_third]
[one_third_last]
[/one_third_last]
[two_third]
Climbing Accessory Cord
The main ridgeline used, stronger than paracord and easier to work with when wet and/or wearing gloves. I use 5mm for the main ridgeline, and 2mm for the prussic loops.
[/two_third]
[one_third_last]
[/one_third_last]
[two_third]
Tent Pegs
Not the same ones as in the video, but nearly identical. These angular tent pegs are easier to place and seem to hold better in stony ground and are a good upgrade from the ones included in the DD Hammocks kit.
[/two_third]
[one_third_last]
[/one_third_last]
Outdoor First Aid Course Report March 2016

Outdoor First Aid Course Report March 2016
we’ve been working witht he team of volunteers at the Brymbo Heritage Project near Wrexham for over 6 months on a few projects, but the one that has really inspired us has been the pilot of a new outdoor qualification and training scheme that we are going to be able to announce in the next few weeks. The very tail-end of that scheme was training in Outdoor First Aid for the volunteers – and we brought in the talented and lovely Teresa from event and remote-area medical specialists Ultramedix.
Here is the video of the course, with testimonials from some of the course delegates and clips from the training scenarios they were put through.
If you want to book your own private Outdoor First Aid Course in North Wales please get in touch.
[clear]
[clear]


- Published in All Blog Posts, Bushcraft General, Course Reports, First Aid, Mountain General, Videos
Beware the GWR… The rise of the Facebook guides

Beware the Guy With Rucksack (GWR)
We’ve seen a troubling rise in online groups taking people into the mountains without training, experience or any of the necessary skills over the last couple of years.
There is a term in commercial photography, particularly the type involving models – G.W.C., or ‘Guy With Camera’. The best description I can find is from the ‘enlightening’ website urbandictionary.com (beware, possible NSFW wording on there!):
Guy With Camera
Commonly used in the modelling/photographer biz, ‘GWC’ is any poser/creep with a digital camera pretending to be a pro/semi-pro photographer. With the introduction of digital cameras, GWC’s have appeared like an explosion in a toy store.
GWC’s typically steal the work of others and don’t have any references.
It’s something that I had been aware of, mainly through professional photographer friends, but it wasn’t something I expected to see in the ‘outdoors’ world…
Over the past 2 years or so there has been an upswell in the popularity and membership of Facebook ‘community’ groups. Following on the back of Meetup.com and other dedicated ‘group’ sites, the Facebook groups are a good way of bringing people together in a forum-style conversation that has all of the extra functionality of the Facebook behemoth. We have one for our clients and fans, and there are hundreds of thousands of others out there for every activity and hobby.
Of particular relevance to the work we do are the UK-centric outdoor groups. There are dozens of really very useful sites (Ground Conditions in UK Mountain Areas, Wild Camping and Bothying in Snowdonia etc) that we regularly visit to either get information quickly, or to post it and share useful information ourselves.
But then there are the other type…
There has also been a rise in groups set up as ‘communities’, whereas in fact they are actually commercial enterprises operating on morally, ethically and legally dodgy ground. It takes only a few minutes to set up a Facebook group, and clever marketing to gain members. Facebook would charge reduced rates for advertising of those groups because they were not openly trading as businesses. Often these pages are set up by keen amateurs who want a change in lifestyle and fancy the idea of running an outdoor activities business. Many of these groups run trips into the mountains as guided walks or activity weekends, in a similar way to mountaineering clubs, but without the hive-mind of experience that those older and more responsible organisations have.
So what’s the problem?
Well, the problem is that being able to gather a huge following of ‘Likes’ and fans is definitely a skill (although you can buy followers from online services – around £8-£10 for 500-800 Facebook likes seems to be the average), that does not translate into being able to competently or legally run trips into the mountains or give advice to clients. A complete novice looking to take their first steps into the mountains may look to join a group or other organisation to show them the way (literally and figuratively), and one of these free-to-join pages is a good place to start. By deciding to come along on one of the organised trips they would naturally assume that they would be in safe hands… but their actions seem to be anything but.
Some of the things we have witnessed from these groups:
- Group ratios of 1:20, or even 1:50 (1:3-1:10 is the norm for professional leaders)
- Stealing images from professional photographers and other providers to publicise their own sites
- Covertly contacting legitimate providers to gain route advice, weather forecasts and even ground condition reports so they can then use them for their own trips (as happened to us twice last week)
- Asking qualified professionals to work for free on commercial trips as ‘exposure’
- Running trips regardless of the conditions because they have advertised it and booked accommodation
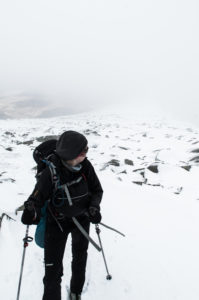
Moel Siabod on Saturday
We met one of these groups yesterday on Moel Siabod – the big lump to the south of the A5 in Capel Curig. It was under full winter conditions above the 600m contour – deep snow, windscoured icy patches and cornices over the eastern slopes. Despite the reasonable forecasts the visibility was down to around 5-10m at times and a hasty descent from the summit was necessary mid-afternoon. We had full winter kit (axes, crampons, goggles, the usual safety items) and were happily within our comfort zones – but it was still tough enough to require some careful route choice. We also met around 30-40 other people (busy day!) on the mountain during the 4 hrs we were out. The one group (around a dozen members) that we spoke to led to this slightly ranty blog post – they were being ‘led’ by one of the admins from a Facebook group. They had organised the trip months before and had planned to climb Moel Siabod, so they were going to do it no matter what the conditions. They were very under-equipped for even this normally ‘friendly’ hill (no axes, mostly wearing light waterproofs and carrying tiny rucksacks and summer-season boots) and walking on terrain that an experienced walker would know to avoid (right over the corniced eastern slope).
This isn’t the first time we’ve met groups like this – online groups led by slightly wannabe (but well-intentioned) unqualified leaders, taking groups of novices into dangerous terrain. There is no legal requirement for qualifications for leading adults in the mountains (if there were I would never have discovered my love of the hills in my late teens!) but there is a duty of care that rests on anybody introducing somebody to activities like this. Some of the best ‘guides’ I have met have been un-qualified but very experienced and intuitive mountaineers and walkers who took a careful approach to leading people in the outdoors.
This isn’t a pitch for our guided walks and trips, or to advertise our own group – just a plea to anybody putting their trust in one of these Facebook group trips or leaders. Beware.
In all likelihood you will get somebody who is keen to become a leader (or ‘guide’) in the mountains but without wanting to become suitably trained or qualified to do the job. It may be they want to run a side-business, it might be just that they want to have the prestige of being the head of a group on their way to a summit… If they are unwilling to go through the established process of getting training and consolidating experience, getting insurance and building up a good reputation then you can also wonder how they will react if somebody becomes injured. Or is separated from the group. Or one of the hundreds of other eventualities a qualified and/or experienced leader has taken into account and is planning for.
Do your research. Gain the skills you need. Push yourself, but be aware of where you will end up if you push too far. Enjoy yourself. Don’t have your early experiences ruined by a Guy (or Girl) With Rucksack.
- Published in All Blog Posts, Articles, Emergency and Safety, Mountain, Skills
VIDEO: See How quickly a flash flood can happen
VIDEO: See how quickly a flash flood can rise
This 2013 video from Utah Moto Trails shows firsthand how quickly a flash flood in a Utah canyon can rise:
From their blog description:
Normally the canyon is dry as there are very few areas for water to accumulate. If there is a storm the water tends to drain quickly so the hiking is easy and pretty drama free. This time however, we hiked the canyon with a %20 chance of rain. The day prior there was zero percent but being out of internet coverage that day left us a bit unprepared. The %20 panned out and we got a quick burst of rain that flooded the canyon…shows how quickly things can get ugly as we were running back to find some less skilled hikers we had left behind. Luckily my wife knew what to do and when the rain started they found an opening slightly upstream from where they were to wait it out on higher ground. I was with my brother and my 2 boys and we were very relieved to see them safe in the opening after running back.
The canyon (Little Wild Horse Canyon) is one of the most popular ‘slot’ canyon hikes in Utah.
Tips for avoiding flash floods
- Avoid dry riverbeds where possible and NEVER camp in a dry river, no matter how dry the weather forecast is
- Plan escape routes if hiking and trekking in canyons and gorges and know where your nearest one is
- Pay attention to weather forecasts, but plan for the possibility that they will be incorrect
- Be aware of any dam or sluice releases upstream of where you are
- Published in All Blog Posts, Bushcraft General, Mountain General, Videos
No.4 – Porth Llechog to Beaumaris

Microadventure No.4 Porth Llechog to Beaumaris
It’s difficult to determine what constitutes a ‘microadventure’, particularly when your job involves wild camping, exploring mountains and rivers and enjoying trips into wet, muddy and remote places a few times a month at least. For me it is something out of the ordinary – so trips conducted either solo or with friends and family but not clients. I love my time working with clients, but the difference between a trip as a leader and one as just an equal is marked.
For this trip we wanted to blow away the cobwebs of months of warm, wet and windy weather, cumulating in storms and flooding during the usual excess of Christmas whilst exploring somewhere we were unfamiliar with. The Wales Coastal Path is going to feature on a few of our challenge events in 2016 and 2017, and I wanted to see some of the sections that we had missed during other reconnaissance trips. After a bit of map-juggling we settled on a 35 mile section of the Anglesey Coastal Path between Porth Llechog (Bull Bay) and Beaumaris. This looked a combination of rugged coastline and narrow paths mixed with some short sections of road and even beach. We decided to wild camp, and try to cover around 17 miles per day.
Leaving Porth Llechog
Saturday 2nd January was a bit wet, a little windy and very cloudy but warm – warm enough to start the walk in just a base layer. We had been dropped off by Rhian’s aunt, having abandoned our car at their house near Beaumaris. After being plied with the offers of tea and cake and then battling the narrow lanes of this corner of Anglesey we arrived in the cliff-top car park just outside Porth Llechog, hunting out the familiar symbol that marks the Anglesey Coastal Path. We were carrying the usual navigation gubbins (map, compass etc) but I wanted to see how easy it would be to follow the route relying entirely on the waymarkers put in place to mark this coastal path. I’ve had good experiences of doing this on the South West Coastal path, leapfrogging from signpost to stile to marked post following the distinctive acorn and wanted to compare the Ynys Mon version – so we kept the sea on our left and followed the muddy trail leading away from the car park.
Amlwch harbour
The first real landmark we hit was Amlwch, a mixture of decaying industrial areas and a small harbour so Cornish in appearance it could have had a piskie eating a pasty outside the Harbour Master’s office and I wouldn’t have been surprised. After losing the path for a few dozen metres around the visitor centre we picked it up again and followed a road and clear trail out to the nature reserve and rough ground between Amlwch and Point Lynas.
The thing about walking on coastal paths is that you are always walking towards a ‘thing’. A headland, a distant town, a hilltop. It means you have a constant measure on your progress as the ‘thing’ gets bigger, and for us the ‘thing’ here was the Point Lynas lighthouse, currently up for sale. If I had a few spare million and a desire to live in a remote, windswept nautical lightbulb I might consider it, but for now the ex-army bivvy bag and tarp in my rucksack would have to do.
We crossed our first beach here then climbed a steep tarmac road out to the other side of the headland. Two things became obvious here – the first was how many cargo vessels were moored off this sheltered coast (we counted to 8 before getting bored) and the second was the substantial hill that we had to cross. Trudging up a muddy field, the top layer of grass and soil loosened by the recent rain acting a bit like that travelator thing they used to have on Gladiators. One step forward, half a step back.
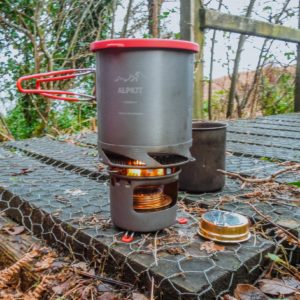 After a bit more trudging through mud and between high hedges we found a sheltered spot next to a bridge over a running stream. We had no shortage of running streams to cross, unsurprisingly after the 3 months of near constant rain we had seen in North Wales and finding drinking water wasn’t a problem. But as were about as low down the river system as it was possible to get we could pretty much guarantee that every sparkling waterfall we saw was full of various bacteria and pathogens that would need killing off or filtering out before drinking. Boiling and or filtering it was!
A quick lunch of noodles and pasta with oatcakes was accompanied with the smell of meths and the sound of contented food-bag rustling. Part of the fun of hiking/walking/trekking/whatever-it’s-called-where-you-are-from is that you have limited options. You can eat everything in your bag today, or you can eat it over two days – but resupplying will mean either stopping to fish/hunt/forage or, more realistically, head away from your route to find a shop or other resupply point. If you’re planning on carrying the meals for the next few days on your back (or in this case, on Rhian’s back as I was carrying the stove and pans) and want to avoid towns then you need to work out what you are eating and when. The rationing aspect to this is fun for a few days, but I can assure you it wears off after a few weeks, particularly if you are eating a combination of the same three things every night. A self-induced problem, and part of the experience.
We plodded on, water bottles filled and feet muddy over what was probably the toughest section of the trip – following an indistinct path over very muddy paths as we crossed onto the land of the Llys Dulas Estate. Our ‘thing’ on the horizon this time had been the rocks just offshore from Moelfre, but we took a sharp right turn and headed inland as the path contoured around the Dulas estuary. Mud and slimy grass gave way to tarmac and confusing paths before dumping us unceremoniously at the Mean High Water mark at the edge of the estuary, marked by a pile of rotting seaweed.
The sun had long dropped below the hills, leaving a pink glow reflecting off the low water of Traeth
Traeth Dulas Sunset
Dulas. The conversation and occasional shouts of somebody doing something with a fishing rod drifted across the estuary, and the gentle call of Oystercatchers completed the aural landscape. All very impressive – I resolved immediately to come back on a different day with a ‘proper’ camera, but for now my mind was turning to the route ahead – it seems that the path here actually drops below the high water line into the mud of the estuary. Great.
After half a mile of silty squidging a better path led us out to the other side and the lights of a pub where we stopped to use their toilets, buy an overpriced soft drink and gently muddy their carpets. Some conversation with the bar staff led me to the conclusion that Moelfre might be further away than we thought (“I’d be getting a taxi if I were you”) but we were happy walking after dark and carried on. Flooded or slippery paths brought us back to the coastline, gently breaking waves below us marking the edge of Lligwy Bay and the start of the next set of obstacles – sand dunes, stones and a tortuously winding path. The lights of Moelfre blurred into those of Llandudno and Deganwy behind them and our destination seemed to be slipping away into the darkness, only the decklights of the ships moored just offshore marking our progress.
Eventually Moelfre changed from potential to a reality at around 7pm, at least 2 hours since the sun set. Contemplating the thought of rehydrated pasta and chorizo we quickly decided to seek out the only pub in town and see if they had something unhealthy and filling on the menu. Rhian pointed out to me that my current attire of muddy trail shoes, running tights and a base layer might be frowned upon. I agreed, and promptly waded straight into the sea at the beach in front of the pub. I was soaked from mud and puddles anyway, so clean salt water was a definite step up from the filth and general detritus it replaced. We smartened ourselves up (a bit) and strode into the pub, rehydrating and demolishing a couple of hearty meals.
Although warm, dry and friendly the pub wouldn’t do for overnight accommodation, and we wanted to find somewhere a mile or so further down the path. we had passed dozens of suitable wild camping locations on the path that day, so surely there would be more further on? Ha! What we found instead was a series of landslips, then a muddy farmyard and acres and acres of sheep fields, complete with a thick layer of glutinous manure. The land dropped steeply through gorse and blackthorn to a rocky beach, with a flooding tide and no escape if the waves came. We had already reached the halfway point of our walk, but it looked like we had more walking ahead of us.
A luxurious bivvy
Traeth Bychan came next, the tiny village and sweeping beach we had visited before on sea-kayaking trips. It seemed to be deserted, except for one figure with a head torch, furtively digging for bait on the sandy intertidal zone. Nowhere suitable for a sneaky bivvy appeared, and we kept following the path onwards, over hills and back down to the sea as we came around to the far side of the bay. Moelfre was now clearly defined and slipping into the distance behind us as we turned the headland. Here we found a wide grassy area in front of an unoccupied holiday cottage. We checked carefully to see if we would be in anybody’s way and then set up the tarp and bivvy bags. The shed door made a great anchor for end of the ridgeline and the other was secured into a patch of gorse, our trekking poles keeping the tarp up. It’s a 3mx3m, so there is more than enough space for two people to spread out and sort through their kit.
As we turned in for the night the weather was warm with a strong breeze, but somewhere in the early hours it changed to 50mph winds and rainy periods. The tarp thankfully stood up to the elements, and I remembered why it wasn’t a good idea to pitch on a headland… but limited options were open to us and we just stuck with it. The glow of a dozen or so cargo vessels on the horizon were our nightlight and we slept though the rest of the storm.
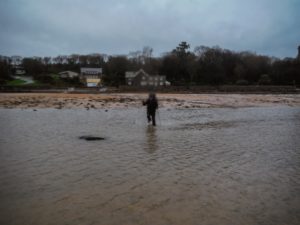
Crossing streams at Red Wharf Bay
Dawn brought some welcome light but not much change in the weather. The waves hitting the rocks below seemed to be troublingly close, and as I lay in my bivvy bag I wondered if today would be as easy as yesterday. We still had 17 miles or so to cover, and there was a big hill in the way this time. We dragged ourselves out and dressed and repacked in the lee of the building. A few stormy miles (and a diversion through a caravan park due to a landslip) landed us in the relative civilisation of Benllech. Down by the beach we had some breakfast and watched charity swimmers flail around in the cold water at low tide. The path continued on to Red Wharf Bay, the Spring Tide and recent storms giving us a wide and flat beach to gaze upon, and a bit of careful calculation enabled us to cross more or less straight across, avoiding the few silty quicksand sections and only having to deal with a myriad of small streams and outflows.
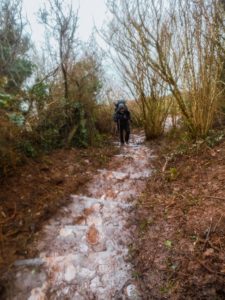
Brand new paths…
Down by the low dunes near the Llanddona end of the bay we set up the stove in the watery sunlight for a leisurely lunch, punctuated by the unexpected and coincidental arrival of our friends Mark and Shan who live nearby. We chatted for a while then realised that we still had 8 or 9 miles left to go and said our goodbyes. We quickly crossed the remainder of the sand and began climbing the steep hillside under Bwrdd Arthur. The path had been relocated away from a farm track and we negotiated freshly-cut branches and thick mud to reach a track and fields on the other side of the hill. The rest of the day without incident and we were led along field edges, through private driveways and between gardens. It was clear that we were not only in a more populated area of Anglesey, but that the property prices were a bit higher here. I saw 14 security cameras on one immaculate property…
Our horizon marker this time was Penmon Point and Puffin Island, very familiar to us and it felt like walking towards home. We arrived shortly before sunset, then turned away and followed the private then public road past Porth Penmon and along the shoreline. The novelty of tarmac and firm ground was short-lived as our feet started to feel tired and we longed for the soft mud and grass of earlier. The path here just follows a series of ninety-degree bends in the road, winding along towards Beaumaris.
Our destination (where the car had been stashed) came sooner than expected, and we shrugged our bags from our shoulders as we walked down the driveway.
We could happily have gone further that night, and much further over the weekend with less/lighter equipment, but the distance and the challenge felt about right for the terrain and the weather. Shorter days and wet weather don’t encourage very long distances, but we were happy with what we had done, and we certainly hadn’t suffered. Well, not by our standards!


- Published in All Blog Posts, Bushcraft General, Microadventures
- 1
- 2